background image

00031455.DOC, Version 1.1

15/16

6 OPERATION

6.1 Switching on

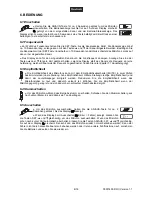
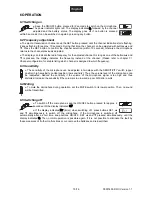
 Keep the ON/OFF button pressed for 2 seconds to switch on the microphone.

The power indicator lights red. The display indicates


O

n

, followed by the channel

adjusted and the battery status. The display goes off if no button is pressed

within 5 seconds. It can be switched on again by pressing any button.

6.2 Frequency adjustment


To select a transmission channel keep the SET button pressed until the channel indication starts flashing.

It keeps flashing for approx. 10 seconds. During that time, the channel can be adjusted with buttons 

 and

. Press the SET button to confirm the channel selection (within 10 seconds) otherwise the microphone

returns to the channel previously adjusted.


The display can indicate the radio frequency for the adjusted channel. As long as one of the buttons 

 and

 is pressed, the display indicates the frequency instead of the channel. (Please refer to chapter 7.

1

Channel configuration 

for a table listing which channel is assigned to which frequency).

6.3 Sensitivity


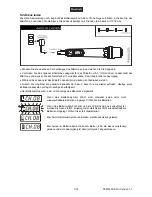
The sensitivity of the microphone can be adjusted in two steps with the SENSITIVITY switch (upper

position: high sensitivity, central position: low sensitivity). Thus, the volume level of the microphone can
be readjusted. Reduce the sensitivity if the volume of the microphone signal is too high and thus
distorted. Increase the sensitivity if the volume is too low and a poor S/N ratio results.

6.4 Muting


To mute the microphone during operation, set the MUTE switch to its lower position. Then, no sound

will be transmitted.

6.5 Switching off


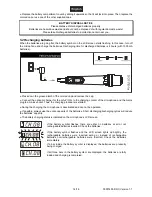
To switch off the microphone, keep the ON/OFF button pressed for approx. 2

seconds until the display indicates 

OFF

.


If the display indicates 

Err


(Error) when switching off,  press buttons SET,


and 

 simultaneously to switch off the microphone. If the microphone is switched off

automatically after a short time, keep buttons ON/OFF, SET 

 and 

 pressed simultaneously, until the

display indicates 

O

n

. Then, normal operation is possible again. If it is not possible to eliminate the fault by

these measures of if other malfunctions occur, remove the batteries and reinsert them.

Summary of Contents for HM-105

Page 1: ... Copyright Nachdruck verboten Reproduction prohibited Für weiteren Gebrauch aufbewahren Keep this manual for future needs BEDIENUNGSANLEITUNG USER MANUAL HM 105 Wireless Microphone ...

Page 2: ...albelegung 9 8 2 Zubehör 9 1 INTRODUCTION 10 2 SAFETY INSTRUCTIONS 10 2 1 Batteries 11 3 OPERATING DETERMINATIONS 11 3 1 Approval 11 4 DESCRIPTION OF THE DEVICE 12 4 1 Features 12 4 2 Operating elements 12 5 SET UP 13 5 1 Inserting replacing batteries 13 5 2 Recharging batteries 14 6 OPERATION 15 6 1 Switching on 15 6 2 Frequency adjustment 15 6 3 Sensitivity 15 6 4 Muting 15 6 5 Switching off 15 ...

Page 3: ...de an Ihrem Kauf haben werden Nehmen Sie das HM 105 aus der Verpackung Bitte überprüfen Sie vor der ersten Inbetriebnahme ob kein offensichtlicher Transportschaden vorliegt Sollten Sie Schäden entdecken nehmen Sie das Gerät nicht in Betrieb und setzen sich bitte mit Ihrem Fachhändler in Verbindung 2 SICHERHEITSHINWEISE Dieses Gerät hat das Werk in sicherheitstechnisch einwandfreiem Zustand verlass...

Page 4: ...HF Bereich 863 100 864 900 MHz Der Frequenzbereich ist in 16 Kanäle unterteilt die sich frei wählen lassen Das Gerät ist auf die Frequenzen des Empfangsmoduls abgestimmt Das Mikrofon darf nur über 1 5 V Mignon Batterien oder zwei 1 2 V Akkus Typ AA betrieben werden und wurde ausschließlich zur Verwendung in Innenräumen konzipiert Der Serienbarcode darf niemals vom Gerät entfernt werden da ansonste...

Page 5: ... zu wechseln Tasten Zur Kanalwahl Um das Display kurz auf Anzeige der Funkfrequenz umzuschalten halten Sie eine der Tasten längere Zeit gedrückt LCD Anzeige Zeigt den Funkkanal oder die Funkfrequenz sowie den Batteriestatus an SET Taste Zur Aktivierung des Einstellmodus für die Wahl des Funkkanals und zum Bestätigen Ladekontakt Stecken Sie hier das optional erhältliche Ladegerät für das HM 105 ein...

Page 6: ...ßem Auswechseln der Batterien Nur durch denselben oder einen entsprechenden vom Hersteller empfohlenen Typ ersetzen Verbrauchte Batterien nach den Anweisungen des Herstellers beseitigen Legen Sie zwei 1 5 V Mignon Batterien oder zwei 1 2 V Akkus Typ AA ein und achten Sie auf die richtige Polung Wir empfehlen die Verwendung von NiMH Akkus Bringen Sie die Batteriefachabdeckung wieder an legen Sie di...

Page 7: ...nn nicht betrieben werden Nutzen Sie möglichst die gesamte Kapazität der Akkus bevor Sie sie wieder aufladen Häufige kurze Entlade Ladezyklen verringern die Speicherfähigkeit Der Batteriestatus wird in der LCD Anzeige des Mikrofons dargestellt Wenn das Batterie Symbol blinkt sind entweder keine oder nicht wiederaufladbare Batterien eingelegt Prüfen Sie die Batterien Wenn das Batterie Symbol blinkt...

Page 8: ...legung 6 3 Empfindlichkeit Die Empfindlichkeit des Mikrofons kann mit dem Empfindlichkeitsschalter MUTE in zwei Stufen bestimmt werden obere Stellung hohe Empfindlichkeit mittlere Stellung niedrige Empfindlichkeit und damit der Lautstärkepegel korrigiert werden Reduzieren Sie die Empfindlichkeit wenn das Mikrofonsignal zu laut und dadurch verzerrt ist Erhöhen Sie die Empfindlichkeit wenn der Mikro...

Page 9: ...enz UHF 863 100 864 900 MHz Frequenzstabilität 0 005 RF Ausgangsleistung 10 mW Richtcharakteristik Niere Frequenzgang 70 Hz 16 kHz Reichweite ca 30 m Spannungsversorgung 2 x 1 5 V Mignon Batterien Typ AA 2 x 1 2 V Akkus Typ AA Lebensdauer der Batterien 13 Stunden 1 5 V Mignon Lebensdauer der Akkus 8 Stunden 1300 mA Ladezeit der Akkus ca 4 Stunden 1300 mA Maße DxL 40 x 260 mm Gewicht 250 g 8 1 Kana...

Page 10: ...there are no obvious transport damages Should you notice any damage do not take the device into operation and immediately consult your local dealer 2 SAFETY INSTRUCTIONS This device has left our premises in absolutely perfect condition In order to maintain this condition and to ensure a safe operation it is absolutely necessary for the user to follow the safety instructions and warning notes writt...

Page 11: ...als to the receiving unit RM 105 of the PA system W A M S 05 The microphone operates in the range of 863 100 864 900 MHz The frequency range is divided into 16 channels which can be selected as desired The unit is tuned to the frequencies of the receiver module The microphone is only allowed to be operated with two 1 5 V mignon batteries or two 1 2 V rechargeable batteries type AA and was designed...

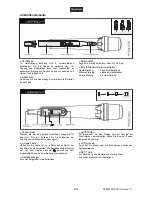
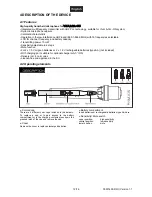
Page 12: ... x 1 5 V mignon batteries or 2 x 1 2 V rechargeable batteries type AA not included With charging port suitable for optional charger HM 105 Delivery incl 4 color caps License free and approved in the EU 4 2 Operating elements Battery compartment Insert batteries or rechargeable batteries type AA here Sensitivity Mute switch upper position high sensitivity central position low sensitivity lower posi...

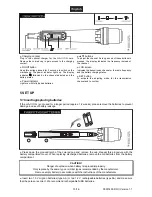
Page 13: ...two 1 5 V mignon batteries type AA or two 1 2 V rechargeable batteries type AA and make sure that the poles are correct We recommend rechargeable NiMH batteries buttons To adjust the channel As long as one of these buttons is pressed the display indicates the frequency instead of the channel LCD screen Indicates the transmission channel or the radio frequency and the battery charging status SET bu...

Page 14: ...for the HM 105 to the charging contact of the microphone and the mains plug to a mains socket Thus the charging procedure is started During the charging the microphone is deactivated and can not be operated If possible always use the entire capacity of the batteries Short discharging recharging cycles will reduce the batteries capacity The battery charging status is indicated on the microphone s L...

Page 15: ... table listing which channel is assigned to which frequency 6 3 Sensitivity The sensitivity of the microphone can be adjusted in two steps with the SENSITIVITY switch upper position high sensitivity central position low sensitivity Thus the volume level of the microphone can be readjusted Reduce the sensitivity if the volume of the microphone signal is too high and thus distorted Increase the sens...

Page 16: ...pattern Omnidirectional Frequency response 70 Hz 16 kHz Range approx 30 m Power supply 2 x 1 5 V mignon batteries type AA 2 x 1 2 V rechargeable batteries type AA Battery life 13 hours 1 5 V mignon Rechargeable battery life 8 hours 1300 mA Charging time approx 4 hours 1300 mA Dimensions DxL 40 x 260 mm Weight 250 g 8 1 Channel configuration Channel Radio Frequency Channel Radio Frequency 1 863 100...

Reviews: