background image

52

4

Addi

ti

o

n

al

 sh

oot

in

g

 f

u

nct

ion

s

Sequential shooting

You can take a sequence of pictures at one time while holding down the 
shutter button.

o

Shoots 1 frame at a time when the shutter button is pressed.

j

Focus, exposure and white balance are locked at the first frame. The 
sequential shooting speed varies depending on the record mode setting.

i

Pictures can be taken at a faster speed than normal sequential shooting.
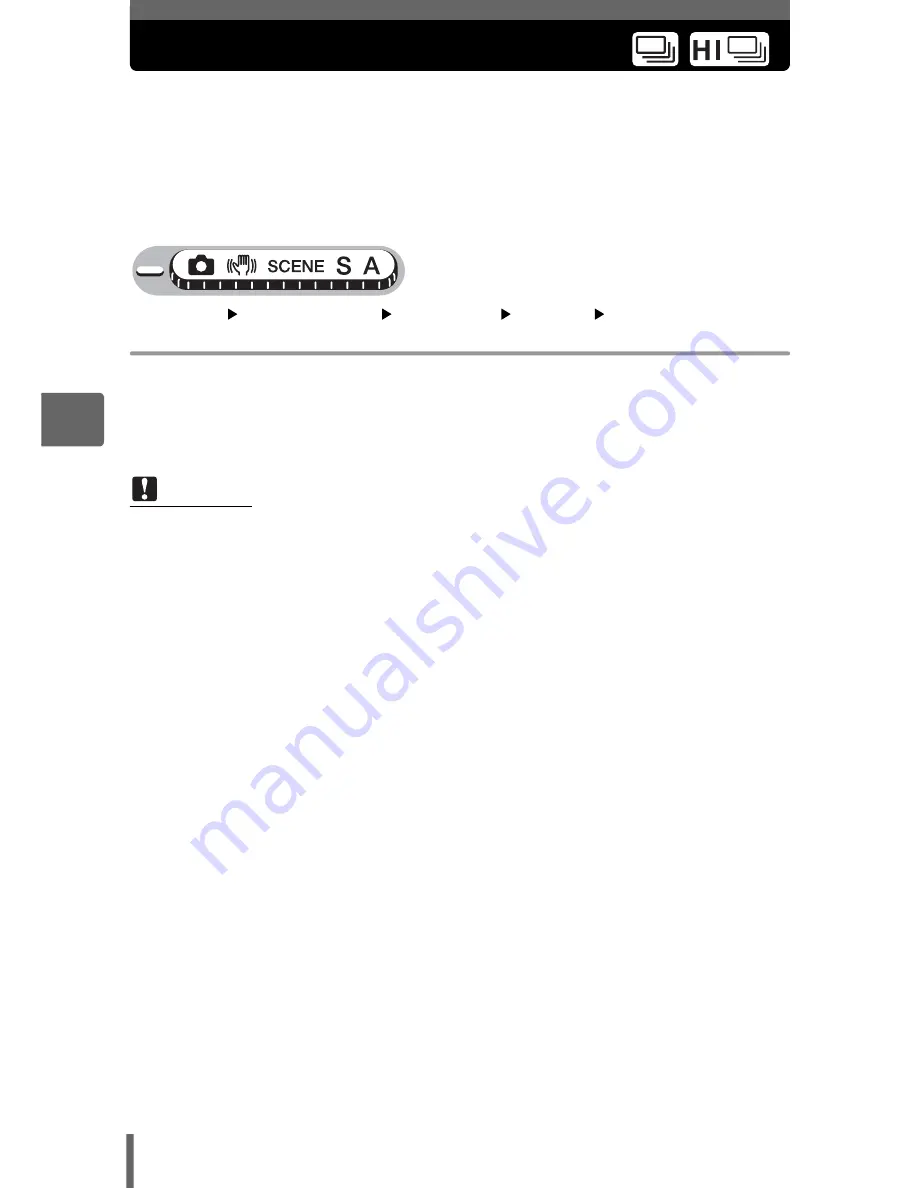
Top menu

[MODE MENU]

[CAMERA]

[DRIVE]

[

j

] / [

i

]

g

“Using the menus” (P. 16)

1

Take the picture.

• Press the shutter button fully and keep it pressed. The camera will take 

pictures in sequence until you release the button.

Note

• During high speed sequential shooting, the flash is not available.
• During panorama and two-in-one pictures, sequential shooting and high speed 

sequential shooting are not available.

• Shooting in [

i

] limits the picture size to [2048 × 1536] or less. Even when 

the [

K

] is set higher than [2048 × 1536], the picture is saved as 

[2048 × 1536].

• If the battery power is low and 

f

 lights during sequential shooting, shooting 

stops and the camera starts saving the pictures you have taken. Whether or not 
all of the shots are saved depends on how much battery power remains.

Summary of Contents for 225625 - Stylus 800 Digital Camera

Page 1: ...mmend that you take test shots to get accustomed to your camera before taking important photographs In the interest of continually improving products Olympus reserves the right to update or modify information contained in this manual DIGITAL CAMERA Advanced Manual Detailed explanations of all the functions for getting the most out of your camera Online Pictures Basic Operation Basic Shooting Advan...

Page 2: ...ahead and take some pictures You will also find information on the camera s main functions as well as how to make prints and enjoy your pictures on a computer Advanced Manual This manual introduces you to the camera s many functions after you have mastered the basics It will help you to use the camera s capabilities to take much more creative pictures with more fun Note Important information on fa...

Page 3: ...names of parts see a list of menus or find what you are looking for You ll find important points for getting the most out of your camera here Read this part before taking pictures To view edit and sort the pictures you have taken Settings to make your camera easier to use To print the pictures you have taken To enjoy the pictures you have taken on a computer To use OLYMPUS Master P 8 P 20 P 33 P 4...

Page 4: ...If the correct focus cannot be obtained 22 How to focus focus lock 22 Subjects that are difficult to focus on 24 Record mode 25 Still picture record modes 25 Movie record modes 26 Number of storable still pictures remaining recording time 26 Changing the record mode 28 The internal memory and memory card 29 The card 30 Inserting and removing the card 31 3 Basic shooting functions 33 Selecting a sc...

Page 5: ...h still pictures 60 Changing the monitor display DISP 61 5 Playback 62 Playing back still pictures 63 Changing the number of thumbnails 64 Picture rotation 64 Playing back movies 65 Viewing an album 66 Adding pictures to an album ALBUM ENTRY 67 Viewing pictures in albums SEL ALBUM 69 Selecting an album cover SELECT TITLE IMAGE 70 Undoing album entries UNDO ENTRY 70 Erasing pictures from albums 72 ...

Page 6: ...e DUALTIME SETUP 93 Setting alarms ALARM CLOCK 94 Adjusting the image processing function PIXEL MAPPING 97 7 Printing pictures 98 Direct printing PictBridge 99 Using the direct printing function 99 Printing pictures 100 Other print modes and print settings 103 If an error message is displayed 105 Print settings DPOF 106 How to make print reservations 106 Single frame reservation 107 All frame rese...

Page 7: ...dix 127 Troubleshooting 128 Error messages 128 Troubleshooting 130 Camera care 137 Battery and charger 138 AC adapter optional 139 Safety Precautions 140 Glossary of terms 144 10 Miscellaneous 147 Menu list 148 List of factory default settings 153 Functions available in shooting modes and scenes 155 Names of parts 158 Camera 158 Monitor indications 160 Index 163 ...

Page 8: ...tions to achieve a variety of effects Now you too can achieve such effects simply by pressing the buttons on your digital camera You can use the various functions available to adjust the brightness and white balance of your pictures alter the focusing range and much more Just display a menu on the monitor and use the buttons to choose a setting Familiarize yourself with the buttons and menus befor...

Page 9: ...es set to the shooting conditions g Selecting a scene according to the situation f P 34 S This function allows you to set the shutter speed manually The camera sets the aperture automatically g Changing the shutter speed for shooting pictures P 47 A This function allows you to set the aperture manually The camera sets the shutter speed automatically g Changing the aperture value for shooting pictu...

Page 10: ... Menu list P 148 You can change the mode before and after turning the camera on In this manual the following icons indicate the position of the mode dial necessary for operating functions This indicates an operation when the mode dial is set to n This indicates an operation when the mode dial is be set to any of the following modes KhfSAn Mode dial notation ...

Page 11: ...utter button halfway d GUIDE button gP 18 Displays a shooting guide describing shooting methods for various purposes Select a menu and press the GUIDE button to display an explanation of its function e DISP button gP 61 Press the DISP button repeatedly to toggle the display of shooting information composition lines and histogram f Y Self timer Remote control button gP 43 55 For switching between s...

Page 12: ...histogram is not displayed while displaying movies e S Erase button gP 72 81 Erases pictures displayed on the monitor f Z button gP 13 Displays the top menu of playback mode c d f e Detailed camera informationisdisplayed g Monitor indications P 160 HQ HQ 05 05 08 08 26 26 12 12 30 30 4 100 100 0004 0004 HQ HQ 05 05 08 08 26 26 12 12 30 30 4 ISO ISO400 400 2 0 1 100 1 100 F4 0 F4 0 HQ HQ 05 05 08 0...

Page 13: ...e used to make each camera setting The menu items displayed in shooting mode and playback mode differ About the menus Press Z Mode dial Mode menu WB MODE MENU Top menu Shortcut menus Menus are divided into shortcut menus and mode menus For setting menu items directly Settings are categorized by function into tabs ...

Page 14: ...WB MODE MENU gP 49 gP 50 gP 25 MOVIE PLAY ALBUM ENTRY MODE MENU For movies For still pictures ALBUM ENTRY MODE MENU gP 80 gP 67 gP 67 gP 73 gP 65 gP 80 MOVIE PLAY ALBUM MENU UNDO ENTRY For movies For still pictures ALBUM MENU UNDO ENTRY gP 80 gP 70 gP 70 gP 73 gP 65 gP 80 ...

Page 15: ...lated functions EDIT tab For editing saved pictures MEMORY CARD tab For formatting internal memory or cards and erasing all image data Also saves internal memory data onto cards SETUP tab For setting basic camera functions and settings that make the camera easier to use TIPS The MEMORY tab is displayed when the internal memory is in use The CARD tab is displayed when a card is inserted in the came...

Page 16: ...g modes KSA 2 Press Z The top menu is displayed 3 Press Y to select MODE MENU 4 Press ON to select the CAMERA tab and press Y Refer to the arrows on the screen to select and make settings with the arrow pad Using the menus Mode dial ONXY buttons Z button WB MODE MENU Top menu This refers to the arrow pad ONXY ISO AF MODE DIGITAL ZOOM DRIVE ESP CAMERA MEM SET ESP OFF SPOT AUTO This refers to the ar...

Page 17: ...ttings using the arrow pad TIPS Menu items common to different modes apply to the same setting ISO AF MODE DIGITAL ZOOM DRIVE ESP CAMERA MEM SET ESP OFF SPOT AUTO The selected item is displayed in a different color Press Y to go on to the following setting AUTO 64 100 200 ISO SELECT OK GO CANCEL Operation guide Press ON to select a setting Press Z to finalize the setting In this manual procedures ...

Page 18: ...To display another shooting guide or item press X to return to the previous screen To close the shooting guide display press the GUIDE button Displaying the menu guide 1 With a menu selected hold down the GUIDE button The menu explanation is displayed Release the GUIDE button to close the menu guide Using the GUIDE function 5 ADJUSTING AREA IN FOCUS 4 BLURRING BACKGROUND 3 ADJUSTING COLORATION 2 S...

Page 19: ...on P 17 This sample page is only for your reference It may differ from the actual page in this manual This indicates the position of the mode dial If multiple icons are displayed the described function can be used in any of these modes g Mode dial P 9 Mode dial notation P 10 Available languages may vary according to where you purchased the camera The displayed language can be changed g Selecting a...

Page 20: ...o dark or the picture doesn t come out the way you want Just knowing which button to press or which setting to change can help you solve these problems And did you know that by selecting an image size according to how you plan to use the pictures afterwards you can store more pictures in the internal memory and on the memory card These are just some of the hints provided in this chapter SHQ SHQ SQ...

Page 21: ...era in shooting mode the lens extends Turning the camera off Press the POWER button The monitor turns off The lens retracts and the lens barrier closes The power lamp turns off TIPS The screen on the right is displayed when the date and time setting has returned to the factory default setting Setting the date and time makes your pictures easier to manage such as when you view them with calendar di...

Page 22: ... focus the camera on an object about the same distance away as the subject 2 Press the shutter button halfway until the green lamp lights The green lamp lights when the focus and exposure are locked When the green lamp blinks the focus and exposure are not locked Release your finger from the shutter button re position the AF target mark on the subject and press the shutter button halfway again 3 K...

Page 23: ...e shutter button fully to take the picture TIPS To focus on a subject not in the center of the frame g Changing the focusing area AF MODE P 54 Note Press the shutter button gently If it is pressed forcefully the camera may move causing the picture to blur Never open the card cover remove the battery or disconnect the AC adapter while the card access lamp is blinking Doing so could destroy stored p...

Page 24: ...s the camera using the focus lock function by pressing the shutter button halfway then return the camera to the horizontal position while keeping the button pressed halfway and take the picture Subjects that are difficult to focus on The green lamp blinks The subject cannot be brought into focus Subject with low contrast Subject with an extremely bright area in the center of the frame Subject with...

Page 25: ...ugh a high compression rate results in a small file size this also produces a grainy look Still picture record modes Record mode Image size Compression Application SHQ 3264 2448 Low compression The number of storable still pictures is lower and recording pictures takes longer but it is useful for creating beautiful prints on full size paper and for performing computer image processing such as cont...

Page 26: ... and saved The higher the compression the less clear the image will be Movies are recorded in Motion JPEG format For still pictures Movie record modes Number of storable still pictures remaining recording time Record mode Image size Number of storable still pictures Internal memory Using a 128 MB card With sound Without sound With sound Without sound SHQ 3264 2448 4 4 31 31 HQ 3264 2448 9 9 61 62 ...

Page 27: ... to 1 when the monitor setting is 1 024 768 However if the monitor setting is over 1 024 768 such as 1 280 1 024 the picture only takes up part of the screen Note The number of storable still pictures and remaining recording time listed in the tables are approximate The number of storable still pictures may change according to the subject or factors like whether print reservations or album entries...

Page 28: ...om SHQ 640 480 HQ 320 240 and SQ 160 120 2 When SQ1 or SQ2 is selected press Y to select the image size 3 Press Z Changing the record mode For still pictures SELECT OK GO SQ2 3264 2448 3264 2448 2048 1536 640 480 SHQ HQ SQ1 For movies SELECT OK GO 640 480 SHQ 320 240 HQ 160 120 SQ When SQ2 is selected 1600 1200 1280 960 1024 768 640 480 SQ2 SELECT CANCEL OK GO ...

Page 29: ...ernal memory with a card You can confirm on the monitor whether the internal memory or card is being used during shooting and playback operations The internal memory and a card cannot be used at the same time The internal memory cannot be used for shooting or playback operations when a card is inserted in the camera Remove the card before using the internal memory Pictures recorded to the internal...

Page 30: ...eased by using a card with a larger capacity c Index area You can use this space to write the contents of the card d Contact area The part where the data transferred from the camera enters the card Compatible cards xD Picture Card 16MB 1GB The card Note This camera may not recognize a non OLYMPUS card or a card that was formatted on another device such as a computer etc Make sure to format the car...

Page 31: ... Orient the card as shown and insert it into the card slot as shown in the illustration Insert the card straight in Insert the card until it clicks into place Inserting the card in the wrong direction or at an angle may damage the contacts and prevent the card from being removed The card may not record properly if it is not inserted all the way in Inserting and removing the card Monitor Power lamp...

Page 32: ...ing the card 3 Push the card all the way in and release slowly The card protrudes slightly and stops Grasp the card and remove 4 Close the card cover Releasing your finger quickly after pushing the card all the way in may cause it to eject forcefully out of the slot Caution Card cover ...

Page 33: ...g method and even selects the type of film according to the subject With a digital camera you don t need to learn how to make difficult settings Your camera will adjust the settings for you All you have to do is choose a scene mode for whatever you want to take whether a landscape a night scene or a portrait style image and the camera will set the best exposure and white balance There s nothing to...

Page 34: ...e Portrait Suitable for taking pictures of your subject against a distant background Blues greens and skin tones are vividly reproduced B Portrait Suitable for taking portrait pictures This mode accentuates the skin texture of the portrait subject N Indoor Suitable for taking pictures of people indoors The atmosphere of the background is also vividly reproduced C Sports Suitable for capturing fast...

Page 35: ...ble G Night Scene Suitable for taking pictures in the evening or at night The camera sets a slower shutter speed than is used in normal shooting The shutter speed is slow Hold the camera as steady as possible U Night Portrait Suitable for taking pictures of your subject against a distant night scene The camera sets a slower shutter speed than is used in normal shooting The shutter speed is slow Ho...

Page 36: ...sion You can erase unwanted pictures before saving the ones you want Suitable for taking moving subjects Shoot Select1 e Focus is locked at the first frame Shoot Select2 f Takes pictures in succession adjusting the focus 1 frame at a time Noise reduction is automatically enabled when the subject is dark Processing time between shots is doubled and you cannot take pictures during this time 1 Press ...

Page 37: ...res to erase is displayed 1 Press XY to select the picture you want to erase and press O Repeat Step 1 to erase multiple pictures 2 When you have selected all the unwanted pictures press Z 3 Select YES and press Z The selected pictures are erased and only the remaining pictures are saved OK GO SELECT The R icon is displayed on the selected picture The picture with the cursor is enlarged ...

Page 38: ...ured by the CCD is cropped and enlarged Because digital zoom takes a small area of the picture and enlarges it the picture becomes grainy as the digital zoom magnification increases The following zoom magnifications are available on this camera Optical zoom 3 equivalent to 38 mm to 114 mm on a 35 mm camera Optical zoom digital zoom Max 15 Note that camera movement is likely to occur at higher magn...

Page 39: ...ture to appear grainy 4 4 3264 3264 2448 2448 HQ HQ 1 200 1 200 F4 0 F4 0 2 0 2 0 The white area of the zoom indicator indicates the optical zoom If the DIGITAL ZOOM is set to ON a red area is displayed on the zoom indicator When you reach the limit of the optical zoom the digital zoom is enabled 4 4 3264 3264 2448 2448 HQ HQ 1 200 1 200 F4 0 F4 0 2 0 2 0 The cursor turns orange when inside the di...

Page 40: ...you shoot from as close as 3 cm 1 2 in to your subject The position of the zoom is fixed automatically and cannot be changed 1 Press N repeatedly to set or g Direct buttons P 11 After 2 seconds of non operation the selection is set and the mode selection screen disappears 2 Take the picture Using macro super macro mode Note During super macro mode the zoom and flash are not available 4 4 3264 3264...

Page 41: ...always emits pre flashes for red eye reduction Only available in S mode Fill in flash The flash fires regardless of the available light This mode is useful for eliminating shadows on the subject s face such as shadows from tree leaves in a backlight situation or for correcting the color shift produced by artificial lighting especially fluorescent light Note After the pre flashes it takes about 1 s...

Page 42: ...e changes in the following order In S mode the flash mode changes in the following order 2 Press the shutter button halfway In conditions where the flash will fire the mark lights flash stand by 3 Press the shutter button fully to take the picture Note Since a slow shutter speed is automatically selected in low light situations when in the flash off mode the use of a tripod is recommended to preve...

Page 43: ...cus and exposure The self timer remote control lamp lights for approximately 10 seconds blinks for approximately 2 seconds and then the picture is taken To stop shooting while in n mode press the shutter button fully again To cancel the self timer press the Y button The self timer mode is automatically canceled after one shot TIPS The flash charge mark blinks jFlash charging Wait until the mark tu...

Page 44: ... saved During movie recording the A mark lights red 3 Press the shutter button again to stop recording When the remaining recording time has been used up recording stops automatically When there is space in the internal memory or the card the remaining recording time P 27 is displayed and the camera is ready to shoot TIPS To use the zoom during movie recording jSet DIGITAL ZOOM to ON g Using the d...

Page 45: ... the subject and make use of other useful functions to create professional like pictures At a sporting event Try various shutter speeds and capture the excitement Or use sequential shooting mode to take a succession of shots of a goal and pick out the best ones later In the country or at a tourist spot Use panorama mode to capture a beautiful mountain range or impressive building 4 ...

Page 46: ... 1 Take the picture Note When the camera moves a lot or the subject is moving quickly the reduction function may not operate effectively Shooting in h mode limits the picture size to 2048 1536 or less Even when the K is set higher than 2048 1536 the picture is saved as 2048 1536 In h mode digital zoom is not available 4 4 2048 2048 1536 1536 SQ SQ1 1 200 1 200 F4 0 F4 0 2 0 2 0 ...

Page 47: ... to 1 1000 When the exposure is correct the shutter speed is displayed in green When the correct exposure cannot be obtained the shutter speed is displayed in red Note To avoid camera movement you are recommended to use a tripod when taking pictures requiring a slow shutter speed Setting a fast shutter speed lets you capture fast moving action as though it was stopped in motion Setting a slow shut...

Page 48: ...s mode when you want to play with how the background is depicted 1 Press XY to set the aperture value The aperture value bar is displayed X Opens the aperture decreases the aperture value Y Closes the aperture increases the aperture value Aperture range Wide angle F2 8 to F8 0 Telephoto F4 9 to F8 0 When the exposure is correct the aperture value is displayed in green When the correct exposure can...

Page 49: ...adjust the exposure and press Z Adjust toward to brighten the image or to darken the image 2 Take the picture TIPS Often bright subjects such as snow turn out darker than their natural colors Adjust toward to make these subjects closer to their real shades To prevent the picture from getting brighter adjust toward when shooting dark subjects Note Sometimes using the flash may not produce the brigh...

Page 50: ...g This type of lamp is used mainly in homes x For shooting under a neutral white fluorescent lamp This type of lamp is generally used in desk lamps etc y For shooting under a white fluorescent lamp This type of lamp is generally used in offices etc Top menu WB g Using the menus P 16 1 Select a white balance setting and press Z TIPS You can select a white balance setting other than the actual light...

Page 51: ...thout being affected by the light in the background ESP Meters the brightness at the center of the monitor and the surrounding area separately to create a picture with balanced brightness When taking pictures against strong backlight the center of the picture may appear dark 5 Only the center of the monitor is metered Suitable for taking a picture of the subject in the center of the monitor agains...

Page 52: ...ke the picture Press the shutter button fully and keep it pressed The camera will take pictures in sequence until you release the button Note During high speed sequential shooting the flash is not available During panorama and two in one pictures sequential shooting and high speed sequential shooting are not available Shooting in i limits the picture size to 2048 1536 or less Even when the K is se...

Page 53: ...ylight With a high ISO setting you can shoot in dark places Top menu MODE MENU CAMERA ISO g Using the menus P 16 1 Select the ISO from AUTO 64 100 200 400 800 and 1600 and then press Z Note ISO is based on the sensitivity of normal camera film Shooting with the ISO set to 800 or 1600 limits the picture size to 2048 1536 or less Even when the K is set higher than 2048 1536 the picture is saved as 2...

Page 54: ...ct within the screen to focus on Even when the subject is not in the center of the screen focusing is possible SPOT Focus selection is based on the subject within the AF target mark Top menu MODE MENU CAMERA AF MODE g Using the menus P 16 1 Select iESP or SPOT and press Z Subject suitable for iESP Subject suitable for SPOT iESP SPOT ISO AF MODE DIGITAL ZOOM DRIVE CAMERA MEM SET ESP ...

Page 55: ...r place it on a stable flat surface 2 Press the Y button repeatedly to set g Direct buttons P 11 After 2 seconds of non operation the selection is set and the mode selection screen disappears 3 Press the shutter button on the remote control The focus and exposure are locked The self timer remote control lamp blinks for 2 seconds before taking the picture 4 4 3264 3264 2448 2448 HQ HQ 1 200 1 200 F...

Page 56: ...o cancel remote control mode jThe remote control mode is not canceled automatically after shooting Go to Step 2 and set to B OFF Note Remote control channel switching is not supported Remote control operation is accepted from either channel If the remote control receiver is exposed to strong light the effective signal distance may be reduced or shooting may not take place To take sequential pictur...

Page 57: ...icture is connected at the left edge O The next picture is connected at the top N The next picture is connected at the bottom The part of the previous picture where it will be joined to the next picture does not remain in the frame on the edge of the screen You have to remember what the part in the frame looked like and take the next picture so it overlaps Compose your shots so that the right edge...

Page 58: ...norama shooting is possible for up to 10 pictures When you have taken 10 pictures a warning mark is displayed 3 Press Z to exit panorama shooting Note Panorama mode is not available when there is no card in the camera Panorama mode is only available with Olympus cards During panorama shooting the flash sequential shooting high speed sequential shooting and recording sound with still pictures are n...

Page 59: ...e combined picture The camera returns to the menu automatically after taking the second picture Note To cancel two in one picture shooting before taking any pictures or after the first picture has been taken press Z The first picture will not be saved If the camera enters sleep mode after the first picture two in one picture shooting will be canceled During two in one pictures sequential shooting ...

Page 60: ...ng playback sound is output from the speaker The volume can be adjusted g Setting camera sounds 8 SHUTTER SOUND VOLUME P 89 Sound can be added later to still pictures Recorded sound can also be re recorded g Adding sound to still pictures P 74 Note If the microphone is farther than 1 m 3 3 ft from the subject sound may not be recorded properly Pictures cannot be taken during sound recording Sound ...

Page 61: ...ows the luminance distribution within the AF target mark Note The histogram displayed during shooting may differ from the histogram displayed during playback 4 4 1 200 1 200 F4 0 F4 0 ISO ISO 400 400 4 4 3264 3264 2448 2448 HQ HQ 2 0 2 0 1 200 1 200 F4 0 F4 0 ISO 400 ISO 400 4 4 3264 3264 2448 2448 HQ HQ 2 0 2 0 1 200 1 200 F4 0 F4 0 ISO 400 ISO 400 4 4 3264 3264 2448 2448 HQ HQ 2 0 2 0 1 200 1 20...

Page 62: ...eyes shut Or maybe you took several pictures of the same scene because you weren t sure whether they would come out or not That s no way to record important memories With a digital camera you can review your pictures immediately Just play the picture back as soon as you ve taken it If you don t like what you see erase and take it again So don t be afraid of pictures not coming out well just keep o...

Page 63: ...Q 100 100 0004 0004 Close up playback Press T to incrementally enlarge the picture up to 8 times the original size Press the arrow pad during close up playback to scroll the picture in the indicated direction Pictures cannot be stored in an enlarged state Index display Use the arrow pad to select the picture Select the number of frames to display g Changing the number of thumbnails P 64 Press T to...

Page 64: ...ect the picture that you want to rotate and display the top menu Top menu MODE MENU PLAY y 90 0 90 g Using the menus P 16 For Top menu ALBUM MENU y 90 0 90 Changing the number of thumbnails Picture rotation Note The following pictures cannot be rotated Movies protected pictures computer edited pictures and pictures taken with another camera New picture orientations are saved even when the power is...

Page 65: ...lays the movie in reverse Each time you press the button the playback speed changes in the following order 2 20 and back to 1 Z Pauses the movie Operations during pause You can play back the movie frame by frame O Displays the first frame N Displays the last frame Y Displays the next frame X Displays the previous frame Z The MOVIE PLAY screen is displayed Note The card access lamp blinks while the...

Page 66: ...card mode menu Set the mode dial to and press Z to display the top menu Make settings in the mode menu using the arrow pad and Z like the normal shooting mode and playback mode g Menus P 13 Top menu Album menu Functions that can be set in ALBUM MENU Function Ref Page Function Ref Page SEL ALBUM P 69 VOLUME P 89 y P 64 s P 91 SELECT TITLE IMAGE P 70 VIDEO OUT P 79 P 106 For still pictures ALBUM MEN...

Page 67: ... album and press Z SEL IMAGE 3 Press XY to select a picture to enter and press O R is displayed on the selected picture Press O again to cancel the selection Repeat Step 3 to enter multiple pictures Press T on the zoom button to display a picture using single frame playback 4 After selecting all the pictures to enter press Z 5 Select YES and press Z Adding pictures to an album ALBUM ENTRY SET CALE...

Page 68: ...ess Z Note A format or all frame erase will erase all the pictures including those entered in albums The same picture cannot be entered in multiple albums 2005 2005 Sun Mon Mon Tue Tue Wed Wed Thu Thu Fri Fri Sat Sat 8 31 1 2 3 4 9 7 10 10 11 11 12 12 13 13 8 16 16 14 17 17 18 18 19 19 20 20 15 15 23 23 21 24 24 25 25 26 26 27 27 22 22 30 30 28 31 31 2 3 1 29 29 6 4 7 8 9 10 5 5 6 SET ALL OK PHOTO...

Page 69: ...umps to the picture 10 frames ahead Press the DISP button to display screen information When playing back still pictures press T on the zoom button for close up playback During close up playback use the arrow pad to scroll Viewing pictures in albums SEL ALBUM TIPS To view pictures from other albums press Z to display the top menu and select ALBUM MENU SEL ALBUM Then select the album to view OK GO ...

Page 70: ...ged You can cancel pictures entered in an album The picture will still be saved on the card This only removes the picture from the album Select the album containing the picture to undo then display the top menu Top menu UNDO ENTRY g Using the menus P 16 1 Select the album undo method and press Z SEL IMAGE Selects one frame at a time to undo UNDO ALL This will undo all images in the album Selecting...

Page 71: ... the selection Repeat Step 2 to undo multiple pictures Press T on the zoom button to display a picture using single frame playback 3 After selecting all the pictures to undo press Z 4 Select YES and press Z UNDO ALL 2 Select YES and press Z OK GO SEL IMAGE SELECT 1 1 6 6 7 7 7 8 8 8 5 5 10 10 10 11 11 11 12 12 12 9 9 4 4 3 3 2 2 OK UNDO ALL YES NO SELECT GO ...

Page 72: ...rase and press the S button g Direct buttons P 11 2 Select YES and press Z Erasing pictures from albums Note You cannot erase protected pictures Cancel protection before erasing such pictures g Protecting pictures P 80 Once erased pictures cannot be restored To only remove pictures from the album use UNDO ENTRY g Undoing album entries UNDO ENTRY P 70 OK ERASE YES NO SELECT GO ...

Page 73: ...E The next picture slides in from the top of the screen ZOOM The next picture gradually enlarges from the center of the screen Select a still picture and display the top menu Top menu m g Using the menus P 16 1 Select BGM and press Y Press Z while this screen is displayed to start the slideshow 2 Select ON or OFF and press Z When BGM is ON the sound recorded with still pictures is not played back ...

Page 74: ...is approximately 4 seconds Select the still picture to which you want to add sound and display the top menu Top menu MODE MENU PLAY R g Using the menus P 16 1 Press Y to display START TIPS During index display the slideshow is displayed in index format Note You are recommended to use the optional AC adapter when running a slideshow for a long period of time The camera will enter sleep mode after a...

Page 75: ...ther than 1 m 3 3 ft from the subject sound may not be recorded properly If you re record the sound the original sound is erased Sound recording is not possible if there is insufficient space in the internal memory or on the card The microphone may pick up the sound of buttons operated Once sound is added to a picture it is not possible to erase the sound In this case make a re recording with sile...

Page 76: ...es the picture to black and white and saves it as a new file SEPIA Changes the picture to sepia and saves it as a new file Q Changes the image size to 1280 960 640 480 or 320 240 and saves the picture as a new file Select the picture that you want to edit and display the top menu Top menu MODE MENU EDIT g Using the menus P 16 1 Select REDEYE FIX BLACK WHITE SEPIA or Q and press Y 2 When REDEYE FIX...

Page 77: ...isplay the top menu Top menu MODE MENU EDIT INDEX g Using the menus P 16 1 Select INDEX and press Z The BUSY bar is displayed The 9 frames extracted from the movie are displayed in index format and the camera returns to playback mode The index is stored as a new picture Note The following cannot be edited with REDEYE FIX BLACK WHITE SEPIA or Q Card with insufficient space movies computer edited pi...

Page 78: ... instruction manual 3 Press the POWER button to turn the camera on The last picture taken is displayed on the TV Use the arrow pad to select the picture you want to display The camera s monitor stays off Note The interval between the frames that are automatically extracted varies depending on the length of the movie Indexes cannot be created with INDEX for movies stored in the internal memory You ...

Page 79: ...enu ALBUM MENU VIDEO OUT NTSC PAL TIPS The close up playback index display and slideshow functions can also be used on a TV screen You are recommended to use the optional AC adapter when playing back pictures on a TV Note Make sure that the camera s video output signal is the same as the TV s video signal g Video output P 79 Be sure to use the provided AV cable to connect the camera to the TV The ...

Page 80: ...el protection Pictures recorded to the internal memory can be copied to a card backup A backup does not erase the picture in the internal memory You need an optional card to use the backup function Insert the card into the camera before using this function Top menu MODE MENU CARD BACKUP g Using the menus P 16 1 Select YES and press Z All image data in the internal memory is copied to the card HQ H...

Page 81: ...er runs out while the camera is backing up the data the image data may be lost or damaged It is recommended that you use the AC adapter Never open the card cover or remove the battery while the camera is backing up data Also do not connect or disconnect the AC adapter The internal memory or the card may not operate properly Note You cannot erase protected pictures Cancel protection before erasing ...

Page 82: ...g pictures 82 5 Playback Top menu MODE MENU MEMORY CARD ALL ERASE g Using the menus P 16 1 Select YES and press Z All the pictures are erased All frame erase YES NO OK ALL ERASE SELECT GO CAUTION ERASING ALL ...

Page 83: ...tected pictures are erased when the internal memory or the card is formatted Make sure that you save or transfer important data to a computer before formatting the internal memory or the card Top menu MODE MENU MEMORY CARD MEMORY FORMAT FORMAT g Using the menus P 16 1 Select YES and press Z The BUSY bar is displayed while the internal memory or the card is formatted Note Do not do any of the follo...

Page 84: ...mized camera One of the key features of a digital camera is that you can view the pictures you have taken immediately But that isn t all For example you can customize the startup screen with your own picture select the beep or shutter sounds or set alarms Making use of these functions will make such a difference to how much fun you get out of your camera Why not try them out Settings 6 ...

Page 85: ... is turned off are saved Note that the settings of each scene in f mode return to the default value Top menu MODE MENU SETUP ALL RESET OFF ON g Using the menus P 16 Functions that return to default settings when ALL RESET is set ON Note The functions on the mode menu setup tab ALL RESET W 8 etc are saved even when ALL RESET is set to ON Function Factory default setting Ref Page Function Factory de...

Page 86: ...layed when the camera is turned on You can also register your favorite picture and display it on the screen g Registering the startup screen SCREEN SETUP P 87 Top menu MODE MENU SETUP PW ON SETUP g Using the menus P 16 TIPS To increase the number of languages jYou can add other languages to your camera with the provided OLYMPUS Master software For details refer to the help in the OLYMPUS Master so...

Page 87: ... be registered Use PW ON SETUP to display the screen you registered g Changing the startup screen and volume PW ON SETUP P 86 Top menu MODE MENU SETUP SCREEN SETUP g Using the menus P 16 If a picture is already registered the IMAGE EXISTING screen is displayed asking if you want to cancel the currently registered picture and register a new one To register a new picture select RESET and press Z If ...

Page 88: ...t OK and press Z The picture is registered and the screen returns to the menu You can select the screen color for menus etc from 4 colors Top menu MODE MENU SETUP COLOR NORMAL BLUE GREEN PINK g Using the menus P 16 OK CANCEL SET AS PW ON SCREEN OK SCREEN SETUP SELECT CANCEL GO Setting screen colors COLOR ...

Page 89: ...F LOW or HIGH to set the volume for playback of still pictures and movies When 8 is selected Top menu MODE MENU SETUP 8 OFF LOW HIGH g Using the menus P 16 When SHUTTER SOUND is selected Top menu MODE MENU SETUP SHUTTER SOUND g Using the menus P 16 1 Select OFF 1 2 or 3 If you selected 1 2 or 3 select LOW or HIGH and press Z When VOLUME is selected Top menu MODE MENU SETUP VOLUME OFF LOW HIGH g Us...

Page 90: ...names respectively include file numbers 0001 to 9999 and folder names 100 to 999 and are named as follows There are two settings from which you can choose RESET or AUTO Choose the one that is best for you when transferring images to a computer RESET The file number and folder number are reset every time a new card is inserted in the camera The folder number returns to No 100 and the file number re...

Page 91: ...just the brightness while looking in the monitor and when you have set the desired level press Z Pressing O brightens the monitor and pressing N darkens it Note When the File No reaches 9999 the file number returns to 0001 and the folder number changes When both the folder number and file number reach their respective maximum number 999 9999 the number of storable pictures becomes 0 even if the ca...

Page 92: ... to the previous setting press X The first two digits of the year are fixed 3 Repeat this procedure until the date and time are completely set The time is displayed in the 24 hour format Consequently 2 p m is displayed as 14 00 4 Press Z For a more accurate setting press Z when the time signal hits 00 seconds Note The date and time settings will be returned to the factory default settings if the c...

Page 93: ...o set the year and press Y to move to the month setting To move back to the previous setting press X The first two digits of the year are fixed The date format is the same as that set in Step 1 of X 3 Repeat this procedure until the date and time are completely set The time is displayed in the 24 hour format Consequently 2 p m is displayed as 14 00 4 Press Z For a more accurate setting press Z whe...

Page 94: ...ODE MENU SETUP ALARM CLOCK g Using the menus P 16 1 Select ONE TIME or DAILY and press Y OFF No alarm is set ONE TIME Alarm is activated once DAILY Alarm is activated daily at the set time TIPS Changes made to X do not affect the date and time set in DUALTIME SETUP After setting the date and time with DUALTIME SETUP it is retained even after DUALTIME SETUP is set to OFF ALARM CLOCK VIDEO OUT DUALT...

Page 95: ...lect ON or OFF and press X OFF No snooze is set ON Alarm is activated every 5 minutes up to 7 times To set ALARM SOUND and volume 1 Select ALARM SOUND and press Y 2 On the ALARM SOUND screen if you selected alarm sound 1 2 or 3 select LOW MID or HIGH and press Z 3 Press Z to return to the ALARM CLOCK screen 6 Press Z The alarm is set To enable the alarm turn the camera off OK GO ALARM CLOCK 09 09 ...

Page 96: ...mera is off press the QUICK VIEW button to display the set alarm time and the current time for 3 seconds How to cancel alarm settings jSelect OFF for ALARM CLOCK in Step 1 While the alarm is sounding the picture registered with PW ON SETUP for SCREEN 3 is displayed Note When X has not been set ALARM CLOCK is not available g Setting the date and time P 92 The alarm only operates when the camera is ...

Page 97: ...it at least one minute after taking or viewing pictures to allow the pixel mapping function to perform properly Top menu MODE MENU SETUP PIXEL MAPPING g Using the menus P 16 1 Press Y When START is displayed press Z The BUSY bar is displayed during pixel mapping When pixel mapping is finished the screen returns to the mode menu Note If you turn the camera off during pixel mapping start again from ...

Page 98: ...the pictures you want to print and decide how many prints you want If you print the pictures at home you can either connect the camera directly to the printer or you can connect the camera to a computer and download the pictures to the computer first Printing pictures Printing at the store Printing at home Select the pictures you want to print at the store Use the camera to select the pictures you...

Page 99: ...dard print settings If STANDARD is selected on the settings screens P 101 to 104 pictures are printed according to these settings Refer to the printer s instruction manual for its standard settings or contact the printer manufacturer Using the direct printing function TIPS For details of printing paper types ink cassettes etc refer to the printer s instruction manual Note You are recommended to us...

Page 100: ...n manual 2 Plug the other end of the USB cable into the multi connector of the camera The camera automatically turns on The monitor turns on and the selection screen for the USB connection is displayed 3 Select PRINT and press Z ONE MOMENT is displayed and the camera and printer are connected The PRINT MODE SELECT screen is displayed on the monitor Select the print settings on the camera s monitor...

Page 101: ...e and press O SINGLE PRINT is set 7 Press Z The PRINT screen is displayed 8 Select PRINT and press Z Printing starts When printing is finished the PRINT MODE SELECT screen is displayed PRINT ALL PRINT MULTI PRINT ALL INDEX SELECT EXIT OK GO PRINT MODE SELECT CANCEL OK GO SELECT STANDARD STANDARD SIZE BORDERLESS PRINTPAPER 100 100 0004 0004 OK PRINT MORE SINGLEPRINT SELECT 100 100 0004 0004 OK PRIN...

Page 102: ...inting To cancel printing select CANCEL and press Z 9 In the PRINT MODE SELECT screen press X A message is displayed 10Remove the USB cable from the camera The camera turns off 11Remove the USB cable from the printer OK CANCEL TRANSFERRING CONTINUE CANCEL PRINT OK SELECT GO Screen during data transfer PRINT ALL PRINT MULTI PRINT ALL INDEX SELECT EXIT OK GO PRINT MODE SELECT ...

Page 103: ...M Select an album and the pictures in the album to print Selecting a print mode PRINT Prints the selected picture ALL PRINT Prints all the pictures stored in the internal memory or the card MULTI PRINT Prints one picture in multiple layout format ALL INDEX Prints an index of all the pictures stored in the internal memory or the card PRINT ORDER Prints the pictures according to the print reservatio...

Page 104: ... can also use the zoom button and select a picture from the index display PRINT Prints one copy of the selected picture SINGLE PRINT Makes a print reservation for the displayed picture MORE Sets the number of prints and data to be printed for the displayed picture Setting the number of prints and data to be printed Sets the number of prints You can select up to 10 prints DATE If you select WITH pi...

Page 105: ...printer NO INK The printer has run out of ink Replace the ink cartridge in the printer JAMMED The paper is jammed Remove the jammed paper SETTINGS CHANGED The printer s paper tray has been removed or the printer has been operated while changing settings on the camera Do not operate the printer while changing settings on the camera PRINT ERROR There is a problem with the printer and or camera Turn ...

Page 106: ...servations can be printed using the following procedures Printing using a DPOF compatible photo store You can print the pictures using the print reservation data Printing using a DPOF compatible printer Printing is possible directly from a card containing print reservation data without using a computer For more details refer to the printer s instruction manual A PC card adapter may also be necessa...

Page 107: ...ty pictures set the record mode as high as possible when taking the pictures g Record mode P 25 Note DPOF reservations set by another device cannot be changed by this camera Make changes using the original device If a card contains DPOF reservations set by another device entering reservations using this camera may overwrite the previous reservations If there is not enough space in the card memory ...

Page 108: ...you finish making print reservations press Z 4 Select NO DATE or TIME and press Z NO The pictures are printed without the date and time DATE The selected pictures are printed with the shooting date TIME The selected pictures are printed with the shooting time 5 Select SET and press Z OK PRINT ORDER SELECT CANCEL GO Operation guide 05 05 08 08 26 26 12 12 30 30 4 HQ HQ OK GO SELECT 100 100 0004 000...

Page 109: ... NO The pictures are printed without the date and time DATE All pictures are printed with the shooting date TIME All pictures are printed with the shooting time 3 Select SET and press Z This function allows you to reset the print reservation data for pictures You can reset all the print reservation data or just for selected pictures Top menu MODE MENU PLAY g Using the menus P 16 For Top menu ALBUM...

Page 110: ...lect the picture with the print reservations you want to cancel and press N to decrease the number of prints to 0 Repeat Step 3 to cancel print reservations for other pictures 4 When you are finished canceling print reservations press Z 5 Select NO DATE or TIME and press Z The setting is applied to the remaining pictures with print reservations 6 Select SET and press Z RESET KEEP PRINT ORDERED PRI...

Page 111: ...em or organize them by date or category or attach them to e mail and send them over the Internet There are all kinds of ways you can use your pictures with a computer You can run a slideshow post your pictures on your home page create an album or set your favorite picture as your desktop wallpaper Connecting the camera to a computer E mail Album making Wallpaper Panorama building Home printing Onl...

Page 112: ... cable jImage files on xD Picture Card may be downloaded using the optional PC card adapter For details visit the Olympus web site at the address shown on the back cover of this manual Note It is recommended that you use the optional AC adapter when connecting the camera to a computer If you use a battery make sure it has enough power The camera does not turn off automatically while it is connecte...

Page 113: ...to the Help guide and OLYMPUS Master reference manual What is OLYMPUS Master Download images from the camera or other media View images and movies You can run a slideshow and play back sound Manage images You can organize your images using the calendar display Search the image you want by date or keyword Make panoramic images You can make panoramic images using pictures taken in panorama mode Prin...

Page 114: ...els 65 536 colors or more Macintosh OS Mac OS X 10 2 or later CPU Power PC G3 500 MHz or later RAM 128 MB or more at least 256 MB is recommended Hard disk capacity 300 MB or more Connector USB port Monitor 1 024 768 pixels 32 000 colors or more Installing OLYMPUS Master Note Data transfer is only guaranteed on computers with a factory installed OS To install the software in Windows 2000 Profession...

Page 115: ...er If the QuickTime screen is not displayed QuickTime 6 or later is already installed on the computer In this case go to step 4 Note Operation is only guaranteed on a Macintosh equipped with a built in USB port QuickTime 6 or later and Safari 1 0 or later must be installed Be sure to remove the media drag drop onto the trash icon before performing the following operations Failure to do so could re...

Page 116: ...formation dialog box is displayed enter your Name and OLYMPUS Master Serial Number select your region and click Next Refer to the sticker on the CD ROM package for the serial number When the DirectX licensing agreement is displayed read the agreement and click Yes A screen asking whether or not you want to install Adobe Reader is displayed Adobe Reader is required to read the OLYMPUS Master instru...

Page 117: ... CD ROM drive The CD ROM window is displayed If the CD ROM window is not displayed double click the CD ROM icon on the desktop 2 Double click on the desired language folder 3 Double click the Installer icon The OLYMPUS Master installer starts up Follow the on screen instructions When the OLYMPUS Master licensing agreement is displayed read the agreement and click Continue and then Agree to proceed...

Page 118: ...ress Z 5 The camera is recognized by the computer Windows 98SE Me 2000 When you connect the camera to your computer for the first time the computer attempts to recognize the camera Click OK to exit the message that is displayed The camera is recognized as a Removable Disk Windows XP When the camera is connected to the computer the screen for selecting an image file operation is displayed As OLYMPU...

Page 119: ...form Macintosh 1 Double click the OLYMPUS Master icon in the OLYMPUS Master folder The main menu is displayed When OLYMPUS Master is started up for the first time the User Information dialog box is displayed before the main menu Enter your Name and OLYMPUS Master Serial Number and select your region After the User Information dialog box the Registration dialog box is displayed Follow the prompts a...

Page 120: ...the browse window 3 Online Print button The online print window is displayed 4 Print Images at Home button Displays the print menu 5 Create and Share button Displays the editing menu 6 Backup Images button Creates backup images 7 Upgrade button Displays window for optional upgrade to OLYMPUS Master Plus To exit OLYMPUS Master 1 Click the Exit on the main menu OLYMPUS Master is exited 1 7 2 3 5 6 4...

Page 121: ...s in the camera are displayed 3 Select the image files and click Transfer Images A window indicating that the download is complete is displayed 4 Click Browse images now The downloaded images are displayed in the browse window To return to the main menu click Menu in the Browse window Downloading and saving images Note The card access lamp blinks while downloading images Do not do any of the follo...

Page 122: ...ows 98SE 1 Double click the My Computer icon and right click the Removable Disk icon to display the menu 2 Click Eject on the menu Windows Me 2000 XP 1 Click the Unplug or Eject Hardware icon in the system tray 2 Click the message that is displayed 3 When a message is displayed saying that the hardware can be ejected safely click OK Macintosh 1 The trash icon changes to the eject icon when the Unt...

Page 123: ...you want to view The camera switches to view mode and the picture is enlarged To return to the main menu click Menu in the Browse window Note Windows Me 2000 XP When you click Unplug or Eject Hardware a warning message may be displayed Make sure that image data is not being downloaded from the camera and that all applications are closed Click the Unplug or Eject Hardware icon again and disconnect ...

Page 124: ...dar menus The explanation below uses the photo menu 1 Click Print Images at Home on the OLYMPUS Master main menu The print menu is displayed Item Description 1 Playback slider Move the slider to select a frame 2 Time display Displays the time that has elapsed during playback 3 Playback pause button Plays the movie Functions as the pause button during playback 4 Back button Displays the previous fr...

Page 125: ...er settings screen is displayed Make the necessary printer settings 4 Select a layout and size To print the date and time with your image check the box next to Print Date and select between Date and Date Time 5 Select the thumbnail image that you want to print and click Add A preview of the selected image is displayed on the layout 6 Select the number of copies ...

Page 126: ...your computer is running Windows 98SE you will need to install the USB driver Before connecting the camera to your computer with the USB cable double click the files from the following folders on the provided OLYMPUS Master CD ROM Drive name USB INSTALL EXE Data transfer is not guaranteed in the following environments even if your computer is equipped with a USB port Windows 95 98 NT 4 0 Windows 9...

Page 127: ...S When you get an error message while using the camera When you press the POWER button but nothing happens When you want to know how to safely store your special camera When you don t understand a term used in the manual Here is where you ll find the answer Appendix 9 ...

Page 128: ...o available memory and cannot store any new data Replace the card or erase unwanted data Before erasing download important data to a computer L NO PICTURE There are no pictures in the internal memory or on the card The internal memory or the card contains no pictures Record pictures r PICTURE ERROR There is a problem with the selected picture and it cannot be played back on this camera Use image p...

Page 129: ...and press Z Insert a new card Select FORMAT and press Z All data on the card is erased There is an error in the internal memory Select MEMORY FORMAT and press Z All data in the internal memory is erased Monitor indication Possible cause Corrective action OK CARD SETUP POWER OFF FORMAT SELECT GO OK MEMORY SETUP POWER OFF MEMORY FORMAT SELECT GO ...

Page 130: ...icture is taken when the shutter button is pressed The battery power is exhausted Charge the battery The camera is in the playback mode Set the mode dial to a mode other than q or P 9 The flash has not finished charging Remove your finger from the shutter button and wait until the flash charge mark stops blinking before taking the picture P 42 The power is off Press the POWER button P 21 The inter...

Page 131: ...era has been left without the battery If the camera is left for 1 day without a battery the date and time setting is canceled Set the date and time again P 92 The settings are returned to the factory default settings when the camera is turned off ALL RESET is set to ON Set ALL RESET to OFF P 85 The picture is out of focus The subject was too close Move further away from the subject To take picture...

Page 132: ... in the panorama mode Cancel panorama mode P 57 The battery run time is brief You are using the camera in a cold environment Battery performance deteriorates in low temperatures Keep the camera warm by putting it inside your coat or clothing The remaining battery power is not indicated correctly When battery consumption fluctuates considerably the camera may turn off without displaying the battery...

Page 133: ...d or hold the camera firmly P 46 The lens was dirty Clean the lens Use a commercially available blower blush and then wipe with a lens cleaner to remove dust Mold may form on the lens surface if the lens is left dirty P 137 The picture is too bright The flash was set to Select a flash mode other than P 41 The center of the subject is too dark If the center of the subject is too dark the surroundin...

Page 134: ...bject is too bright the image as a whole emerges darker Adjust the exposure compensation toward plus P 49 The aperture value is too high in A mode Decrease the aperture value or set the camera to K mode P 48 The shutter speed setting is too fast in S mode Reduce the shutter speed or set the camera to K mode P 47 The colors of pictures look unnatural Indoor lighting affected the picture s colors Se...

Page 135: ...monitor does not function when the AV cable is connected to the camera P 78 Single frame erase and all frame erase cannot be performed The pictures are protected Cancel the protection of the pictures P 80 No picture is displayed on the TV when connected to the camera The video output signal is incorrect Set the video output signal according to the region where used P 79 The TV video signal setting...

Page 136: ...he USB cable Remove the USB cable and start again from Step 1 of Printing pictures P 100 The printer does not support PictBridge Refer to the instruction manual for your printer Or contact your printer manufacturer The camera is not recognized by the computer The computer failed to recognize the camera Disconnect the USB cable from the camera and connect it again P 118 The USB driver has not been ...

Page 137: ...e lens with a commercial blower then wipe gently with a lens cleaner Battery Charger Wipe gently with a soft dry cloth Storage When storing the camera for extended periods remove the battery AC adapter and card and keep in a cool dry place that is well ventilated Periodically insert the battery and test the camera functions Note Do not use strong solvents such as benzene or alcohol or chemically t...

Page 138: ...mera is connected to a computer or printer Using an exhausted battery may cause the camera to turn off without displaying the battery level warning The rechargeable battery is not fully charged at the time of purchase Charge the battery fully with the LI 10C charger before use The provided rechargeable battery usually takes approximately 120 minutes to charge Never use any charger other than the L...

Page 139: ...nected to a computer or printer Do not remove or load the battery or connect or disconnect the AC adapter while the camera is turned on Doing so could affect the camera s internal settings or functions The AC adapter can be used within the range of AC 100 V to AC 240 V 50 60 Hz When using abroad you may need a plug adapter to convert the plug to match the AC wall outlet For details ask at your loc...

Page 140: ...e camera After storage test the camera by turning it on and pressing the shutter release button to make sure that it is operating normally Always observe the operating environment restrictions described in the camera s manual This camera uses a lithium ion battery specified by Olympus Do not use any other type of battery For safe and proper use read the battery s instruction manual carefully befor...

Page 141: ...iform in color and brightness This is not a malfunction Olympus makes no representations or warranties regarding any damages or benefit expected by using this unit lawfully or any request from a third person which are caused by the inappropriate use of this product Olympus makes no representations or warranties regarding any damages or any benefit expected by using this unit lawfully which are cau...

Page 142: ... used in any form or by any means electronic or mechanical including photocopying and recording or the use of any type of information storage and retrieval system without the prior written permission of Olympus No liability is assumed with respect to the use of the information contained in these written materials or software or for damages resulting from the use of the information contained therei...

Page 143: ...tions However there is no guarantee that interference will not occur in a particular installation If this equipment does cause harmful interference to radio or television reception which can be determined by turning the equipment off and on the user is encouraged to try to correct the interference by one or more of the following measures Adjust or relocate the receiving antenna Increase the distan...

Page 144: ...ubject The camera determines if the image is focused by the level of contrast in the subject Conventional Photograph This refers to recording images using silver halide the method for recording images in conventional non digital photography This system is in contrast to still video and digital photography DCF Design Rule for Camera File System A standard for image files by the Japan Electronics an...

Page 145: ...ight conditions JPEG Joint Photographic Experts Group A compression format for still images Photographs pictures taken using this camera are recorded onto the card in JPEG format By downloading these images to a computer users can edit them using graphics application software or view the images using an Internet web browser Noise reduction When shooting in dark places shutter speeds become slower ...

Page 146: ...e so that the picture is taken with the best exposure Sleep Mode A mode designed to save battery life The camera automatically enters the sleep mode if you do not operate it for a certain time To exit the sleep mode use any button on the camera shutter button arrow pad etc TFT Thin Film Transistor Color Monitor A transistor color monitor constructed using thin film technology ...

Page 147: ...ons the names and meanings of the icons that are displayed on the monitor and the lists of the top menus and mode menus The index helps you find the pages containing a function or item that you are looking for For effective use of the manual reference page numbers are listed next to the names of the camera parts and in the menu lists Miscellaneous 10 ...

Page 148: ...Y FORMAT FORMAT YES NO P 83 BACKUP YES NO P 80 SETUP ALL RESET OFF ON P 85 W P 86 PW ON SETUP SCREEN OFF 1 2 3 P 86 VOLUME OFF LOW HIGH COLOR NORMAL BLUE GREEN PINK P 88 8 OFF LOW HIGH P 89 SHUTTER SOUND OFF 1 2 3 P 89 LOW HIGH REC VIEW OFF ON P 90 FILE NAME RESET AUTO P 90 PIXEL MAPPING P 97 s P 91 X P 92 DUALTIME SETUP OFF ON P 93 ALARM CLOCK OFF ONE TIME DAILY P 94 VIDEO OUT NTSC PAL P 79 F 2 0...

Page 149: ...NU CAMERA ESP n ESP n P 51 DIGITAL ZOOM OFF ON P 39 MEMORY CARD MEMORY FORMAT FORMAT YES NO P 83 BACKUP YES NO P 80 SETUP ALL RESET OFF ON P 85 W P 86 PW ON SETUP SCREEN OFF 1 2 3 P 86 VOLUME OFF LOW HIGH COLOR NORMAL BLUE GREEN PINK P 88 8 OFF LOW HIGH P 89 FILE NAME RESET AUTO P 90 PIXEL MAPPING P 97 s P 91 X P 92 DUALTIME SETUP OFF ON P 93 ALARM CLOCK OFF ONE TIME DAILY P 94 VIDEO OUT NTSC PAL ...

Page 150: ... 640 480 320 240 CANCEL P 76 MEMORY CARD ALL ERASE YES NO P 82 MEMORY FORMAT FORMAT YES NO P 83 BACKUP YES NO P 80 SETUP ALL RESET OFF ON P 85 W P 86 PW ON SETUP SCREEN OFF 1 2 3 P 86 VOLUME OFF LOW HIGH SCREEN SETUP OK CANCEL P 87 COLOR NORMAL BLUE GREEN PINK P 88 VOLUME OFF LOW HIGH P 89 8 OFF LOW HIGH P 89 s P 91 X P 92 DUALTIME SETUP OFF ON P 93 ALARM CLOCK OFF ONE TIME DAILY P 94 VIDEO OUT NT...

Page 151: ...RASE YES NO P 82 MEMORY FORMAT FORMAT YES NO P 83 BACKUP YES NO P 80 SETUP ALL RESET OFF ON P 85 W P 86 PW ON SETUP SCREEN OFF 1 2 3 P 86 VOLUME OFF LOW HIGH COLOR NORMAL BLUE GREEN PINK P 88 VOLUME OFF LOW HIGH P 89 8 OFF LOW HIGH P 89 s P 91 X P 92 DUALTIME SETUP OFF ON P 93 ALARM CLOCK OFF ONE TIME DAILY P 94 VIDEO OUT NTSC PAL P 79 G 4 9 16 25 P 64 MOVIE PLAY P 65 ALBUM ENTRY SEL IMAGE SET CAL...

Page 152: ...vies 2 Not displayed for still pictures Top menu Item Settings Ref Page ALBUM MENU SEL ALBUM P 69 y 1 90 0 90 P 64 SELECT TITLE IMAGE OK CANCEL P 70 1 U P 106 VOLUME OFF LOW HIGH P 89 s P 91 VIDEO OUT NTSC PAL P 79 m 1 MOVIE PLAY 2 P 65 73 UNDO ENTRY SEL IMAGE UNDO ALL CANCEL P 70 0 P 80 ...

Page 153: ...yback mode Information display DISP Information on screen Zoom Wide OFF B B OFF Flash Still pictures AUTO Movies K HQ F 0 0 WB AUTO ESP n ESP DRIVE o ISO AUTO DIGITAL ZOOM OFF AF MODE SPOT R OFF SHUTTER SOUND 1 LOW REC VIEW ON FILE NAME RESET Information display DISP Information off screen 0 OFF y 0 OFF m BGM ON TYPE NORMAL VOLUME LOW G 9 ...

Page 154: ...154 10 Miscellaneous Others Settings differ according to the region where the camera is sold ALL RESET ON W PW ON SETUP SCREEN OFF COLOR NORMAL s 0 X Y M D 2005 01 01 00 00 DUALTIME SETUP OFF ALARM CLOCK OFF VIDEO OUT NTSC or PAL 8 LOW ...

Page 155: ... to the table below Mode Function K h S A F D B N 9 9 9 B 9 Flash 9 Information display DISP 9 Optical zoom 9 F 9 WB 9 K 9 3 ESP n 9 DRIVE 9 ISO 9 9 6 DIGITAL ZOOM 9 9 AF MODE 9 R 9 PANORAMA 9 9 2 IN 1 9 Format 9 ALL RESET 9 W 9 PW ON SETUP 9 COLOR 9 8 9 SHUTTER SOUND 9 REC VIEW 9 FILE NAME 9 PIXEL MAPPING 9 s 9 X 9 DUALTIME SETUP 9 ALARM CLOCK 9 VIDEO OUT 9 ...

Page 156: ...9 1 9 Flash 9 9 9 Information display DISP 9 Optical zoom 9 2 F 9 WB 9 K 9 3 ESP n 9 4 DRIVE 9 ISO DIGITAL ZOOM 9 9 9 AF MODE 9 5 R 9 PANORAMA 9 9 2 IN 1 9 Format 9 ALL RESET W 9 PW ON SETUP 9 COLOR 9 8 9 SHUTTER SOUND 9 REC VIEW 9 FILE NAME 9 PIXEL MAPPING 9 s 9 X 9 DUALTIME SETUP 9 ALARM CLOCK 9 VIDEO OUT 9 ...

Page 157: ...y ESP is available 5 When using Q or R only iESP is available 6 When using A and S modes AUTO is not available Mode Function U X W V d e f n 9 9 B 9 9 Flash 9 9 9 Information display DISP 9 Optical zoom 9 F 9 WB 9 K 9 3 ESP n 9 DRIVE 9 ISO DIGITAL ZOOM 9 9 9 AF MODE 9 R 9 PANORAMA 9 2 IN 1 9 Format 9 ALL RESET 9 W 9 PW ON SETUP 9 COLOR 9 8 9 SHUTTER SOUND 9 REC VIEW 9 FILE NAME 9 PIXEL MAPPING 9 s...

Page 158: ...socket Shutter button gP 22 Speaker Card cover lock gP 31 Flash gP 41 Remote control receiver gP 55 Strap eyelet Battery lock knob Multi connector gP 78 100 118 DC IN jack gP 139 Self timer Remote control lamp gP 43 55 Card cover gP 31 Battery compartment Connector cover gP 78 118 Names of parts ...

Page 159: ...de button gP 11 41 QUICK VIEW button gP 11 63 Macro button gP 11 40 Arrow pad GUIDE button gP 11 18 DISP button gP 11 61 Self timer button Y gP 11 43 55 Erase button S gP 11 72 81 Monitor gP 160 Zoom button gP 38 63 Mode dial gP 9 Card access lamp gP 122 Power lamp gP 21 31 118 Names of parts ...

Page 160: ... G U X W V d e f P 9 34 2 Shutter speed 4 1 2000 P 47 3 Aperture value F2 8 to F8 0 P 48 4 Exposure compensation 2 0 2 0 P 49 5 Battery check e f 6 Green lamp P 22 7 Flash stand by Camera movement warning Flash charge Lights Blinks P 42 P 43 8 Alarm k P 94 9 Dual time l P 93 10 Macro mode Super macro mode P 40 11 Drive o j i P 52 1 60 1 60 F2 8 F2 8 2 0 2 0 ISO ISO 400 400 4 4 3264 3264 2448 2448 ...

Page 161: ...Q1 SQ2 P 25 16 Image size 3264 2448 2560 1920 640 480 etc P 25 17 AF target mark P 22 18 Number of storable still pictures Remaining recording time 4 00 36 P 26 P 27 44 19 Spot metering 5 P 51 20 ISO ISO 64 ISO 1600 P 53 21 White balance 5 3 1 w y P 50 22 Memory indicator IN xD P 29 23 Memory gauge a b c d Item Indications Ref Page Names of parts ...

Page 162: ...1600 P 53 12 Date and time 05 08 26 12 30 P 92 13 Frame number Playing time Total recording time 4 00 00 00 36 P 65 Note The indications that appear on a movie picture that has been selected and displayed from the index display are different from those on the movie picture that is displayed using the movie playback function HQ HQ 10 10 05 05 08 08 26 26 12 12 30 30 4 ISO ISO400 400 2 0 3264 3264 2...

Page 163: ...W 34 Beep sound 89 BEHIND GLASS 34 BGM 73 BLACK WHITE 76 C Calendar display 63 Camera movement warning 160 CANDLE 35 Card 30 CCD 97 144 Close up playback 63 Cloudy day 50 COLOR 88 Compression 25 26 CUISINE 36 D Date and time 92 DIGITAL ZOOM 39 Direct printing 99 DOCUMENTS 36 DPOF 106 144 DRIVE 52 DUALTIME SETUP 93 E Error messages 105 128 ESP 51 144 EV 145 Exposure 22 145 Exposure compensation 49 ...

Page 164: ...NORMAL Slideshow 73 NTSC 79 145 Number of storable still pictures 26 O OLYMPUS Master 113 Optical zoom 38 P PAL 79 145 PANORAMA 57 PC 118 PictBridge 99 145 Picture rotation 64 PIXEL MAPPING 97 Pixels 25 145 Playback mode 9 63 Playback on a TV 78 PORTRAIT 34 Press fully 23 Press halfway 22 PRINT ORDER 103 Print settings 106 Program auto 9 Protect 80 PW ON SETUP 86 R REC VIEW 90 Record mode 25 28 Re...

Page 165: ...9 Single frame erase 72 81 Single frame reservation 107 Single frame shooting 52 Sleep mode 146 SLIDE 73 Slideshow 73 SPORT 34 SPOT AF MODE 54 Spot metering 51 SQ 25 28 SQ1 25 28 SQ2 25 28 STANDARD 99 Sunny day 50 SUNSET 35 Super macro mode 40 T Top menu 13 Tungsten light 50 TYPE 73 U UNDO ALL 70 UNDO ENTRY ALBUM ENTRY 70 USB cable 100 118 126 USB driver 114 126 V VIDEO OUT 79 VOLUME 89 W White ba...

Page 166: ...9 40 23 07 61 Goods delivery Bredowstrasse 20 22113 Hamburg Germany Letters Postfach 10 49 08 20034 Hamburg Germany European Technical Customer Support Please visit our homepage http www olympus europa com or call our TOLL FREE NUMBER 00800 67 10 83 00 for Austria Belgium Denmark Finland France Germany Italy Luxemburg Netherlands Norway Portugal Spain Sweden Switzerland United Kingdom Please note ...

Reviews: