45
921468007_09_011
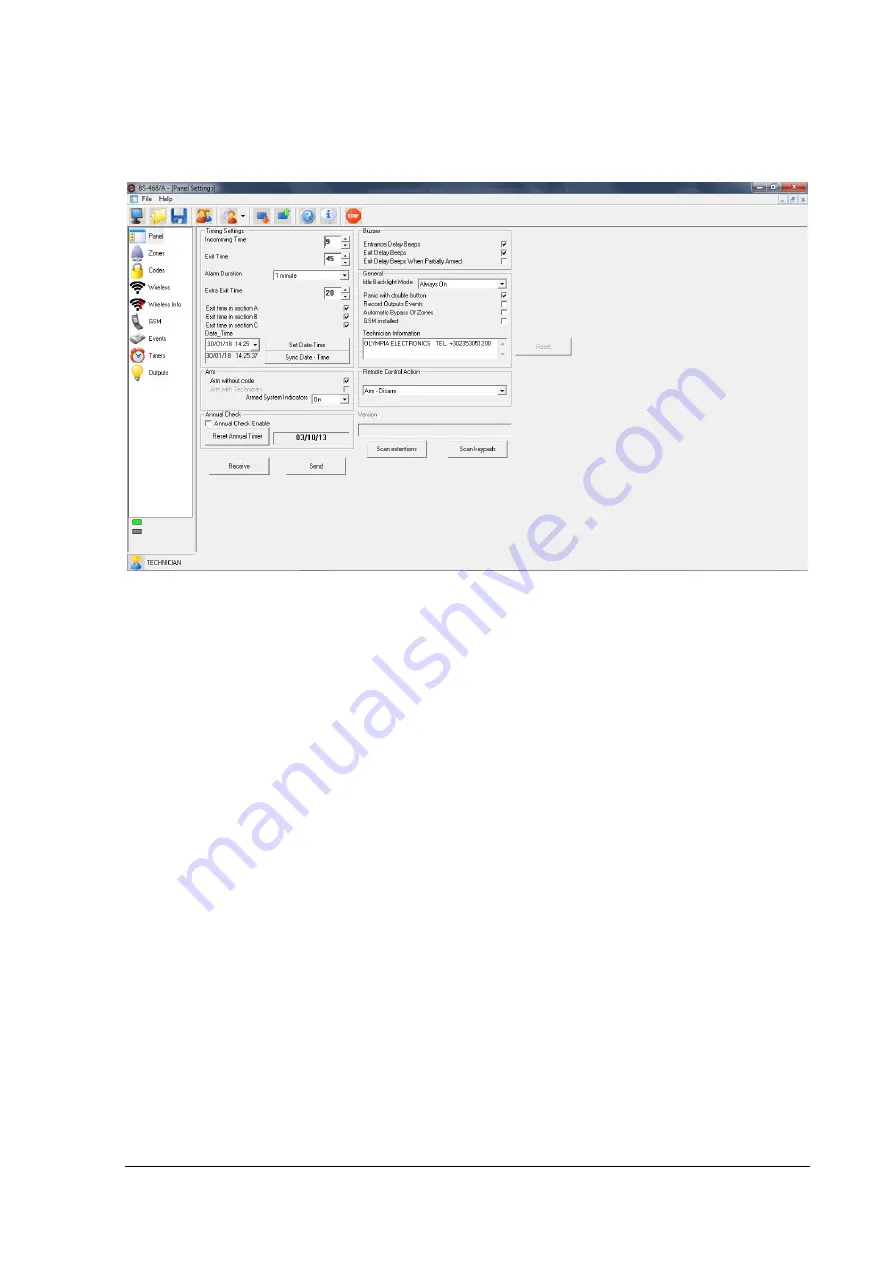
"Panel" Window
In this window we can see and make changes on the panel settings. We can receive the settings from
the panel by pressing the button "Receive". This action is needed in case we have not pressed "Down-
load All", as described on the previous page.
These changes can also be performed by the keypad. By using a PC there is a better overall picture
and changes are done quickly and easily. Additionally, by using the PC we have the opportunity to
synchronise time and date pressing the corresponding button.
If we want, for example, to change the "Entry time" delay and make it 40 seconds we press the up ar-
row next to the entry time. Now we can see that the field we have changed is highlighted green and
the time is 40sec. This means that we have made a change that is not yet permanent (Not sent to the
panel).
If we want to make the changes permanent we have to press
"Send"
. A window showing the send
progress appears and it will disappear when the settings have been sent. After that, the entry time
field becomes white again.
In general, this is a standard procedure in any window. Whenever we perform some changes, the cor-
responding fields become green and we have to send these data to apply the changes to the panel.
In case we press "Scan extensions" or "Scan keypads", we have to wait 30 seconds and then we must
press "New" button on the toolbar. In the following window the new devices must be visible now.
"Zones" Window
In this window we can change and view each zone's properties (see picture on next page). By press-
ing the button "Receive", we can receive the information of all the zones. The user can also acquire
each zone's properties by single clicking the mouse on the field "Device type" of each zone (last col-
umn). If, for example, the user presses the cell of Line 8 and Column 9, the PC will ask the data for
that zone only.


