background image

9

240011511 REV. C [05/31/2017]

  Belt Drive Blower Systems

 WARNING

Improper installation could result in death or serious 

injury. Belt drive components operate at high speeds 

and may snag loose clothing resulting in injury or 

death. Have a trained service professional preform 

the following instructions.  Failure to follow these 

instructions could result in death or serious injury. 

!


Belt drive blower systems can be modified for speed and air deliv

-

ery by adjusting variable speed motor pulley and changing blower 

pulley.

•  Adjust variable speed motor pulley by loosening 5/32 Allen 

set screw in outer sheave. Turn outer sheave clockwise to 

increase blower speed, counter clockwise to reduce speed. 

• 

Verify setscrew is tightened at one of the flat spots, failure 

to do so will convert the variable speed pulley to a fixed 

speed pulley by ruining the threads.

•  Modify blower speed by changing the blower pulley. Smaller 

blower pulley will cause the blower to turn faster. Large 

pulley reduces blower speed.

•  Large increases in the blower speed may increase power 

requirements.

•  Check amperage draw of the blower motor after making 

changes. If amperage draw is greater than the value listed 

on the motor rating plate, replace with motor of higher 

horsepower.

• 

Deflection of 3/4 of an inch to 1 inch fan belt tension is 

necessary. Less deflection places a strain on the blower 

bearings and increases start up amperage draw.

• 

More deflection allows excess slippage and causes 

premature motor pulley wear. 

•  Automotive belt dressings are not recommended.
•  Bar soap will work as belt dressing to reduce belt squeaks, 

etc. If using soap apply to the sides of belt only.

If operating belt drive blower at speeds above 1100 RPM, replace 

sintered bronze blower bearings with roller bearings.

WARNING

Electrical shock hazard.  Turn OFF electrical power 

supply at service panel before opening blower access 

door.  Failure to do so could result in death or serious 

injury.

!


22b.  Circulating Air Blower (LRFV) 

LRFV furnace models are equipped with electronically commutated 

motors (ECM).  

Setting Blower Speed and “ON” and “OFF” Timings

Blower speed and on/off time delays are handled by ECM motor 

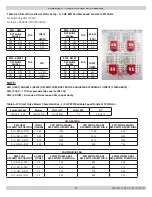
programming and are set via dipswitches per Table A-10. 

Heating airflow rate is SW1 and on/off delay is SW4, both are set 

according to firing rate. Cooling airflow rate is SW2 and if used 

is set according to installed cooling capacity. SW3 can be used 

to adjust airflow rate by (+) or (-) 15%.  Features of this ECM 

variable speed motor are that it will deliver a constant airflow 

within a wide range of external static pressures, and also includes:

•  Soft Start:

  ECM will slowly ramp up to required operating 

speed.  In heating cycle allows heat exchanger to reach 

operating temperature before set heat speed, minimizes 

noise and increases comfort.

•  Soft Stop:

  At end of heating cycle, ECM will slowly ramp 

down.  Allows increased energy efficiency and reduced noise 

levels.

•  Dehumidification:

 Feature is programmed into the variable 

speed motor.  At start of each cooling cycle, variable speed 

motor will run at 82% of rated airflow for 7.5 minutes.  After 

7.5 minutes has elapsed, motor will increase to 100% of 

rated airflow.  Used to provide dehumidification and improve 

system efficiency.

•  Continuous Fan Operation:

 When thermostat continuous 

fan (G) switch is on without call for heating or cooling, 

indoor fan is immediately energized at 50% of cooling speed.  

Allows continuous circulation of air between calls for heating 

or cooling. If call for heat (W) or cool (Y) occurs during 

continuous fan, blower remains energized.

23.  Maintenance And Service

Routine Maintenance By Home Owner

•  Arrange for professional servicing of furnace by the service 

or installation contractor annually.

• 

Homeowner is to maintain air filter or filters. A dirty filter 

can cause furnace to over-heat, fail to maintain indoor 

temperature during cold weather, increase fuel consumption 

and cause component failure.

• 

Inspect, clean or replace filter monthly. 

• 

Furnace is supplied with semi-permanent type filter. If filter 

is damaged, replace with filters of same size and type. 

• 

During monthly filter inspection, inspect general condition of 

furnace. Watch for signs of oil leaks in vicinity of oil burner, 

soot forming on any external part of furnace, soot forming 

around joints in vent pipe, etc. If any of these conditions are 

present, please advise your service or installation contractor.

Summary of Contents for LRF100

Page 1: ...RFV Lowboy Rear Flue Model with ECM Blower Oil Fired Warm Air Furnaces P N 240011511 Rev C 05 31 2017 ECR International 2210 Dwyer Avenue Utica NY 13501 web site www ecrinternational com INSTALLATION...

Page 2: ...Weight Width A Length B Height C Supply D x E Return F x G Diameter Height H LRF LRFV 22 53 33 8 20 x 18 20 x 18 8 5 29 20 x 20 x 1 240 LB 55 8 cm 135 9 cm 85 4 cm 52 1 cm x 45 7cm 52 1 cm x 47 3cm 1...

Page 3: ...ifier 7 16 Piping Installation 7 17 Oil Filter 7 18 Oil Burner Nozzles 8 19 Oil Burner Adjustment 8 20 Burner Electrodes 8 21 Burner Primary Safety Control 8 22a Circulating Air Blower LRF LRFV 8 22b...

Page 4: ...stitute of Canada HRAI or by other means prescribed or approved by the local authority having jurisdiction United States Manual J titled Load Calculation published by the Air Conditioning Contractors...

Page 5: ...furnace in parallel with or upstream from evaporator coil to avoid condensation in heat exchanger When installed in parallel prevent chilled air from entering furnace by use of dampers or other air c...

Page 6: ...oint for most of furnace electrical components United Technologies 1158 120 has an adjustable fan on time set by selecting dipswitch combination displayed in Chart 1 Fan on delay can be set at 30 60 9...

Page 7: ...rom electronic fan timer board where provisions have been made for connections but should have their own controls Do not use direct drive motor connections as a power source there is risk of damaging...

Page 8: ...itive If problems persist call your service contractor WARNING Fire burn asphyxiation hazard Do not start the burner unless blower access door is secured in place Failure to follow these instructions...

Page 9: ...gs Blower speed and on off time delays are handled by ECM motor programming and are set via dipswitches per Table A 10 Heating airflow rate is SW1 and on off delay is SW4 both are set according to fir...

Page 10: ...all for heat Burner should start It may be necessary to press RESET button on primary combustion control relay 2 There is a fan on time delay before circulating fan is energized United Technologies 11...

Page 11: ...GPH Head Air Setting LRF65 LRFV65 66 000 AFG70MPSS 0 50 45 W 140 0 55 L2 4 LRF80 LRFV80 78 000 AFG70MPSS 0 50 45 W 175 0 65 L2 5 LRF90 LRFV90 89 000 AFG70MPSS 0 60 60 W 175 0 75 L2 7 LRF100 LRFV100 10...

Page 12: ...3 APPENDIX A CHECK OUT AND ADJUSTMENTS Table A 4 Riello 40BF Burner Set Up Riello 40BF3 40BF5 Series Oil Burners For use with direct vent units using outdoor combustion air only Furnace Model Output...

Page 13: ...ce above horizontal center line 13 64 inch Distance ahead of nozzle 5 64 to 7 64 inch Carlin Burners Electrode gap 1 8 inch to 5 32 inch Distance above horizontal center line 5 16 inch Distance ahead...

Page 14: ...blower motor Isolate AC line voltage pins on 5 pin power connector with electrical tape to prevent electric shock hazard C Restore electrical power to furnace D Set thermostat above room temperature E...

Page 15: ...15 240011511 REV C 05 31 2017 APPENDIX A CHECK OUT AND ADJUSTMENTS FIGURE 3 UNITED TECHNOLOGIES 1168 1 ECM TAP BOARD LRFV FIGURE 2 UNITED TECHNOLOGIES 1158 120 FAN TIMER BOARD LRF...

Page 16: ...A CHECK OUT AND ADJUSTMENTS TIP Formulas will assist with design of duct work and determination of air flow delivery CFM Bonnet Output 1 085 x System Temperature Rise T System Temperature Rise T Bonn...

Page 17: ...ON is approximately equal to 400 CFM SW3 ADJUST Increase OR decrease CFM respectively APPENDIX A CHECK OUT AND ADJUSTMENTS Table A 11 Direct Drive Blower Characteristics 1 2 HP ECM Variable Speed Cons...

Page 18: ...11 Direct Drive Blower Characteristics 1 2 HP ECM Variable Speed Constant CFM Motor continued DELAY PROFILE FOR OIL HEATING SW4 DELAY DIP SWITCH POSITION INPUT USGPH PRE RUN ON DELAY TIME CFM LEVEL SH...

Page 19: ...19 240011511 REV C 05 31 2017 APPENDIX B WIRING DIAGRAMS Chimney Vent Furnace Wiring Diagram LRF LRFV...

Page 20: ...20 240011511 REV C 05 31 2017 APPENDIX B WIRING DIAGRAMS Direct Vent Furnace Wiring Diagram LRF LRFV...

Page 21: ...at cool speed Thermostat ends call for cool G and Y terminals are de energized Cooling contactor is de energized immediately Circulator fan turns off immediately FAN Thermostat begins call for fan G...

Page 22: ...stage of two stage cooling Y1 while Y Y2 is not calling The 24 VAC input signal is passed to pin 6 of P1 Blower runs at 80 of cooling speed profile FAN Thermostat calls for fan G The 24 VAC input sig...

Page 23: ...ay burn out heat anticipator of standard 24 vac thermostat or cause harm to components within micro electronic thermostat Before checking oil primary control perform these preliminary checks repair or...

Page 24: ...epair light leak if necessary Open safety switch Check for open limit or auxiliary limit Check internal wiring connections loose connectors etc Furnace will not start without first pushing oil primary...

Page 25: ...supplier Frozen oil line Gently warm oil line Insulate oil line Outdoor piping size may require increased diameter Oil burner sputtering at nozzle Electrodes out of adjustment or defective Check elec...

Page 26: ...e rise is too high speed up blower fan Defective high limit control Test high limit function of all limit switches Use duct thermometer to verify accuracy of limit control Check for obstructions to ai...

Page 27: ...05 31 2017 Model No Serial No Date Installed Contractor Contact Address Postal Code Telephone No After Hours No Fuel Supplier Fuel Oil Supplier Contact Telephone No After Hours No APPENDIX D HOMEOWNER...

Page 28: ...pe Assembly 3002317 23 Flue Pipe Insulator Pipe 29713 24 Flue Pipe Flange 109009797 25 Flue Pipe Gasket 3 per unit 240011382 26 Observation Port Sight Glass 240008235 27 Sight Glass Washer 109009449 2...

Page 29: ...BOF 130 F 30388 40 Oil Burner Assembly Beckett AFG70MPSS 0 50 45 W 550003220 Oil Burner Assembly Riello 40F3 0 55 80 B 550003221 Oil Burner Assembly Carlin EZ LF 0 50 70 B 550003222 41 Filter Side Rai...

Page 30: ...sure Switch for use with Beckett Burners 0 65 WC Blocked Vent Safety Switch 240011862 5 x 4 Appliance Adapter Connects Furnace to Vent Pipe 240011898 Combustion Air Intake Collar 4 for Beckett Burner...

Page 31: ...0011511 REV C 05 31 2017 PARTS LISTING Model LRF LRFV Diagram 1 2 3 4 8 7 9 11 14 15 16 16 27 28 30 31 32 33 34 36 37 42 40 25 21 15 18 13 41 25 24 23 22 25 29 35 20 10 19 19 17 38 8 5 41 6 26 16 31 3...

Page 32: ...ECR International 2210 Dwyer Avenue Utica NY 13501 web site www ecrinternational com...

Reviews: