Page 10
www.oldschoolmodels.com
Construction Manual
■ ■
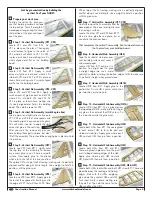
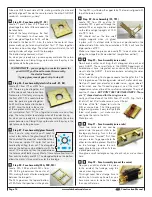
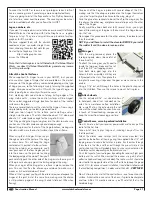
Step 55 - Wing Assembly (fl ap anchor)
Remember that 1/4" x 1/4" balsa strip that we're using to cut small
pieces from? Measure and cut two 7-3/8" lengths. You'll install one
now, so set the other aside for use on the starboard wing.
Whether or not you're installing fl aps right now, go ahead and install
this piece. You could change your mind down the road and this will
be VERY hard to install into a fi nished wing.
First, you'll need to trim the length so that it will fi t perfectly between
R2 and R5 - when pushed into the
cutouts on the bottom of the R3
and R4 ribs.
Technically, this distance is 7.3053" according to the master
drawings, but just use your eye to sand/cut/trim the piece.
Then glue this in place, making sure it's glued to each of the ribs it
touches, and the strip is completely pushed into the slots.
■ ■
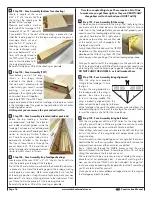
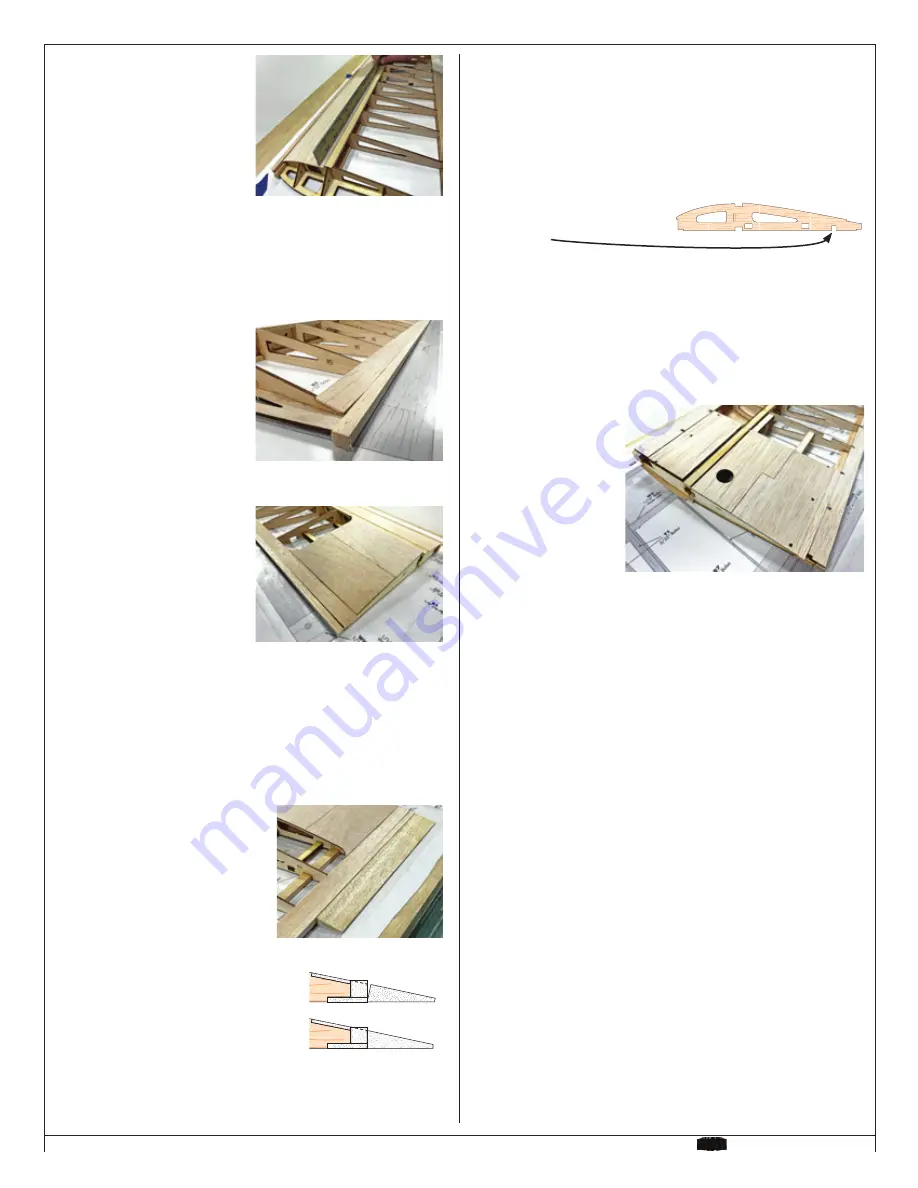
Step 56 - Wing Assembly (CS1)
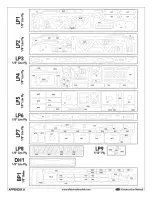
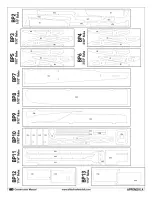
Locate one CS1 from BP12. This will be cover the R1, R2 and R3 ribs
between the leading edge and the webs. Note that there are small
pegs as part of these
ribs. These not only help
set the height of those
ribs, but are now used
to properly place CS1
in the right orientation.
Make sure CS1 is glued
to each of those ribs, to
the leading edge and to
the webs.
■ ■
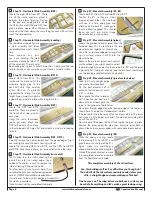
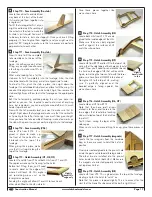
Step 57 - Wing Assembly (CS2, CS3)
Locate one CS2 from BP12, and one CS3 from BP11. These
will cover the same ribs, but from the webs back to the trailing
edge. Again, note the pegs so you can properly attach CS1. Then
attach CS2, referring to the above picture to make sure you have
everything in the proper orientation.
■ ■
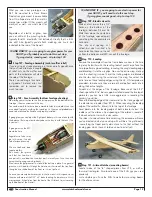
Step 58 - Wing Assembly (sanding the root rib)
Time to do some sanding. Take the time to true up the root rib,
removing all the excess sticks and sheeting that extend past the
R1 rib itself.
A large, fl at sanding block is best for this as you'll need the surface
to be completely fl at and free of any extra sheeting, balsa or
basswood sticks.
Set the port wing half aside and begin work on the starboard half.
Tape the starboard wing plan and fresh wax paper on your board.
Then follow steps 24 through 58 to complete the starboard wing
half. Once fi nished, then move on to step 59.
Note that when building the starboard half that many of the
parts will need to be glued to the opposite side (the shear
webs, for instance). Always refer to the plans to make sure
you’re gluing the parts together in the correct way.
■
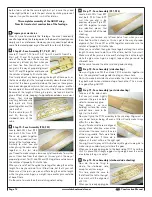
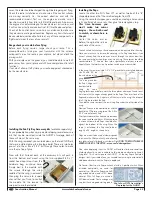
Step 59 - Wing Assembly (DH1)
Locate all three of the DH1s.
They will be glued together to form the wing's dihedral brace.
Note that if there is a bow to these pieces, that's OK.
Mix up some 15 or 30 minute epoxy and apply it to the concave
the edge that will be glued to the
back of the leading edge. Press
this in place, and use your long
straight-edge like we've shown
on the previous page. Doing this
allows you to evenly press over a
long area - pretty cool eh?
Once that glue has cured, then
apply more glue to the upper
edges of each of the ribs, the top of the webs and to the front
edge of the spar.
Slowly drag the straight edge rearwards to press the sheeting in place,
evenly working your way from the leading edge, back to the spar.
■ ■
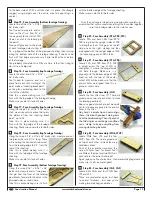
Step 52 - Wing Assembly (trailing edge sheeting)
Grab the 3/4" width and it will be
glued into the rear notch of each
rib and up against the trailing
edge.
Again, using your long straight-
edge will help hold everything down
evenly along those long spans.
■ ■
Step 53 - Wing Assembly (C4)
Locate two CS4s from BP13.
These are used as the top
sheeting, over the R1, R2 and R3
ribs.
These pieces are identical and
made just a little wider than
needed, so they can be perfectly
trimmed to fi
t between the
upper spar and the trailing edge
sheeting you just installed.
Take your time trimming these, remembering that it's easier to
remove wood than put it back on!
Once satisfi ed with the fi t of these pieces, glue both of them in
place, making sure they are fi rmly attached to spar, the trailing
edge, and the total length of where they make contact with the ribs.
■ ■
Step 54 - Wing Assembly (aileron stock)
Locate one of the 5/16" x 1-1/4" x 36
strips. These are used as the ailerons
and also the rear of the wing's center
section.
So, to make the rear of the wing's
center section, you'll need to measure
and cut this piece. The measurement
doesn't need to be exact, but does
need to be the same on both wings - we cut a 10" length.
Note that this piece's profi le is tapered,
but not symmetrical. Using the diagram
to the right, glue this to the rear of the
trailing edge, so the 90° angle is against
the building board and the trailing edge.
This completes the top of the wing.
Carefully remove it from the board, and fl ip it over.
Nope.
Much
better.


