Page 8
www.oldschoolmodels.com
Construction Manual
the bottom spar. Now that you
know how these work, remove this
web, apply glue along the edge
touching R7, and along the bottom
of the web where it contacts the
bottom spar. Glue this in position.
Then glue R5 to W3, the spar, the
leading and trailing edges.
■ ■
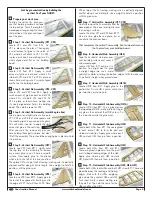
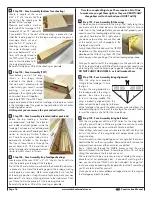
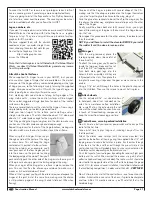
Step 33 - Wing Assembly (R5, W3)
Locate three more R5s from BP4, BP5
or BP6 and three more W3s. Working
your way inward, these webs and ribs
are glued in place, one at a time, using
the same techniques you just used on
the fi rst W3 and R5. Make sure all the
tabs, notches and slots are all correctly
positioned while the glue cures.
■ ■
Step 34 - Wing Assembly (R6, W3)
Locate two R6s from BP4 and BP5
and two more W3s. Still working
your way inward, these webs and
ribs are glued in place, one at a
time, using the same techniques
you just used on the previous ribs
and webs. Make sure all the tabs,
notches and slots are all correctly
positioned while the glue cures.
■ ■
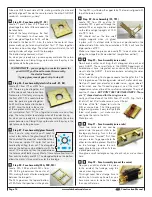
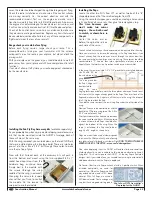
Step 35 - Wing Assembly (SH2)
Locate four SH2s from LP7 and LP8.
Glue two of them together, one on
top of the other, to form a thicker SH2.
Make sure they are perfectly aligned
when doing this. You'll have two
matching, thicker SH2s when fi nished.
■ ■
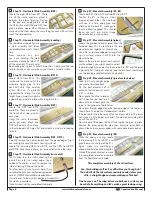
Step 36 - Wing Assembly (SH2)
Now carefully push the two SH2s from the
previous step into the pairs of pre-cut holes
in the R6 ribs. Glue these in position to both
ribs as shown here.
■ ■
Step 37 - Wing Assembly (SH2 trim piece)
Locate one of the 1/4" x 1/4" strips of balsa
sticks - this will be your "small pieces" stick. Cut
four 2-3/8" lengths (the distance between the
ribs) off of this stick.
You'll glue one of these strips in place now,
on the back of the rear SH2 you just installed.
Make sure it is pushed fl at against the building board as well.
Set the other pieces aside as you'll use one when making the other
wing half, and the other two for the fl ap area.
Note: these are not really structural pieces - it simply completes the
back end of the servo areas, and gives your covering something to
stick to - trust us, it will make perfect sense later on in the build.
■ ■
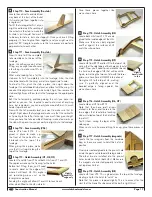
Step 38 - Wing Assembly (R5, W3)
Locate two R5s from BP4 and BP5 and two more W3s. Still working
your way inward, these webs and ribs
are glued in place, one at a time, using
the same techniques you just used on
the previous ribs and webs. Make sure
all the tabs, notches and slots are all
correctly positioned while the glue
cures.
■ ■
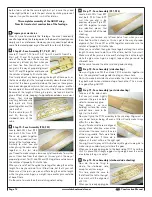
Step 39 - Wing Assembly (R4, W3)
Locate one R4 from BP3 or BP4 and
another W3. Still working your way
inward, this web and rib are glued in
place, using the same techniques you
just used on the previous ribs and webs.
Make sure all the tabs, notches and slots
are all correctly positioned while the
glue cures.
■ ■
Step 40 - Wing Assembly (R3, W3)
Locate one R3 from BP3 and another
W3. Still working your way inward, this
web and rib are glued in place, using the
same techniques you just used on the
previous ribs and webs. Make sure all the
tabs, notches and slots are all correctly
positioned while the glue cures.
■ ■
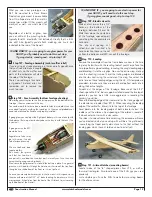
Step 41 - Wing Assembly (SH2)
Locate four SH2s from LP7 and LP8. Glue
two of them together, one on top of the
other, to form a thicker SH2. Make sure they
are perfectly aligned when doing this. You'll
have two matching, thicker SH2s when
fi nished.
Now carefully push the two SH2s into the
pairs of pre-cut holes in the R3 and R4 ribs. Glue these in position to
both ribs as shown here.
■ ■
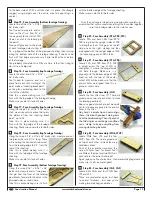
Step 42 - Wing Assembly (SH2 trim piece)
Locate one of the 2-3/8" lengths of 1/4" x 1/4" strips of balsa you
cut a few steps back.
Glue this strip in place on the back of the rear SH2 you just installed.
Make sure it is pushed fl at against the building board as well.
■ ■
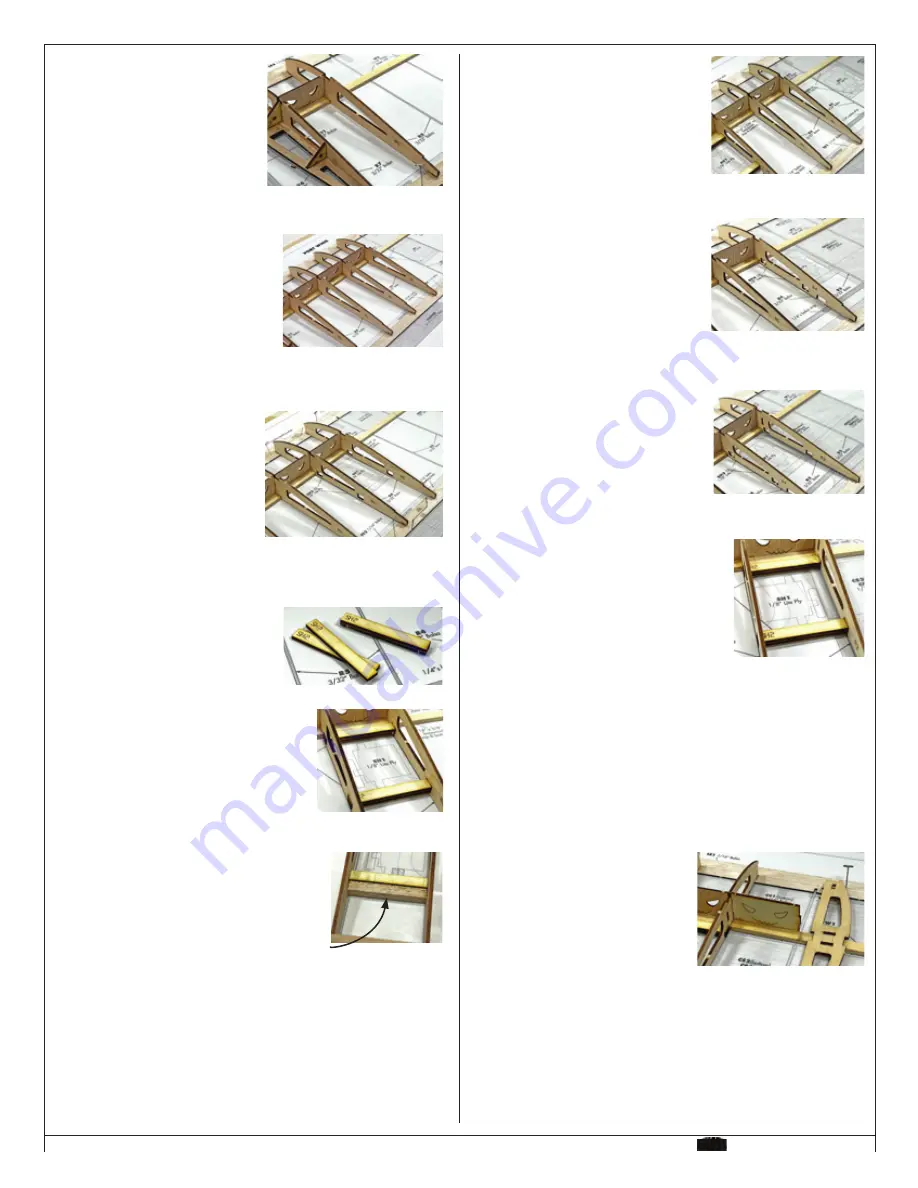
Step 43 - Wing Assembly (R2, W2)
Locate R2 from BP3 and two W2s from
LP5 and LP7. Although thicker, the W2
webs are is glued in place just the same
as the other webs. The only change is
that one is glued on each side of the
lower spar. There are additional slots
in R2 and R3 to accommodate the
extra W2. Then R2 is glued in place, just like the other ribs.
■ ■
Step 44 - Wing Assembly (R1P, W1P)
Locate one R1P from LP7 and both W1Ps from LP5. You might also
want to pop out the 3° dihedral gauges (LP4 & LP5) and it's foot
that's part of LP4 as it can be used to help hold R1P at the correct
angle.
Note the face etched into both W1Ps - there's a winking eye. This


