Construction Manual
www.oldschoolmodels.com
Page 15
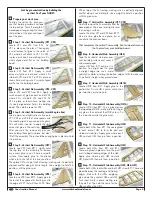
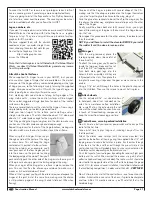
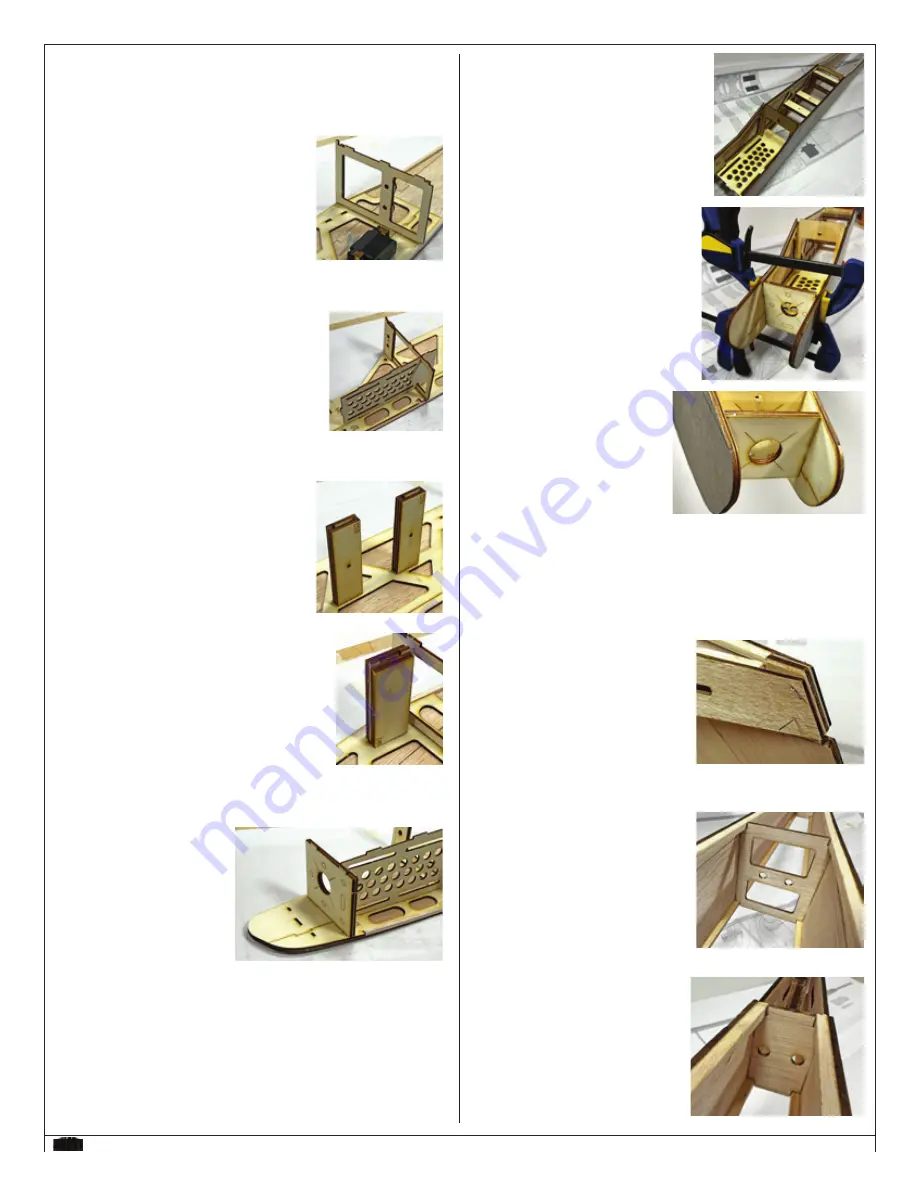
First, glue in all of the pieces from F3,
rearwards. They're all fl at which makes
holding the port side in place as easy
as clamping the two sides together
around the cabin area.
Also, place the fuselage upright on the
table, as pictured. Push down on both
sides to make sure they're fl at against
the board. We're trying to eliminate any
twists while the glue is curing. You can
check this by pulling the balsa sides
together at the rear - they should
match up, aligning with each other.
Second, work from F3 forward, using
epoxy and clamps to make this work.
Note, that if you are going to use
electric power, you'll also need to
glue in the EF1/EF2 assembly during
this same time. Note it's etched
circle that should be on the
starboard side.
As just stated, use epoxy for
this, and clamps. Epoxy for the
strength, and clamps to make
sure it all stays as you left it.
■
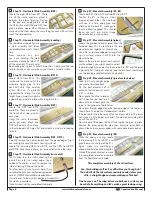
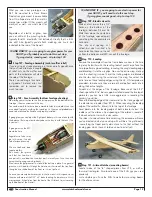
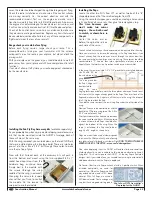
Step 100 - Fuse Assembly (rear fuselage pins)
This next step doesn't require any glue - you're simply holding
things in place to help in the next few steps.
Grab the vertical fi n and a few pins. You'll now put the vertical in
between the fuselage sides, then squeeze the two sides together
so they are aligned and are touching the fi n.
Now push in a few pins at various
angles to hold this all together.
What we're looking for are two
matching tapers on the fuselage
sides, if you were to sight down the
fuselage from the front and back.
Also the sides should be level with
each other.
■
Step 101 - Fuse Assembly (F5)
Locate the F5 assembly from several
steps back.
You'll now glue this in between
the fuselage sides, making sure
it's tabs are fully inserted to the
corresponding slots pre-cut into
both sides of the fuselage.
■
Step 102 - Fuse Assembly (F6)
Locate F6 from BP10. You'll now
glue this in between the fuselage
sides, making sure it's tabs are
fully inserted to the corresponding
slots pre-cut into both sides of the
fuselage.
■
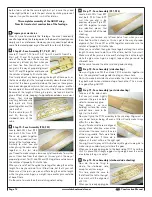
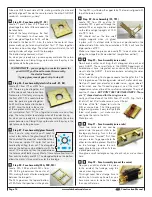
Step 93 - Fuse Assembly (servo rails)
Now go back to step 89 and repeat everything you just did, so now
you can mount the servo into the other fuselage side.
■
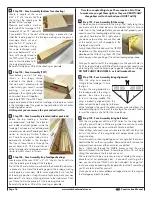
Step 94 - Fuse Assembly (F4)
Locate the F4 assembly and the starboard
fuselage side. Place the fuse side with the
plywood upwards, nose pointed to the left
and tail to the right - just as in this photo.
Glue F4 in place, into the slots pre-cut into
the plywood sides. Note it's orientation and
make sure that the F4's support pieces face
towards the rear of the fuselage, as pictured here.
■
Step 95 - Fuse Assembly (F3)
Locate the F3/TR1 assembly. Glue F3 in place,
into the slots pre-cut into the plywood sides
and the bulk of the TR1 facing towards the
nose.
Note that TR1's tabs will not necessarily fi t
into the fuselage side yet, as it tapers toward
the front. Don't worry about this right now, as
that will be taken care of in a few steps.
■
Step 96 - Fuse Assembly (CS8/CS9)
Time to glue in the CS8/CS9 sandwiches.
Make sure they are completely inserted into
the plywood sheet. Also make sure they are
perfectly perpendicular to the ply in both
directions.
■
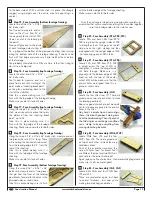
Step 97 - Fuse Assembly (WH6/WH7)
Now it's time to glue in the Texas toast
assembly of WH6/WH7. Make sure the tabs in
Wh6 are completely inserted into the plywood
sheet's slots. Also make sure it is perfectly
perpendicular to the ply in both directions.
■
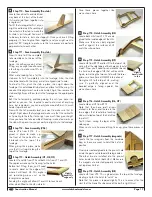
Step 98 - Fuse Assembly (F1/F2)
Remember that we told you not to worry about
the taper in the TR1 piece? Well, now we're going to tackle part
of that.
Grab the F1/F2 fi
rewall
assembly and test fi t this to
the front of TR1. At the same
time you can bend the front
of the fuselage sheeting see
that the tabs in the tray and
the fi rewall will fi t into the
slots pre-cut into the side
sheeting.
When you see how this will work, mix up a little epoxy to glue these
pieces together.
Make sure you do NOT introduce any twist into
the fuselage side when doing this.
■
Step 99 - Fuse Assembly (port fuselage side)
Now it's time to attach the port fuselage side to the starboard
assembly. This is gonna take a bit of time, and we recommend
doing this in two steps.


