Construction Manual
www.oldschoolmodels.com
Page 9
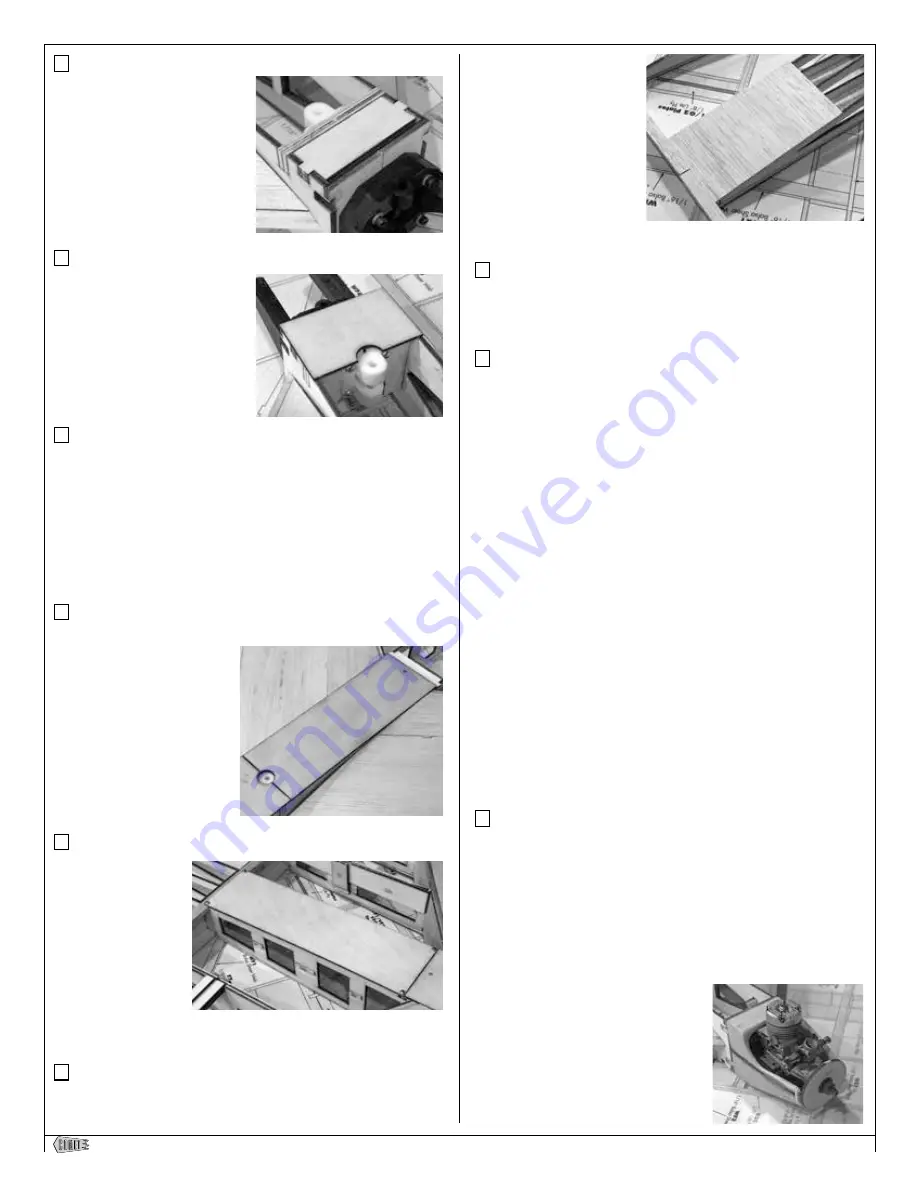
Step 52 - Center Section Assembly (F2)
Flip the Comet so the bottom is
facing up, with the firewall facing
you.
Locate both F2s from LP2. These
will be glued together, to form
a thicker F2. Then this assembly
is epoxied in place in the gap
behind the firewall. Make sure it
is fully seated, making it flush.
Step 53 - Center Section Assembly (U2)
Locate U2 from LP4. Glue in
place as shown, making sure it
is flush with the firewall and both
sides of the center section.
Step 54 - Center Section Assembly (U1 & U3)
Locate U1 and U3 from LP4. U3 will be the battery/fuel hatch and
has a pre-cut circle that designates the rear of the hatch.
U1 is glued to the front of U3 so it forms a lip that will catch under
U2. An easy way to see where it should mount is to slip U1 into the
battery/fuel compartment, under the U2 piece you just installed.
Using a pencil, trace a line on to U1 where it overlaps U2. Now use
this as your guide when gluing it to U3.
Also make sure that U1 is centered left/right on U3.
Step 55 - Center Section Assembly (U3)
Position the finished U3 battery/fuel hatch in place as shown.
Using a pencil, transfer where
the circle on the rear of the
hatch lines up with F7 (already
installed).
Remove the hatch, then drill
and tap F7 for a 10-32 thread.
This is where the included 10-
32 x 1/2 nylon thumb screw
is used to hold the hatch in
place.
Step 56 - Center Section Assembly (U4)
Locate U4 from
LP4. U4 is the radio
hatch and is held in
place with 4 of the
supplied 2-56 x 3/4”
self tapping screws.
Position U4 on the
center section as
shown, then using a
1/16” bit, drill the 4
mounting holes, using the pre-cut holes in U4 as a guide.
Step 57 - Center Section Assembly (rear sheeting)
Hopefully you have been careful with your cutting and have
saved the scrap pieces of 1/16h sheeting from BP6 and the BP8
sheets. Using the leftover
1/16th sheeting, sheet the
remaining portion of the
bottom center section,
similar to the way you
sheeted the top back in
step 28.
Note that if you are using
an electric powerplant, you
need to make a couple of
cutouts in this bottom sheeting to allow the exhaust air to escape.
Step 58 - Center Section Assembly (cowl)
Cut the two, thin internal braces from inside the cowl. They’re not
needed anymore as the cowl is now a rigid structure. Also, they will
interfere with installing the powerplant.
Step 59 - Center Section Assembly (powerplant install)
Measure your cowl from the back of base (part that mounts against
the firewall, not the tabs) to the front edge. It should measure close
to 3-5/8” in length. Add an extra 1/8” for clearance and that gives
a measurement of 3-3/4”. This is the recommended distance from
the firewall to the front of your powerplant’s drive washer (back of
the spinner).
To help aid in the mounting of your powerplant, we’ve included
two parts cut into LP3 - SP1 and SP2. Locate these parts and glue
SP1 to SP2, carefully lining it up. The hole in SP1 is meant to fit
over the prop shaft of your powerplant (you may have to enlarge
is slightly depending on your setup). The SP2 ring acts as a spacer
between the cowl and the back of your spinner. When using this SP
assembly, make sure that the SP2 ring always faces the cowl.
It is strongly recommended that glow engines be side
mounted, with the cylinder is on the starboard side of the
fuselage. Photos shown were of the prototype and we had
a very hard time getting the fuel to flow properly when the
engine was mounted upright.
The next steps involve attaching the powerplant. The steps
you follow depend on your choice of glow or electric.
For glow power, continue with step 60.
For electric, skip to step 61.
Step 60 - Center Section Assembly (glow install)
If you’ve removed the engine mount from the firewall, now is the
time to re-install it.
Using our recommended 3-3/4” distance, drill and tap your mount
for your engine. Now, comes a bit of fun, trial, and hopefully
no error. You’ll need to make the cut out so the engine can be
mounted. There is no quick way to do this, but it all starts with
mounting the cowl, then slowly cutting away the cowl as needed
until there’s just enough cut away to clear the engine so it can be
mounted. Also make sure the muffler
won’t touch and you have access to all
of the mounting screws. Lastly, make
sure that cowl doesn’t interfere the
motion of the throttle arm.
When finished, it should look something
like we’ve shown here.
Skip to step 65.


