
ESDX-3420W_rev010509
* Specifications are subject to change without notice
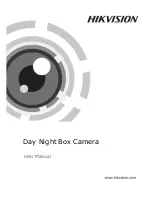
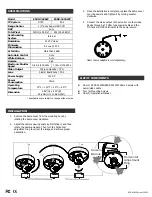
1.
Remove the dome cover from the mounting base by
rotating the dome cover clockwise.
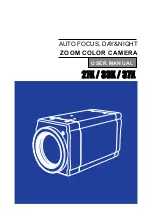
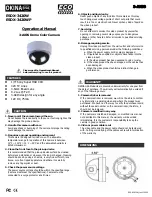
2.
Adjust the camera viewing angle by first tilting it, and then
rotate the camera module. Then turn the horizontal
adjustment ring to correct the image and achieve proper
orientation.
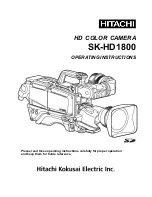
3.
Once the installation is complete, replace the dome cover
over the camera and tighten it by turning counter
clockwise.
4.
Connect the video output to the monitor or other video
device through a 75 Ohm type coaxial cable and the
DC-Jack or AC/DC-Terminator to the power source.
Note: Power adapter is sold separately.
z
One (1) ESDX-3420W/ESDX-3420WP Dome Camera with
power/video cable
z
Four (4) Mounting Screws
z
One (1) Operational Manual
Model ESDX-3420W
ESDX-3420WP
TV System
NTSC PAL
Image Sensor
1/3” Sony Super HAD CCD
DSP
Sony
Total Pixel
510(H) x 492(V)
500(H) x 582(V)
Synchronizing
System
Internal
Resolution
420 TV Lines
Minimum
Illumination
0.2 Lux @ F2.0
S/N Ratio
More than 48dB
Auto Gain Control
Auto
White Balance
Auto
Gamma
0.45
Electronic Shutter
Speed
1/60~1/100,000s 1/50~1/100,000s
Video Output
1Vp-p composite / 75
Ω
Lens
3.6mm Board Lens / F2.0
Power Supply
12V DC
Power
Consumption
75mA
Operating
Temperature
14°F ~ 122°F / -10°C ~ 50°C
Dimension
3.56”(H) x 4.20”(Ø)
90.5mm(H) x 106.8mm(Ø)
SPECIFICATIONS
INSTALLATION
LIST OF COMPONENTS
Top
Rotate
T
il
t
Top
T
op
Camera
Module
Horizontal
Adjustment
Ring