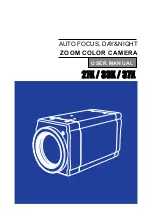
background image


AUTO FOCUS, DAY&NIGHT 

ZOOM COLOR CAMERA


사용


설명서


27X / 33X / 37X 

USER MANUAL


Summary of Contents for 27X

Page 1: ...AUTO FOCUS DAY NIGHT ZOOM COLOR CAMERA 27X 33X 37X USER MANUAL...

Page 2: ...Components 5 4 Name and Functions of Each Parts 6 1 Front 2 Back 5 Connection 9 1 Connecting to Monitor 2 Connecting to Connection 6 Operating Your Camera 11 1 Menu Configuration 2 Menu Setup 7 Troubl...

Page 3: ...midity or near flammable materials e g oil or gas Install the product in an incorrect environment may cause fire electric shock damage to the product Do not install correct installation place to preve...

Page 4: ...y time selecting operating mode automatically Change B W mode 0 02Lux building in ICR DAY NIGHT in the dark DIS Function Compensate for vibration of camera under the shaking condition Motion detection...

Page 5: ...5 1 Color zoom camera 2 Instruction Manual 3 Products Components...

Page 6: ...unting is attached on bottom of the camera but it can install the mounting in the top of camera when the user need The measurement of suitable screw for the holes Remote receive Zoom and focus functio...

Page 7: ...indicator to down To widen the view ZOOM OUT SET To access the main setup menu LEFT F NEAR button To move the arrow indicator to left To see a near object clearly RIGHT F FAR button To move the arrow...

Page 8: ...C 12V 10 500 The wire is polarized Match and terminals properly Video Output Jack Used to connect an external video monitor in jack External Control Connector Zoom and focus functions can be controlle...

Page 9: ...1 Connecting to Monitor Connect Video Out Jack to the monitor s Video In jack as shown below Connect cables with the unit powered down 2 Connecting to connection External Control Connector 5 Connectio...

Page 10: ...10 Focus and Zoom functions can be controlled by using external signals It can be broken by using Overvoltage MD Motion Detection Output Signal Level less than 10mA Communication Control Connector...

Page 11: ...HLC MOTION DET OFF ON FOCUS MODE ZOOM TRK ZOOM SPEED D ZOOM ZOOM POS INIT USER PRESET LENS INIT RET EXPOSURE BRIGHTNESS IRIS SHUTTER AGC SSNR3 SENS UP END SPECIAL PRIVACY DAY NIGHT DIS SYNC COMM ADJ I...

Page 12: ...arrow indicator to EXIT and press the SET button Notes Features marked with a have an accessible submenu Some features marked with a are not available according to the status of setting option Select...

Page 13: ...o change the SSDR level according to the contrast between bright and dark areas WHITE BAL Your camera provides three WHITE BAL control modes for your choosing in adjusting the white balance 1 Press th...

Page 14: ...re is between 4500 K and 8500 K Manual To fine adjust select the Manual mode You can increase or decrease the red or blue factor while monitoring the difference on the screen Set to MANUAL mode and pr...

Page 15: ...RIGHT button BLC Enables a user to directly select a desired area from a picture and to view the area more clearly HLC High Light Compensation If the scene contains extremely bright light areas such...

Page 16: ...o the ambient illumination when BLC is selected set it to OFF 1 Color or screen changes unnaturally 2 Noise appears in the bright part of the screen z Since the performance of the BLC function may be...

Page 17: ...Y You can select up to 8 MD areas When SENSITIVITY number is high motion detection sensitivity is increased to recognize even small movement SMART ZOOM Smart Zoom is operated in connection with MOTION...

Page 18: ...s The camera interprets sudden changes in lighting and subsequent change in brightness of an object as motion With the feature enabled other algorithms may require additional time to operatethan usual...

Page 19: ...or TRACK and press SET button to activate the zoom action focus function ONE PUSH Focus is automatically adjusted just once after zoom position is changed Select ONE PUSH and press the SET button to c...

Page 20: ...hen set todesired mode by using the LEFT or RIGHT button z FAST To move zoom fast z MEDIUM To move zoom at medium speed z SLOW To move zoom slowly Notes z The ZOOM SPEED mode cannot be used if MODE is...

Page 21: ...evious level that was set before the power went off z MANUAL The zoom magnification level can be set from 1x to 27x or 33x 37x Notes When the DIS is enabled you cannot use the D ZOOM and the zoom posi...

Page 22: ...ress the SET button to set up the initialization of the lens AUTO The lens is initialized by setting the date reset time can be set from 1 day to 7 days and the lens resets every 24 hours from the set...

Page 23: ...using the LEFT or RIGHT button while verifying the changes on screen Set END once desired level is obtained IRIS Set IRIS to AUTO or MANUAL Position the indicator over IRIS by using the UP or DOWN bu...

Page 24: ...and then press the SET button Increase or decrease iris level by using the LEFT or RIGHT button while verifying the changes on screen SHUTTER Control image brightness by adjusting shutter speed Posit...

Page 25: ...be configured manually 2x to 512x Verify changes made to the shutter speed by referencing to changes in on screen brightness Press the SET button to complete Notes Image may become unstable if the ca...

Page 26: ...n screen noise reduction Position the indicator over SSNR by using the UP or DOWN button Set SSNR to the desired mode by using the LEFT or RIGHT button OFF Disabled LOW Low noise reduction MEDIUM MEDI...

Page 27: ...tton Select SET button is AUTO mode then SENS UP limit can be adjusted from x2 x512 AUTO Select this mode for use in night time or under low lighting conditions OFF Disabled Notes SENS UP doesn t work...

Page 28: ...privacy area by using this feature The mask area expand contract upon the zoom position When the SPECIAL menu screen is displayed press the Up and Down buttons so that the arrow indicates PRIVACY Set...

Page 29: ...P menu screen is displayed select DAY NIGHT by using the Up and Down buttons so that the arrow indicates DAY NIGHT Select a desired mode using the Left and Right buttons according to the picture displ...

Page 30: ...x STW PELCO D PELCO P CAM ID Assign an ID number to the camera 1 to 255 Identification number zero is used for Remote controller setup BAUD RATE Configure baud rate from 2400 4800 9600 19200 38400 576...

Page 31: ...ncreasing this value sharpens object edges Too high of a setting however produces noise and may obscure the image COLOR Adjusting this value affects the chroma level only the burst level is unaffected...

Page 32: ...can enter up to 20 characters a Move the cursor to the character entry field by using the LEFT or RIGHT button b Use UP DOWN LEFT and RIGHT buttons to select a desired character c Press the SET button...

Page 33: ...T button to confirm the position When completed move the cursor to END and press SET button CAM ID Displays camera ID on top left corner of the screen CAM INFO Displays camera information on screen MO...

Page 34: ...DEUTSCH ITALIANO FRANCAIS ESPANOL Korean Japanese PORTUGUESE END Select this to save the DISPLAY menu settings and return to the SPECIAL menu RESET To reset your camera to factory default condition N...

Page 35: ...functioning properly and its surface is hot Check the power source for compliance with specifications Auto mode of DAY NIGHT is not selected or not active Ensure DAY NIGHT mode the mode set to AUTO E...

Page 36: ...oom 16x DIS ON OFF Min Focus Distance 1 5m Angle Field of view 27X H 55 5 Wide 2 24 Tele V 42 5 Wide 1 79 Tele 33X H 55 5 Wide 1 77 Tele V 42 5 Wide 1 33 Tele 37X H 55 5 Wide 1 59 Tele V 42 5 Wide 1 1...

Page 37: ...37...

Page 38: ......

Reviews: