background image

INTRODUCTION > 12

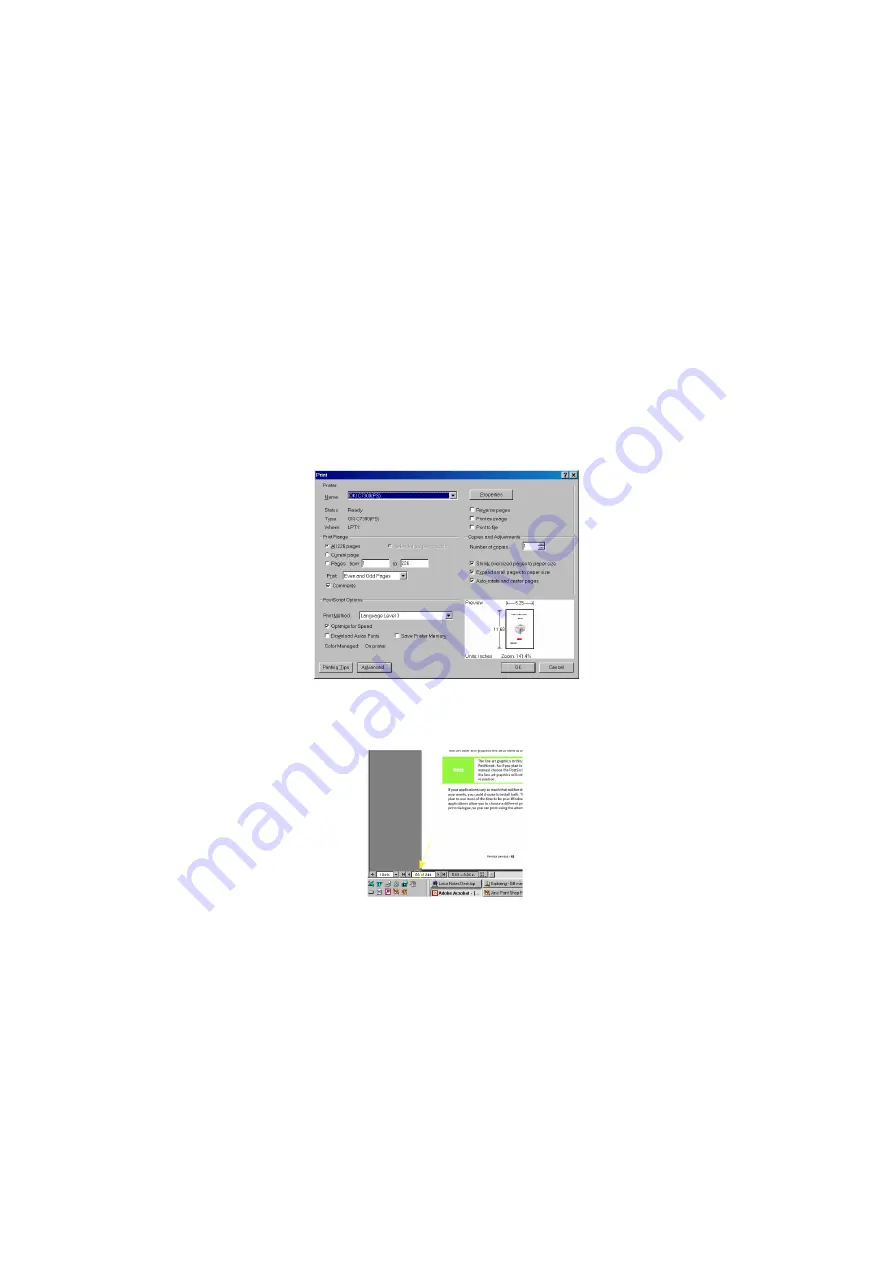
PRINTING PAGES

The whole manual, individual pages, or sections may be printed. The 
procedure is:

1.

From the toolbar, select [File], then [Print] (or press the 
Ctrl + P keys).

2.

Choose which pages you wish to print:

(a)

[All pages], for the entire manual

(b)

[Current page]    for the page at which you are looking

(c)

[Pages from] and [to] for the range of pages you specify 
by entering their page numbers.

3.

Click on [OK]....

Summary of Contents for C9300dn

Page 1: ...C9300 C9500 USER S GUIDE WINDOWS 2000 l...

Page 2: ...marks of Oki Electric Industry Company Ltd Energy Star is a trademark of the United States Environmental Protection Agency Hewlett Packard HP and LaserJet are registered trademarks of Hewlett Packard...

Page 3: ...d protective sheet removal 19 Toner cartridge installation 24 Loading paper 27 Manual feed 31 Power connection 33 Control panel 34 Menu settings 35 Changing the display language 35 Confirmation printo...

Page 4: ...tching Method 92 RGB or CMYK 92 Matching Photographic Images 92 Matching Specific Colours 93 Printing Vivid Colours 93 PCL Driver 94 Colour Matching Options 94 Colour Swatch 95 PostScript Driver 96 Co...

Page 5: ...ntenance 150 Adding Paper 150 Changing the toner cartridge 152 Changing the image drum 157 Changing the transfer belt 162 Changing the fuser unit 164 Cleaning the LED head 166 Transporting the printer...

Page 6: ...e printing 184 Unclear printing 185 Miscellaneous 187 The power is on but the printer does not go online 187 Print processing does not start 187 Print processing cancels 187 Printer makes a strange no...

Page 7: ...lour menu 212 System Config menu 212 PCL Emulation menu 213 PPR Emulation menu 213 FX Emulation menu 214 Parallel menu 214 USB menu 214 Network menu 215 Memory menu 215 Disk Maintenance menu 215 Syste...

Page 8: ...h may help you to use and understand the product CAUTION A caution appears in this manual like this A caution provides additional information which if ignored may result in equipment malfunction or da...

Page 9: ...D monochrome Booklet printing Single pass digital technology for high quality speed and reliability True 1200 dpi resolution C9500 or 600 x 1200 dpi resolution C9300 for very high quality output Duple...

Page 10: ...automatically performs a colour check when the machine is switched on when the top cover is opened and then closed and adjusts the colour balance automatically It can even be set to adjust the colour...

Page 11: ...w printer This information is compiled in the logical sequence required to result in a successful installation ONLINE USAGE This manual is intended to be read on screen using Adobe Acrobat Reader Use...

Page 12: ...dure is 1 From the toolbar select File then Print or press the Ctrl P keys 2 Choose which pages you wish to print a All pages for the entire manual b Current page for the page at which you are looking...

Page 13: ...genta yellow and black 3 CD ROM disks containing printer drivers network software and documentation see following page for contents 4 LED lens cleaner not illustrated 5 Light proof plastic bags not il...

Page 14: ...r Drivers all languages The software utilities are described briefly in the Help facility on the CD and can be installed as required They each have extensive on line Help facilities CD2 MANUALS Printe...

Page 15: ...ware PRINTER LOCATION Place the printer on a flat surface large enough and strong enough to accept the size and weight of the printer There must be sufficient space around the printer to allow for acc...

Page 16: ...PRINTER COMPONENTS 1 Top cover 2 Control panel 3 Top cover release catch 4 Multi purpose tray manual feed 5 Paper support extension 6 Paper guides 7 Right side cover 8 Paper tray 9 Paper level indicat...

Page 17: ...GETTING STARTED 17 11 LED heads 4 12 Discharge roller 13 Fuser unit 14 Image drum cyan 15 Image drum magenta 16 Image drum yellow 17 Image drum black...

Page 18: ...GETTING STARTED 18 18 Power connector 19 Side exit paper tray 20 Interfaces and card slot 21 USB interface connector 22 Parallel interface connector 23 Network interface card...

Page 19: ...er to a computer and power supply the toner cartridges must be installed and paper inserted in the paper tray PACKAGING AND PROTECTIVE SHEET REMOVAL 1 Remove any adhesive tape and packaging from the p...

Page 20: ...SETTING UP 20 3 Remove the LED head restrainer from behind the LED heads in the top cover...

Page 21: ...image drums and place them on a level surface CAUTION Never expose image drums to light for more than 5 minutes Always hold image drum by the ends Never expose image drums to direct sunlight Never tou...

Page 22: ...SETTING UP 22 5 Remove the protective sheets from each of the four image drums...

Page 23: ...23 6 Replace the four image drums into the printer making sure each image drum is installed in its correct colour location 7 Push the tab inwards and remove the blanking plate from each of the image...

Page 24: ...r cartridges back and forth several times then holding each toner cartridge horizontally remove the tape and then remove the plastic clip rom behind the coloured lever WARNING Take extreme care when h...

Page 25: ...e drum left side first engaging the drum locating peg in the hole in its toner cartridge Make sure the colours of the toner cartridge and image drum correspond 4 Gently push the toner cartridge down e...

Page 26: ...SETTING UP 26 5 Gently push the coloured lever toward the rear of the machine until it stops This releases the toner into the image drum 6 Close the top cover...

Page 27: ...SETTING UP 27 LOADING PAPER 1 Remove the paper tray from the printer...

Page 28: ...pace between the paper and the paper guides and rear stopper Don t overfill the paper tray Capacity depends on the type of paper and the paper weight Don t load damaged paper Don t load paper of diffe...

Page 29: ...er portrait or landscape orientation 4 If fitted a lower paper tray cannot be used to print if there is no paper tray inserted above it 5 For face down printing make sure the rear paper exit is closed...

Page 30: ...rse order and tray capacity is approximately 100 sheets depending on paper weight 7 Load letter headed paper face down as shown for both portrait and landscape printing CAUTION Don t open or close the...

Page 31: ...the paper and adjust the paper guides to the size of the paper being used 3 Load the paper into the multi purpose tray with the print face upward for single sided printing and print face downward for...

Page 32: ...UP 32 5 Load envelopes or letterheaded paper face up as shown for both portrait and landscape printing CAUTION Don t open or close the rear paper exit while printing as it may result in a paper jam A...

Page 33: ...quence When the printer is ready the READY indicator comes on and stays on green and the LCD indicates ONLINE WARNING Ensure both the printer power switch and the AC supply are switched OFF before con...

Page 34: ...s briefly again to select the next menu Press for more than 2 seconds to scroll through the different menus 5 Item button Press briefly to scroll forward to the next menu item 6 Value button Press bri...

Page 35: ...GE is displayed 5 Press the Value button repeatedly until the required language is displayed 6 Press the Select button An asterisk appears next to the selected language 7 Press the Online button when...

Page 36: ...ng the control panel on your printer you can set which paper feed to use the size of the paper you wish to use the weight of the paper thickness the type of paper NOTE If the settings in the printer d...

Page 37: ...ress the Item button until PAPER FEED is displayed 3 Press the Value button until the required paper feed is displayed then press the Select button An asterisk appears next to the selected paper feed...

Page 38: ...o the selected paper size 5 Press the Online button to return the printer to ONLINE status 6 Select the correct paper settings in the printer driver before printing the file NOTE When using paper tray...

Page 39: ...e required tray is displayed 4 Press the Value or button until the required paper type or weight is displayed then press the Select button An asterisk appears next to the selected paper type or weight...

Page 40: ...speed and prevent the use of the duplex option Don t use very smooth shiny or glossy paper Don t use heavily embossed headed paper very rough paper or paper that has a large grain difference between...

Page 41: ...A6 Simplex Simplex Simplex B4 Simplex Duplex Simplex Duplex Simplex Simplex Duplex Simplex Duplex B5 Simplex Duplex Simplex Duplex Simplex Simplex Duplex Simplex Duplex Letter Simplex Duplex Simplex D...

Page 42: ...m Medium light Simplex Simplex Simplex Simplex Simplex 75 to 90 g m Medium Simplex Duplex Simplex Duplex Simplex Simplex Duplex Simplex Duplex 91 to 104 g m Medium heavy Simplex Duplex Simplex Duplex...

Page 43: ...led paper is slightly thicker than the paper weight ream weight indicated on the wrapper To ensure that toner is fused correctly on such paper make sure that the MEDIA TYPE is set to RECYCLED and MEDI...

Page 44: ...ton to print the menu map The printer will return to online status when the menu map is printed CHANGING THE SETTINGS 1 Press the Menu button until the required menu is displayed then press the Select...

Page 45: ...to nn Selects printing job for secure printing This item is also displayed even when OP MENU ALL CATEGORY is set to DISABLE in the Admin menu Item Value Description PRINT MENU MAP Execute Prints menu...

Page 46: ...er of copies DUPLEX On Off Specifies two sided duplex printing if the optional duplex unit is installed BINDING Long edge Short edge Sets binding for duplex printing Only displayed if duplex is ON OUT...

Page 47: ...Auto Tray Select and Auto Tray Switch do not permit the use of the MP Tray However if MP TRAY is specified in PAPER FEED the printer behaves as if a NORMAL TRAY is selected even though DO NOT USE is s...

Page 48: ...Transparency Bond Recycled Card stock Rough User type 1 5 Selects the paper type for Tray 1 User type 1 5 are displayed only if registered in the host PC If Media character strings are specified thes...

Page 49: ...er type 1 to 5 Selects the paper type for multipurpose paper tray User type 1 to 5 are only displayed if they have been registered MP TRAY MEDIA WEIGHT Auto Light Medium light Medium Medium heavy Heav...

Page 50: ...is automatically adjusted to the recommended levels through density adjustment and TRC compensation This function permits TRC adjustment to your requirement by using the adjustment menu of HIGHLIGHT...

Page 51: ...al direction The adjustment is reflected as an offset addition value to the corrections through Auto Color Registration Correction Values are adjusted in increments of 1 1200th of an inch Example if t...

Page 52: ...selected are those enabled in the Personality Personality Personality Personality section of the Maintenance menu Maintenance menu Maintenance menu Maintenance menu USB PS PROTOCOL ASCII RAW Specifie...

Page 53: ...set to CONTINUE allows printing to continue when Low toner is displayed If STOP is selected when Low toner is displayed the printer goes off line JAM RECOVERY ON OFF Sets whether or not printing will...

Page 54: ...spacing outline font FONT HEIGHT 4 00 pt to 999 75 pt 12 00 pt Sets the font point size Only displayed if the font is a relative spacing outline font SYMBOL SET PC 8 Selects a PCL character symbol set...

Page 55: ...Specifies whether or not the printer ejects a blank sheet Not available on duplex operation CR FUNCTION CR CR LF Sets functionality on receipt of CR code LF FUNCTION LF LF CR Sets functionality on re...

Page 56: ...ION CR CR LF Sets functionality on receipt of CR code LF FUNCTION LF LF CR Sets functionality on receipt of LF code LINE LENGTH 80 COLUMN 136 COLUMN Specifies the number of characters per line FORM LE...

Page 57: ...SOFTWARE PALETTE Sets whether to use Menu Palette which defines the width and colour of pen used in GL 2 drawings When PALETTE is selected the pen width and colour specified by the command is invalid...

Page 58: ...End plot Specifies the designation of Pen 0 in GL 2 drawings If END PLOT is set the command to select PEN 0 will prompt printing then ejecting This will not affect GL 2 mode in PCL CHARACTER PITCH 6 C...

Page 59: ...l OFFLINE RECEIVE Enable Disable When set to Enable this function maintains reception without changing the interface signal even though an alarm occurs The interface stays open even if the operator pa...

Page 60: ...EtherTalk protocol NETBEUI Enable Disable Selects NetBEUI protocol FRAME TYPE Auto 802 2 802 3 Ether II snap Selects Ethernet frame type DHCP BOOTP Enable Disable Selects whether selection of DHCP BOO...

Page 61: ...TIALIZE Execute Partitions hard disk and formats each partition PARTITION 1 Common PCL PS Sets usage of partition number 1 PARTITION 2 Common PCL PS Sets usage of partition number 2 PARTITION 3 Common...

Page 62: ...I A3 Nobi A3 Wide A3 Tabloid extra Sets Tray 5 large paper size TRAY 5 LEGAL 14 Legal 14 Legal 13 5 Sets Tray 5 legal paper size Only displayed if Tray 5 is fitted PCL TRAY 2 ID 1 59 5 Sets Tray 2 num...

Page 63: ...ature differences when printing on transparencies TRANSPR COLOUR SETTING 0 1 2 2 1 Item Value Description TOTAL PAGE COUNT nnnnnn Shows total number of pages printed TRAY 1 PAGE COUNT nnnnnn Shows num...

Page 64: ...e FUSER LIFE Remaining nnn Displays the remaining life of the fuser roller as a percentage BLACK TONER 15K xxx 7 5K xxx Displays black toner remaining CYAN TONER 15K xxx 7 5K xxx Displays cyan toner r...

Page 65: ...U Enable Disable Enable Disable PPR EMULATION MENU Set to Disable PPR EMULATION MENU is not displayed FX EMULATION MENU Enable Disable Enable Disable FX EMULATION MENU Set to Disable FX EMULATION MENU...

Page 66: ...NU Set to Disable USAGE MENU is not displayed COLOUR MENU Execute This is the menu to reset the TRC data that had been stored retained for tracking For example correct values could not be taken due to...

Page 67: ...urn the printer off using the power switch CAUTION NEVER turn the printer off while it is printing If the optional hard disk has been fitted The following procedure MUST BE FOLLOWED before turning off...

Page 68: ...d to Windows 98 or Macintosh This port requires a cable conforming to USB version 1 1 or above The operation of a printer is not assured if a USB compatible device is connected concurrently with other...

Page 69: ...If your printer is to be installed as a network printer please refer to the relevant section in the User s Guide for the network interface card for further details on how to configure the network conn...

Page 70: ...heir best quality If your applications vary so much that neither driver seems to cover all your needs you could choose to install both Then select the one you plan to use most of the time to be your W...

Page 71: ...erating correctly 4 Click on Driver Installation then Install Printer Driver and follow the on screen prompts to complete your printer driver installation NOTE Take time to note the facilities availab...

Page 72: ...is printer has an automatic driver configuration program However for both PostScript PS and or Printer Control Language PCL you can also manually set the following options ADDITIONAL MEMORY Memory siz...

Page 73: ...PRINTER DRIVERS 73 4 In Installable Options adjust the amount of memory to be the same as that now installed in the printer as shown in the Menu Map 5 Click on OK...

Page 74: ...tScript 1 Access the printer settings page via the Start menu 2 Highlight the printer name and click on File then Properties 3 Click on the Device Settings tab 4 In Installable Options click on Hard D...

Page 75: ...DRIVERS 75 PCL 1 Access the printer settings page via the Start menu 2 Highlight the printer name and click on File then Properties 3 Click on the Device Options tab 4 Check Printer Hard Disk 5 Click...

Page 76: ...Script 1 Access the printer settings page via the Start menu 2 Highlight the printer name and click on File then Properties 3 Click on the Device Settings tab 4 In Installed Options click on Duplex an...

Page 77: ...DRIVERS 77 PCL 1 Access the printer settings page via the Start menu 2 Highlight the printer name and click on File then Properties 3 Click on the Device Options tab 4 Check Duplex Option Unit 5 Clic...

Page 78: ...Access the printer settings page via the Start menu 2 Highlight the printer name and click on File then Properties 3 Click on the Device Settings tab 4 In Installable Options click on Available Tray...

Page 79: ...nter settings page via the Start menu 2 Highlight the printer name and click on File then Properties 3 Click on the Device Options tab 4 Increase the number of Installed Paper Trays to the number of p...

Page 80: ...the printer settings page via the Start menu 2 Highlight the printer name and click on File then Properties 3 Click on the Device Settings tab 4 In Installable Options click on Available Tray and sel...

Page 81: ...nter settings page via the Start menu 2 Highlight the printer name and click on File then Properties 3 Click on the Device Options tab 4 Increase the number of Installed Paper Trays to the number of p...

Page 82: ...will not print and the LCD will display an error message The following printer driver instructions are given as a guide only Some software applications require the paper feed size and media settings t...

Page 83: ...vanced tab Printing Defaults button then Paper Quality tab 4 Select the required paper feed from Paper Source NOTE If Automatically Select is selected for paper source the correct paper tray is automa...

Page 84: ...PRINTER DRIVERS 84 5 Click on the Advanced button then click on Media Type and select the required type NOTE If Printer Setting is selected make sure the printer has been set to the correct media type...

Page 85: ...PRINTER DRIVERS 85 6 Click on Paper Size and set the required paper size 7 Click on OK three times...

Page 86: ...the Start menu 2 Highlight the printer name and click on File then Properties 3 Click on the General tab Printing Preferences button then Setup tab OR Click on the Advanced tab Printing Defaults butt...

Page 87: ...other selections required then click on OK 8 Click on OK twice and close the printer dialogue box NOTE If Auto is selected the correct paper tray is automatically selected as the paper feed If Multi P...

Page 88: ...ogram on the drivers CD On selecting Get Printer Settings it queries the printer driver for the installed hardware options and enables the appropriate settings The printer driver network extension all...

Page 89: ...ument print dialogue COLOUR PRINTING The PCL and PostScript printer drivers supplied with this machine provide several controls for changing the colour output of your printer For general use the Auto...

Page 90: ...y produced on any printer using toner or ink Similarly there are certain colours some yellows for example that can be printed but cannot be displayed accurately on a monitor This disparity between mon...

Page 91: ...vision sets k degrees Kelvin a measurement of temperature How your software application displays colour Some graphics applications such as Corel Draw or Adobe Photoshop may display colour differently...

Page 92: ...distinctions between Red Green Blue RGB and Cyan Magenta Yellow Black CMYK Generally most documents you print will be in RGB format This is the most common and if you do not know your document s colo...

Page 93: ...lour Swatch Utility to print out a chart of RGB swatches and enter your desired RGB values in your application s colour picker PS only RGB or CMYK If you are printing from a graphics application such...

Page 94: ...t Manual for Colour Matching 5 Choose from the following options Monitor 6500k Perceptual Optimised for printing photographs when using a monitor with a colour temperature of 6500K Monitor 6500k Vivid...

Page 95: ...colours Listed below each sample colour are the corresponding RGB Red Green Blue values This can be used to pick specific colours in applications that allow you to choose your own RGB values An exampl...

Page 96: ...s Oki s proprietary colour matching system and affects RGB data only Perceptual settings are best for printing photographic images Vivid or Digital Camera settings produce brightest colours sRGB is th...

Page 97: ...olours such as a company logo colour The colours within the printer s colour gamut are printed without any modification and only colours that fall outwith the printable colours are modified POSTSCRIPT...

Page 98: ...is often very different from paper white so this may result in colour casts especially in the lighter areas of an image Relative Colorimetric Good for proofing CMYK colour images on a desktop printer...

Page 99: ...ou do not see any profiles associated with the driver click Add and locate the ICC profiles for your printer Windows ICM uses the information in these profiles to convert colours in your documents to...

Page 100: ...file input profile input profile input profile e g digital camera and an output profile output profile output profile output profile e g the C7300 printer to be selected It uses both these profiles to...

Page 101: ...OPERATION 101 1 Click on the Colour Management tab 2 Select Automatic or Manual setting for colour matching...

Page 102: ...OPERATION 102 3 If using Manual setting click on the Add button and select the required colour profile from the list Click on Add then Apply...

Page 103: ...ION 103 PostScript printer driver a Click on the General tab Printing Preferences button then Layout tab OR Click on the Advanced tab Printing Defaults button then Layout tab b Click on the Advanced b...

Page 104: ...OPERATION 104 c Select the required image colour management from Graphic d Click on OK three times and close the printer dialogue box...

Page 105: ...rinter driver a Click on the General tab Printing Preferences button then Colour tab OR Click on the Advanced tab Printing Defaults button then Colour tab b Select the required printing and colour mod...

Page 106: ...OPERATION 106 c To set the colour matching manually set Manual Colour in Colour Mode d To print a colour sample use the Colour Swatch button e Click on OK twice and close the printer dialogue box...

Page 107: ...ck on the General tab Printing Preferences button then Layout tab OR Click on the Advanced tab Printing Defaults button then Layout tab 2 Select the number of pages per sheet from Pages per Sheet 16 p...

Page 108: ...r 1 Click on the General tab Printing Preferences button then Setup tab OR Click on the Advanced tab Printing Defaults button then Setup tab 2 Select the required number of pages per sheet from Finish...

Page 109: ...OPERATION 109 3 Click on Options and select the required page border layout and margins 4 Click on OK three times and close the printer dialogue box...

Page 110: ...y set to custom paper size before use Width of a custom page size can be from 76 2 to 328 mm and length from 127 to 1200 mm PostScript printer driver 1 Click on the General tab Printing Preferences bu...

Page 111: ...OPERATION 111 4 Enter the width and height measurements in Custom Page Size Definition then select Paper Feed Direction if necessary 5 Click on OK repeatedly to return to the main driver window...

Page 112: ...hen select the multi purpose tray in Paper Source 7 Click on OK twice and close the printer dialogue box PCL printer driver 1 Click on the General tab Printing Preferences button then Setup tab OR Cli...

Page 113: ...later use 1 On the Setup tab select Paper Feed Options then the Custom Size button 2 Enter the relevant information in Width and Height and give your document size a name in Name 3 Click on Add to ad...

Page 114: ...ing Preferences button then Job Options tab OR Click on the Advanced tab Printing Defaults button then Job Options tab 2 Select the required printing resolution from Print Quality 3 Set Toner Save if...

Page 115: ...nit must be fitted to the printer and enabled before duplex printing can be carried out Paper must be loaded into the paper tray with the print side facing upwards The multi purpose tray cannot be use...

Page 116: ...N 116 Click on the Advanced tab Printing Defaults button then Layout tab 3 Select Flip on long edge or Flip on short edge from Print on Both Sides Duplex 4 Click on OK twice and close the printer dial...

Page 117: ...nter driver 1 Click on the Device Options tab 2 Click on the General tab Printing Preferences button then Setup tab 3 Select long or short edge from 2 Sided printing 4 Click on OK twice and close the...

Page 118: ...stScript printer driver 1 Click on the General tab Printing Preferences button then Layout tab OR Click on the Advanced tab Printing Defaults button then Layout tab NOTE Some software applications may...

Page 119: ...OPERATION 119 2 Select Booklet from Pages per Sheet 3 Click on OK twice and close the printer dialogue box...

Page 120: ...OPERATION 120 PCL printer driver 1 Click on the Device Options tab 2 Click on the General tab Printing Preferences button Setup tab 3 Select Booklet from Finishing Mode...

Page 121: ...OPERATION 121 4 Click on Options and set Signature 2Pages Right to Left and Bind Margin as required then click on OK 5 Click on OK twice to close the printer dialogue box...

Page 122: ...er driver 1 Click on the General tab Printing Preferences button Job Options tab then Watermark button OR Click on the Advanced tab Printing Defaults button Job Options tab then Watermark button 2 Sel...

Page 123: ...utton 4 Type in the required text and select size and angle in Text 5 Select Font Colour Trim and Position of the new watermark then click on OK 6 Check First Page Only if the watermark is to be print...

Page 124: ...ent any conflicts in printing i e collate from the software application or collate from the printer driver The following instructions explain how to select collating using a printer driver 1 Click on...

Page 125: ...using Windows PostScript drivers 1 Click on the General tab Printing Preferences button then Layout tab OR Click on the Advanced tab Printing Defaults button then Layout tab 2 Click on the Advanced bu...

Page 126: ...OPERATION 126 4 Expand Postscript Options and select the required download option from True Type Font Download Option 5 Click on the OK button twice...

Page 127: ...e printer dialogue box PRINTING THE FONT LIST 1 Press the Menu button until PRINT MENU is displayed then press the Select Select Select Select button 2 Press the Item button until PRINT PCL FONT or PR...

Page 128: ...Job Options tab a In Job Type select Proof and Print NOTE The internal hard disk must be fitted to the printer and enabled to allow for spooling of the print job before final printing If the hard dis...

Page 129: ...y of the document is printed for checking 4 After checking the remaining copies can then be printed or deleted if incorrect using the procedures given below PRINTING COPIES To print the remaining copi...

Page 130: ...ng the buttons on the printer control panel 3 Press the Value button until ALL JOBS or the required job name is displayed 4 Press the Cancel button to delete the remaining copies of the document 5 Whe...

Page 131: ...then Job Options tab a In Job Type select Secure Print NOTE The internal hard disk must be fitted to the printer and enabled to allow for spooling of the print job before final printing If the hard di...

Page 132: ...o spool the print job on the printer s hard disk 4 The print job can then be printed and deleted using the procedures given below CONFIDENTIAL PRINTING To print out the confidential document carry out...

Page 133: ...the buttons on the printer control panel 3 Press the Value button until ALL JOBS or the required job name is displayed 4 Press the Cancel button to select the print job and delete it from the printer...

Page 134: ...the number of required copies and if required check the Collate box NOTES The internal hard disk must be fitted to the printer to allow for spooling of the print job before final printing If the hard...

Page 135: ...the hard disk 4 The document can then be printed or deleted using the procedures given below PRINTING COPIES To print the remaining copies of the document after checking carry out the following on th...

Page 136: ...alue button until ALL JOBS or the required job name is displayed 4 Press the Cancel button to delete the remaining copies of the document 5 When the deletion confirmation message appears confirm by pr...

Page 137: ...feature allows these items to be printed in various combinations depending on your requirements For example you could create an Overlay consisting of a single item such as the file that prints the log...

Page 138: ...rint PRN file 1 From inside your application program choose File then Print 2 Ensure that the Print To File option is switched on in your application s Print dialogue box 3 Depending on the applicatio...

Page 139: ...ipt 1 From inside your application program choose File then Print 2 Ensure that the Print To File option is switched on in your application s Print dialogue box 3 Depending on the application you may...

Page 140: ...file BIN file is assigned an ID number You can change this ID number by double clicking it and entering a new one in the ID field PostScript This automatically generates a PostScript hst file Note the...

Page 141: ...PERATION 141 DEFINING OVERLAYS Postscript printer driver a Click on the General tab Printing Preferences button then Overlays tab OR Click on the Advanced tab Printing Defaults button then Overlays ta...

Page 142: ...ter a name for the overlay in Overlay Name and select which pages the overlay is to be printed on from Print on Pages NOTE The Form Name must be EXACTLY the same as the file name you made a note of in...

Page 143: ...g Highlight the overlay name in Defined Overlays and click on the Add button to add the overlay to the list in Active Overlays h Select Use Overlay from the drop down list i Click on OK twice and clo...

Page 144: ...ON 144 PCL printer driver a Click on the General tab Printing Preferences button then Job Options tab OR Click on the Advanced tab Printing Defaults button then Job Options tab b Click on the Overlay...

Page 145: ...Please refer to the user guide for the storage manager f Select which pages the overlay is to be printed on from Print on Pages then click on Add followed by Close NOTE The Overlay Name must be EXACT...

Page 146: ...hlight the overlay name in Defined Overlays and click on the Add button to add the overlay to the list in Active Overlays h Check Print Using Active Overlays i Click on OK three times and close the pr...

Page 147: ...ou to configure and print posters It is only available with a PCL driver 1 Click on the General tab Printing Preferences button then Setup tab OR Click on the Advanced tab Printing Defaults button the...

Page 148: ...OPERATION 148 3 Click on Options and enter the poster configuration details 4 Click on OK three times and close the printer dialogue box...

Page 149: ...up to a ream 500 sheets of paper then replace the sheets removed in Step 2 above this ensures that the oldest paper is used first to help preventing paper jams 4 Check that the paper guides and rear...

Page 150: ...mix paper of different sizes quality or thickness Don t remove the paper tray during printing Close the paper tray gently 5 If fitted a lower paper tray cannot be used to print if there is no paper t...

Page 151: ...this stage remove the toner cartridge and check whether it is empty if so the toner cartridge needs to be replaced Cartridge life is approximately 15 000 A4 pages at 5 print density The first toner c...

Page 152: ...he direction of the arrow as far as it will go 4 Remove the toner cartridge 2 lifting the right side of the cartridge first to disengage the locating peg on the image drum from the toner cartridge 5 M...

Page 153: ...the toner cartridge horizontally remove the tape 7 Insert the new toner cartridge into the image drum left side first engaging the drum locating peg 1 in the hole 2 in the toner cartridge 8 Gently pus...

Page 154: ...ward until it stops This releases the toner into the image drum 10 Gently wipe the LED head surface with LED lens cleaner or a soft tissue CAUTION Do not use methyl alcohol or other solvents on the LE...

Page 155: ...er installing the new toner cartridge the message on the display TONER LOW or CHANGE TONER should disappear However this sometimes does not disappear until printing has been carried out If it still do...

Page 156: ...ean the LED head at the same time as changing the image drum Image drum life is approximately 30 000 sheets of A4 This assumes a typical office environment where 20 of print jobs are one page emails 3...

Page 157: ...fully remove the toner cartridge 2 lifting the right side of the cartridge first to disengage the locating peg on the image drum from the toner cartridge c Carefully put the toner cartridge in a safe...

Page 158: ...MAINTENANCE 147 3 Remove the image drum 4 Make sure the replacement image drum is the correct colour and remove it from the packaging Remove the protective sheet from the new image drum...

Page 159: ...MAINTENANCE 148 5 Remove the protective sheet from the new image drum...

Page 160: ...ur location in the printer 7 Push the tab inwards and remove the blanking plate 2 from the image drum 8 Re install the toner cartridge or replace it by a new toner cartridge of the corresponding colou...

Page 161: ...layed in the control panel Transfer belt life is approximately 80000 sheets A4 long edge feed However this assumes a standard print job of three sheets If single sheets are printed transfer belt life...

Page 162: ...ansfer belt unit from its packaging 5 Using the handles 2 and 3 align the pins 4 with the grooves 5 on the printer and insert the new transfer belt into the printer 6 Move the lock lever 1 forward and...

Page 163: ...G THE FUSER UNIT When the fuser unit reaches the end of its product life CHANGE FUSER UNIT is displayed in the control panel Fuser unit life is approximately 80 000 A4 sheets 1 Switch off the printer...

Page 164: ...user unit from its packaging 5 Using the handle 2 install the new fuser unit into the printer 6 Make sure the two spring loaded locking levers 1 lock the fuser unit into place 7 Remove the retaining t...

Page 165: ...D head when printing does not come out clearly has white lines or when text is blurred 1 Switch off the printer and open the top cover CAUTION Do not use methyl alcohol or other solvents on the LED he...

Page 166: ...MAINTENANCE 155 2 Gently wipe the LED head surface with LED lens cleaner or soft tissue 3 Close the top cover...

Page 167: ...able from the printer and remove any paper from the paper trays 3 Open the top cover and remove the four image drums 4 Seal the aperture on each image drum and its toner cartridge with plastic adhesiv...

Page 168: ...celling the current job CENTRO I F ERROR Centronics interface error parallel interface CHANGE IMAGE DRUM Change the image drum indicates colour CHANGE BELT UNIT Change the transfer belt CHANGE FUSER U...

Page 169: ...ired before job can be printed INSTALL NEW IMAGE DRUM Install a new image drum Colour will be indicated INSTALL NEW TONER Install a new toner cartridge Colour will be indicated INSTALL PAPER CASSETTE...

Page 170: ...configuration of serial card RS232C OVERRUN ERROR Serial overrun error Check configuration of serial card RS232C PARITY ERROR Serial parity error Check configuration of serial card SERVICE CALL A seri...

Page 171: ...cover of the printer IN THE PAPER TRAY Remove the paper tray and any jammed paper from the printer then re install the paper tray NOTE The top cover of the printer must remain open FOR UP TO A MAXIMUM...

Page 172: ...TROUBLESHOOTING 161 BEHIND THE RIGHT SIDE COVER 1 Open the right side cover and remove any jammed paper then close the right side cover...

Page 173: ...TROUBLESHOOTING 162 ON THE TRANSFER BELT a Remove all four image drums b Carefully remove any jammed paper from the transfer belt and top paper exit c Replace all four image drums into the printer...

Page 174: ...TROUBLESHOOTING 163 BEHIND THE LEFT SIDE COVER 1 Open the left side cover side exit paper tray and remove any jammed paper then close the left side cover...

Page 175: ...are spring loaded toward the front b Remove the fuser unit holding the unit by the handle and place it on a flat table c With the coloured lever on the fuser unit to your left move it in the direction...

Page 176: ...f there is any paper jammed in the optional duplex unit carry out the following a Remove the separator 1 andremove any jammed paper from the printer b Replace the separator c Open the small front cove...

Page 177: ...TROUBLESHOOTING 166 e Open the duplex top cover and remove any jammed paper f Close the duplex top cover and slide the duplex unit paper tray back into the printer g Close the small front cover...

Page 178: ...TRAYS If any additional paper tray s or the high capacity feeder are installed remove the paper trays and check that no paper is jammed along the various parts of the exit path Finally When all paper...

Page 179: ...ENU is displayed then press the Select button 2 Press the Item button until the required setting is displayed 3 Press the Value button to display ENABLE or DISABLE as required 4 Press the Select butto...

Page 180: ...f paper see Specifications The paper is moist or affected by static Store paper within specified temperature and humidity levels The paper is creased or wrinkled The paper is not aligned correctly Adj...

Page 181: ...was not correctly followed or cancelled Configure again from the beginning Parallel cable is disconnected or faulty Reconnect or try another cable A converter buffer or extension cable is being used T...

Page 182: ...ssible mismatch on parallel connection between computer and printer Change parallel transmission mode see Parallel Transmission Mode above Possible cause Remedy Interface is disabled In the printer me...

Page 183: ...free space on hard disk Delete unnecessary files Printer driver is incorrectly configured Correctly configure printer driver Possible cause Remedy Memory is insufficient for number of applications run...

Page 184: ...er or soft tissue Toner is low Change toner cartridge Paper is unsuitable for printer Use recommended paper Possible cause Remedy The toner cartridge is incorrectly installed Reinstall the toner cartr...

Page 185: ...he fuser unit The image drum has been exposed to light Remove the image drum from the printer and store it in a dark place for several hours If this does not work replace the image drum Possible cause...

Page 186: ...e Remedy Check the control panel If an error message is displayed correct the problem Possible cause Remedy The printer interface cable is faulty Replace the printer interface cable The time out setti...

Page 187: ...efore entering power save mode The image drum carries out a cleaning process to ensure print quality which takes time Wait until this process has been completed The fuser unit adjusts temperature whic...

Page 188: ...the associated printer driver settings have to be made for these options as described under Installed Options in the chapter entitled Printer Drivers ADDITIONAL MEMORY Additional memory increases the...

Page 189: ...the example below The module with the highest part number capacity must be installed in Slot 1 first next highest in Slot 3 and the lowest in Slot 2 Installation 1 Switch off the printer and disconne...

Page 190: ...e into Slot 1 the second highest into Slot 3 and the lowest into Slot 2 c Replace the mother board and secure it with the two screws 4 Reconnect the printer interface cable and power cable then switch...

Page 191: ...installed a Press the Menu button twice to access the INFORMATION MENU b Press the Select button and confirm that PRINT MENU MAP is displayed on the LCD c Press the Select button to print the menu ma...

Page 192: ...sk is used for proof and print password or secure printing Installation 1 Switch off the printer and disconnect the power cable and printer interface cable 2 Loosen the two screws 1 and remove the mot...

Page 193: ...that PRINT MENU MAP is displayed on the LCD c Press the Select button to print the menu map d Check that HDD now shows as being installed in the printer The printer will automatically configure to inc...

Page 194: ...until it reaches its stop then lift up to remove the tray completely from the printer 3 Remove the front cover by lifting it at both ends 4 Place the duplex unit on top of the paper tray so that they...

Page 195: ...switch the printer on The printer will automatically configure to include this option However you can manually set it as follows 1 Press the Menu button until PRINT MENU is displayed then press the S...

Page 196: ...rinter 4 Pull the post 2 forward and pull the two stoppers 3 forward to release the duplex unit from the paper tray then remove the duplex unit from the paper tray 5 Refit the front cover to the print...

Page 197: ...ACCESSORIES 186 10 Press the Online button to turn the printer back to online status 11 Remove the duplex option setting from the printer driver properties...

Page 198: ...1 Switch off the printer and disconnect the power cable and printer interface cable 2 Lower the printer gently on to the additional paper tray unit aligning the holes and connection socket on the bas...

Page 199: ...Y 3 if fitted appear under MEDIA MENU The printer will automatically configure to include this option However you can manually set it as follows 1 Press the Menu button until the PRINT MENU is display...

Page 200: ...maximum printer capacity of 2750 sheets Installation 1 Switch off the printer and disconnect the power cable and printer interface cable 2 Lower the printer gently on to the high capacity feeder alig...

Page 201: ...p d Check that the additional paper trays appear under MEDIA MENU 5 Automatic tray switching is switched on as follows a Press the Menu button until the PRINT MENU is displayed and press the Select bu...

Page 202: ...and provides a tray on which to locate the Scancopier Unit For full details of installing and using these accessories refer to the User s manual entitled C9300 C9500 Scancopier Unit User s Guide FINI...

Page 203: ...nd above Classic Internal font PostScript 3 PCL5c fonts Print Start First print time 10 secs black 11 5 secs colour Warm up time 160 secs Parallel Interface IEEE Std 1284 1994 parallel Connections 36...

Page 204: ...bels Paper capacity depending on paper weight Paper tray 550 sheets approx Manual feed 100 sheets approx High capacity feeder 1650 sheets approx Paper exit 100 sheets face up 500 sheets face down see...

Page 205: ...artridge transfer belt unit fuser roller unit Product life 5 years or 1 000 000 sheets Weight 72 kg not including optional accessories and paper a Print speed varies with paper size media weight and p...

Page 206: ...SPECIFICATIONS 195 EXTERNAL DIMENSIONS...

Page 207: ...408 EP IMAGE DRUM CYAN 30 000 A4 41963407 EP IMAGE DRUM MAGENTA 30 000 A4 41963406 EP IMAGE DRUM YELLOW 30 000 A4 41963405 FUSER UNIT 230V 80 000 A4 41946105 TRANSFER BELT 80 000 3 pages job 41946003...

Page 208: ...F BINDING LONG EDGE JOB OFFSET ON PAPER FEED TRAY1 TRAY SEQUENCE DOWN MP TRAY USAGE FEED WHEN MISMATCHING AUTO TRAY SWITCH ON MEDIA CHECK ENABLE PRIORITY TRAY TRAY1 RESOLUTION 600dpi LED model 1200dpi...

Page 209: ...EDIUM MP TRAY SIZE TYPE WEIGHT A4 LONG EDGE PLAIN MEDIUM UNIT OF MEASURE MILLIMETRE X DIMENSION 210 Y DIMENSION 297 Item Factory default setting AUTO REGISTRATION ON AUTO DENSITY MODE AUTO AUTO GAMMA...

Page 210: ...R LF FUNCTION LF PRINT MARGIN NORMAL TRUE BLACK OFF PEN WIDTH ADJUST ON Item Factory default setting CHARACTER PITCH 10 cpi FONT CONDENSE 10 cpi to 12 cpi CHARACTER SET SET 2 SYMBOL SET PC 8 LETTER 0...

Page 211: ...MAL LINE PITCH 6 lpi WHITE PAGE SKIP OFF CR FUNCTUION CR LINE LENGTH 80 column FORM LENGTH 11 7 inch TOF POSITION 0 0 inch LEFT MARGIN 0 0 inch FIT TO LETTER DISABLE TEXT HEIGHT SAME CONT PAPER MODE O...

Page 212: ...E NETBEUI ENABLE FRAME TYPE AUTO DHCP BOOTP ENABLE RARP DISABLE IP ADDRESS 0 0 0 0 SUBNET MASK 0 0 0 0 GATEWAY ADDRESS 0 0 0 0 PRINT SETTINGS OFF INITIALIZE OFF Item Factory default setting RECEIVE BU...

Page 213: ...XTRA TRAY2 LEGAL14 PAPER LEGAL 14 TRAY3 A3 Nobi PAPER TABLOID EXTRA TRAY3 LEGAL14 PAPER LEGAL 14 TRAY4 A3 Nobi PAPER TABLOID EXTRA TRAY4 LEGAL14 PAPER LEGAL 14 TRAY5 A3 Nobi PAPER TABLOID EXTRA TRAY5...

Page 214: ...Hard disk 193 High capacity feeder 201 I Image drum 157 Information Menu 45 L LED head 166 Location 15 M Maintenance Cleaning LED head 166 Fuser unit 164 Image drum 157 Toner cartridge 152 Transfer b...

Page 215: ...nting Booklets 118 Creating overlays 138 Custom page sizes 110 Duplex 115 Font list 127 Proofing 128 Using passwords 131 Protective sheet removal 19 S Secure printing 131 Setting up Power cable 33 Pro...

Page 216: ...108 8551 Japan Tel 81 3 5445 6158 Fax 81 3 5445 6189 http www okidata co jp Oki Data Singapore Pte Ltd 78 Shenton Way 09 01 Singapore 079120 Tel 65 221 3722 Fax 65 421 1688 http www okidata com sg Oki...

Reviews: