Version 1.1
19
2011-06-28
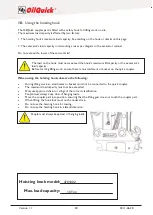
Procedure for setting down an attachment:
Make sure that everyone is clear of the excavator's
working area.
Raise the attachment.
Move the tilt cylinder out until the attachment hangs
from the front pin and the rear pin presses against the
coupler part (see illustration below).
1
2
Open the quick coupler by pressing the lock switch. The warning light comes on and the alarm sounds.
Move the tilt cylinder right out, enabling pressure to build up and the H-cylinder to open.
Make sure that the indicator rod is visible (1).
Make sure that the locking plungers are retracted (2).
Move the tilt cylinder out until the attachment only hangs from the front pin. There should be 0-2 cm
play between the rear pin and the coupler part (see illustration below).
Lower the attachment onto the ground. The ground should be hard and even.
Move the tilt cylinder in until the quick coupler is at an angle of 30-45 degrees to the attachment frame
on the tool (see illustration below).
Release the front pin from the attachment frame and raise the boom.
Disable the lock switch for the quick coupler.
Move the tilt cylinder out to its maximum position so that pressure is built up in the machine and the
H-cylinder moves forward and locks the quick coupler. The light and the alarm both turn off. The quick
coupler is locked and the dirt guard is closed, preventing the quick couplings from getting dirty.
Check that the indicator rod is not visible
Make sure that the locking plungers are out (locked position)
Finished.
It is important for the attachment to be tilted inwards.
If it is not, unlocking the H-cylinder could cause it to fall to the ground unchecked.
Lock function
The warning light on the
lock switch is on and an
alarm sounds
30°
-
45°
Summary of Contents for OQ 70/55
Page 4: ......
Page 30: ...Version 1 1 30 2011 06 28 Notes...


