Defender 3000 Indicators
EN-17
2.3.4
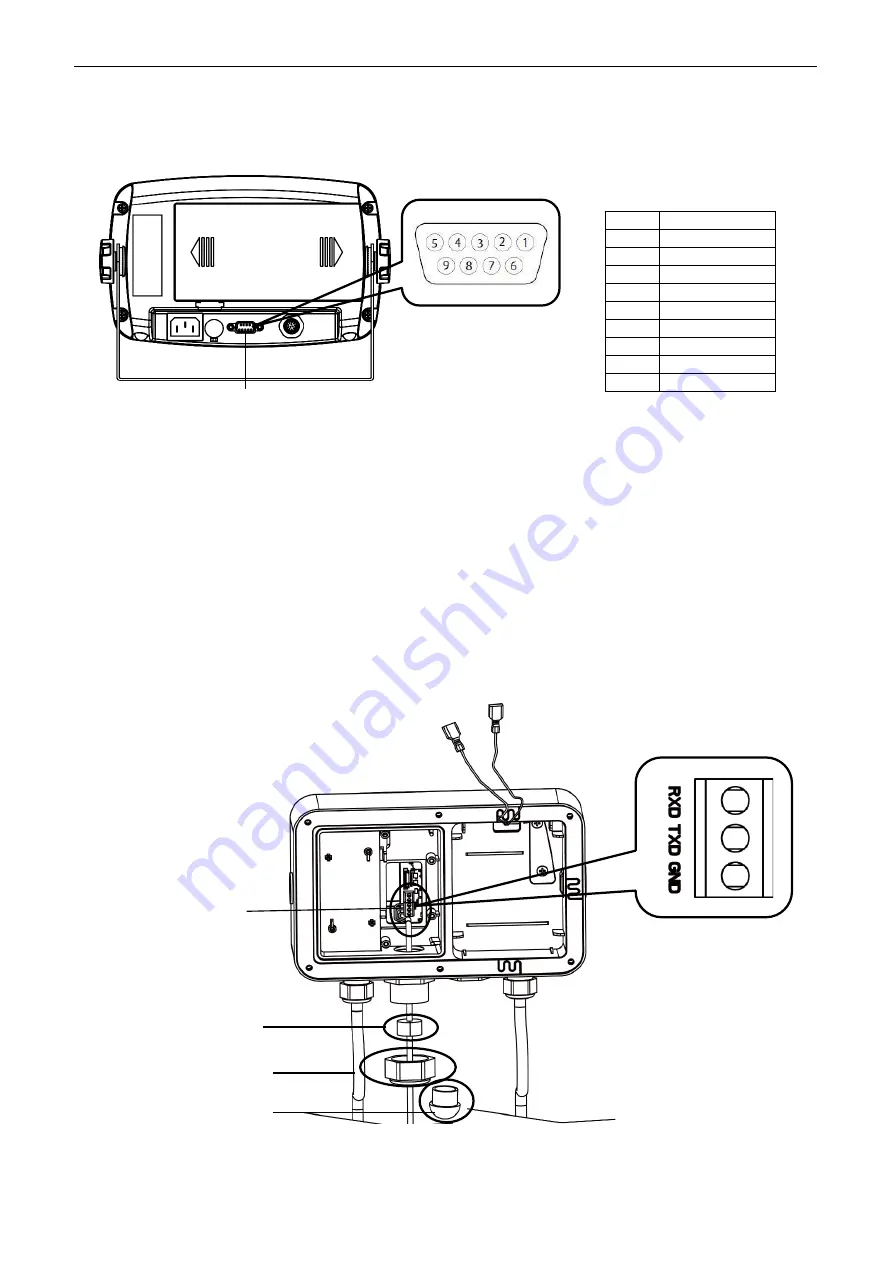
i-DT33P RS232 Connection
Connect the optional RS232 cable to the RS232 connector on the rear housing of the i-DT33P indicator. Please
refer to table 2-2 for the definition of each pin if needed.
2.3.5
i-DT33XW RS232 Connection
For i-DT33XW model, to make the RS232 connection:
1.
Open the rear housing. Please refer to
Open the Housing
section for how to open the rear housing.
2.
Take out the battery. Please refer to
the
i-DT33XW
sub-section of
Non-EasyConnect
TM
Indicator
section
for how to take out the battery.
3.
Release the strain relief for option connector on the bottom of the indicator and remove the plug on it.
4.
Pass the optional RS232 cable through the connector and attach it to the RS232 terminal block on the
mainboard.
5.
Attach the watertight seal to the cable and push it into the strain relief for option connector. Tighten the
strain relief for option connector with the watertight seal in it to finish installation.
Note:
Please check the graphic below for the parts mentioned above.
Pin
Connection
1
N/C
2
TXD
3
RXD
4
N/C
5
GND
6
N/C
7
N/C
8
N/C
9
N/C
RS232 Connector
Figure 2-6 i-DT33XW RS232 Connection
Table 2-2 RS232 Pins
Figure 2-5 i-DT33P RS232 Connector
RS232
terminal block
Strain relief for
option connector
Watertight seal
Plug
Summary of Contents for Defender 3000
Page 1: ...DefenderTM 3000 Indicators Instruction Manual i DT33P i DT33XW Manual_DT33 Indicators_V1...
Page 2: ......
Page 59: ......


