L I G H T. Y E A R S A H E A D . WWW.OCEANLED.COM
OceanLED MANUAL / EYES CAMERA / EYES HD GEN 2 /
REVISION 1
2020
INSTALLATION & OPERATION MANUAL
EYES HD GEN2 OCEAN CAMERA
Page 1: ...LIGHT YEARS AHEAD WWW OCEANLED COM OceanLED MANUAL EYES CAMERA EYES HD GEN 2 REVISION 1 2020 INSTALLATION OPERATION MANUAL EYES HD GEN2 OCEAN CAMERA...
Page 2: ...alt water corrosion however screws and fasteners used for the installation must be of a marine grade type stainless steel or equivalent and monitored annually to ensure the camera remains in service f...
Page 3: ...ay result in additional installation time and could invalidate the warranty IMPORTANT NOTICE Attention Installer This manual contains important information about the installation operation and safe us...
Page 4: ...e to variables beyond your control such as ambient temperature and supply voltage fluctuations to ensure your camera is always receiving the proper voltage and to ensure the power supply is not overlo...
Page 5: ...odifications to your vessel Please also consult the manufacturer for more detail on modifications and installation If camera is to be installed in a conductive hull an Isolation Kit must be used Conta...
Page 6: ...g the connections will be required Suitable cable for supply connection Suitable cable crimps for connection of the vessels sacrificial bonding system to the camera body Fuse fuse holder to fuse suppl...
Page 7: ...to ensure a complete unbroken seal around the camera Make sure sealant fills in the recess groove on the reverse of the camera bezel The next process is made much easier if a second person is inside t...
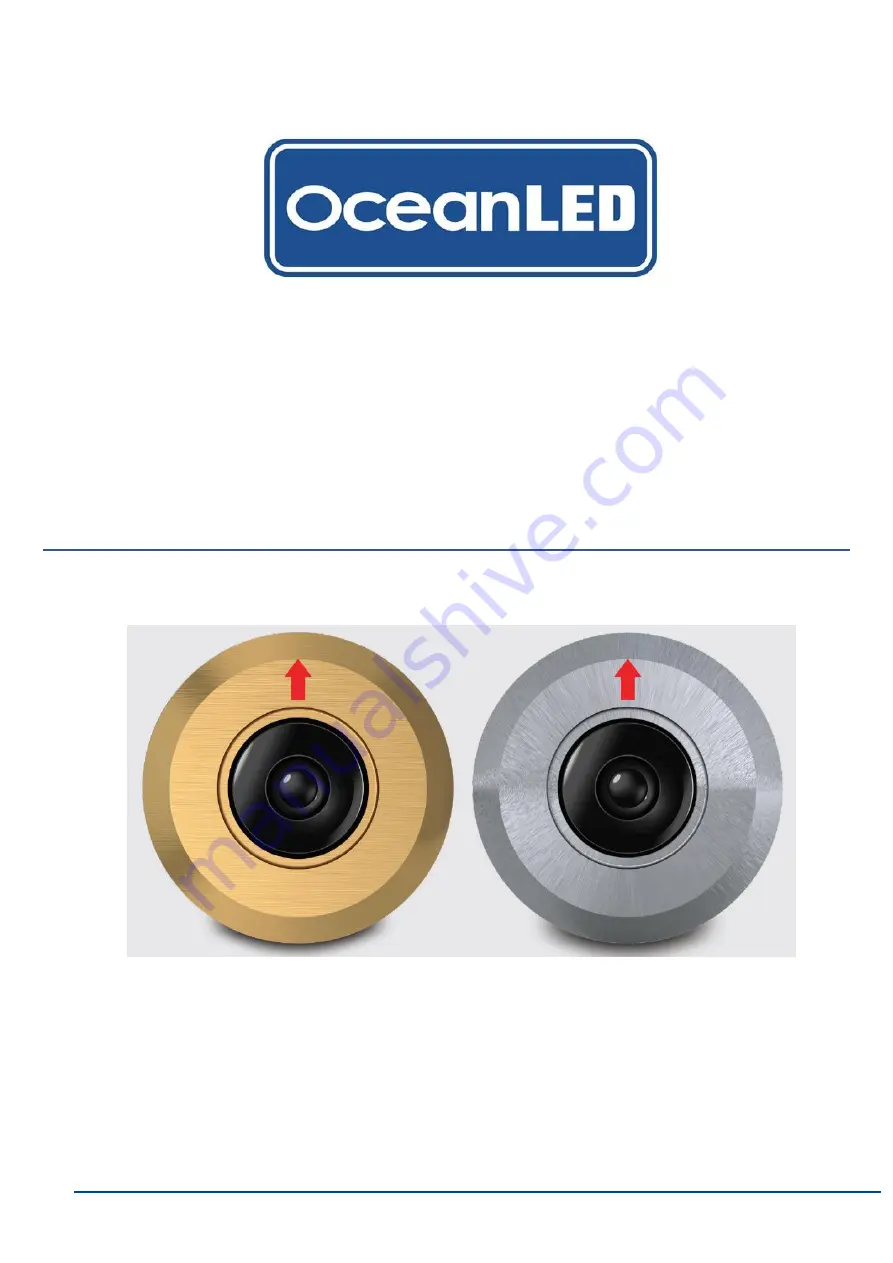
Page 8: ...arrow points to the top of the image when viewed on a monitor 6 Insert the plastic compression washer over the camera body 7 Fit one of the the securing nuts onto the body and tighten DO NOTover tight...
Page 9: ...e with the screw and shake proof washer provided BONDING The camera body MUST be attached to the vessels bonding cathodic protection system Once fitted it is mandatory to check that there is full cont...
Page 10: ...connector to the yellow connector If using the HD video output connect the video cable BNC connector to the BNC connector with the thinner black wire It is imperative to ensure that these connections...
Page 11: ...nto the water At this final stage make sure all of the system is operational If you have any issues please contact your local OceanLED representative Never install a new camera then leave the vessel i...
Page 12: ...en coated with a specialized Tritonium coating which makes the surface of the glass lens a non stick layer Lenses should be cleaned with a boat brush or similar biweekly or as needed to keep the lens...
Page 13: ...nnected to o The yellow BNC plug is the std composite video output NTSC PAL o The all metal connector with thinner black wire is the HD SDI output Ensure that the monitor display can display the video...
Page 14: ...ct OceanLED 1 Connect the camera assembly to the cathodic protection system as explained in Chapter 3 2 Measure the electrical continuity between the front bezel and the sacrificial anode This test sh...
Page 15: ...rved Specifications are subject to change without notice Trademarks are the property of Ocean LED Marine LTD Ocean LED Marine LTD Ocean LED USA LLC www oceanled com Unit 1 Jacknell Road Dodwells Bridg...