background image

11

www.Observint.com

© 2019 Observint Technologies. All rights reserved.

• 

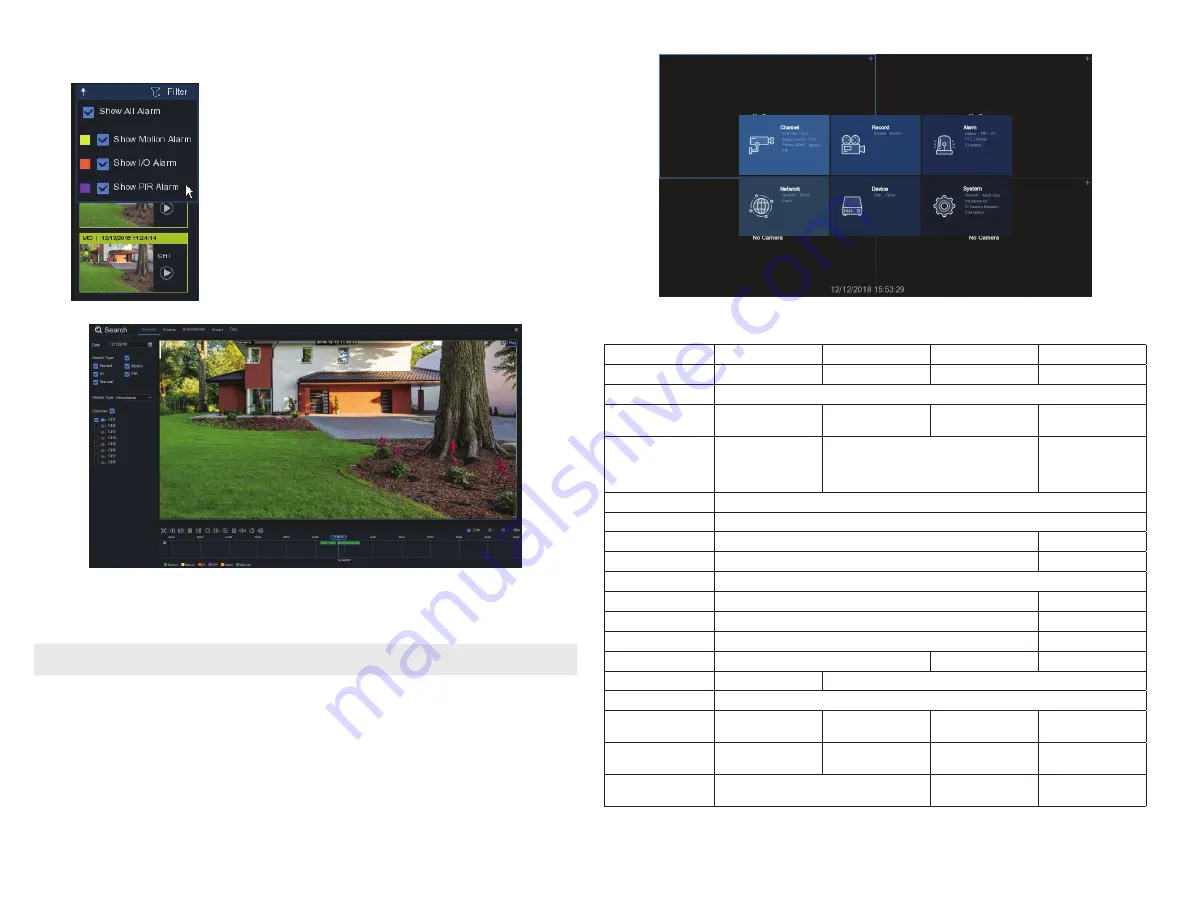
Filter Panel

The Filter panel opens when the mouse cursor is moved to the right of the screen. It 
provides links to playback recordings, and allows you to filter recordings by the alarm 
type. 

Click the 

Play

 icon in the thumbnail to open 

Search

 window and playback the recording.  

See below. 

• 

Setup (Menu mode)

To open the 

Setup 

menus, click the icon in the lower right corner of the Task Menu Bar, and then click the 

Setup

 icon. Click the block 

for the setup configuration you want to see or change. Using these menus may require authentication. 

NOTE

If the recorder is not in menu operation for one (1) minute, the screen will lock to prevent unauthorized OSD operations.

Refer to the 

NVR User Manual

 for more information about the setup features of your recorder. 

Specifications

Model

N4

N8

N16

N32

Recording Bandwidth

Max 40 Mbps

Max 128 Mbps

Max 128 Mbps

Max 320 Mbps

Recording Resolution 

8 MP (4K), 5 MP, 3 MP , 2 MP (1080P), 1.3 MP (960P), 1.0 MP (720P)

Display Split 

1 / 4

1 / 4 / 6 / 8 / 9

1 / 4 / 6 / 8 / 9 / 10 / 13 / 

14 / 16

1 / 4 / 6 / 8 / 9 / 10 / 13 / 14 / 

16 / 17 / 19 / 22 / 25 / 32 / 36

Live / Playback performance

4K: 1 ch realtime 

4 MP: 2 ch realtime 

2 MP: 4 ch realtime

4K: 2 ch realtime 

4 MP: 4 ch realtime 

2 MP: 8 ch realtime

4K: 4 ch realtime 

4 MP: 6 ch realtime 

3 MP: 10 ch realtime 

2 MP: 16 ch realtime

Output Interface

1 HDMI (up to 4K), 1 VGA 

Display Resolution

1024 × 768, 1280 × 720, 1280 × 1024, 1440 × 900, 1920 × 1080 , 2560 × 1440, 3840 × 2160

Alarm Input / out

No

16 ch input, 1 ch output

Ethernet

RJ-45 port (100 / 1000M)

RJ-45 port (1000M)

Smart Phone

iOS, Android

Internal HDD

1 × SATA 3.0 HDD, up to 8TB

4 × SATA 3.0 HDD, up to 8TB

RS485

No

Yes

e-Sata

No

Yes

Line In

No

Yes

Yes

USB

2 × USB 2.0 for mouse

1 × USB 3.0 for backup / upgrade , 2 × USB 2.0 for mouse

ONVIF 

Yes

PoE

4 PoE ports

6 PoE ports

16 PoE ports

16 PoE ports; single port up to 

802.3at (30w)

Power Supply

48 Vdc / 1.2 A 

PoE Switch : 48 V

48 Vdc / 2A

PoE Switch :48 V

48 Vdc / 3.75 A 

PoE Switch :48 V

AC 110 ~ 240V, 

PoE Switch :48 V

Dimension (W × D × H)

11.8 × 8.94 × 2.1 in  

(300 × 227 × 53 mm)

11.8 × 11.9 × 2.1 in  

(300 × 302 × 54 mm) 

14.9 × 11.9 × 2.6 in  

(378 × 325.8 × 66 mm)

Summary of Contents for N16

Page 1: ...recording bandwidths up to 320 Mbps Supports recording resolutions of 8 MP 5 MP 3 MP 2 MP 1080P 1 3 MP 960P 1 0 MP 720P H 264 H 265 Video encoding N4 N8 N16 support 1 HDD up to 8TB N32 supports 4 HDD...

Page 2: ...ound Cover screw Ground terminal and screw for cover 1 of 5 4 48 Vdc power Port for 48 Vdc power adapter 5 AUDIO OUT RCA connector for audio line out 6 VGA Connector VGA monitor cable 7 HDMI Connector...

Page 3: ...tion Tools to install the cameras and route power and cables VGA or HDMI compatible computer monitor to connect to the NVR Un interuptable power supply UPS is recommended This UPS is used to ensure sy...

Page 4: ...nectors toward the center of the chassis Use the bracket screws removed earlier HDD mounting screws 8 Lay the NVR on the table top up Verify that the SATA and power connector on the HDD is fully seate...

Page 5: ...nitor 3 If using a speaker set apply power to your speakers Step 5 Using the Wizard for basic configuration setup When the NVR powers on a SYSTEM INITIALIZING splash screen normally appears within 3 m...

Page 6: ...der acquires network using DHCP Dynamic Host Configuration Processor which usually exists somewhere on your LAN DHCP provides network settings that are compatible with other devices on your LAN 1 In t...

Page 7: ...mple 192 168 001 100 Subnet Mask Subnet mask is a network parameter which defines a range of IP addresses that can be used in a network If IP address is like a street where you live then subnet mask i...

Page 8: ...data on the disk If you installed HDDs in your recorder it is strongly advised to format these drives before using your recorder a To configure the HDD for Overwrite i Check the select box for the HDD...

Page 9: ...n click the Add button Video from the camera will appear in the viewing frame i Check the select box for the HDD you want to format from the list above ii Click the Format button Allow the format oper...

Page 10: ...ystem enter menu mode Click to Lock Unlock the screen Unlock state allows access to the configuration menus Click to Shutdown Reboot and Logout of the system Status Icons Status icons This indicates t...

Page 11: ...esolution 8 MP 4K 5 MP 3 MP 2 MP 1080P 1 3 MP 960P 1 0 MP 720P Display Split 1 4 1 4 6 8 9 1 4 6 8 9 10 13 14 16 1 4 6 8 9 10 13 14 16 17 19 22 25 32 36 Live Playback performance 4K 1 ch realtime 4 MP...

Reviews: