background image

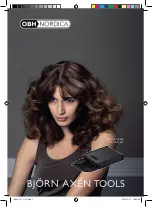
OBH Nordica Flexi Curler Styling Set

Before Use
Before the appliance is used for the first time, read the instruction manual carefully and save 
it for future use. 

Use
Make sure that all curlers fits correctly into the storage case. Heat up the curlers by connecting 
the plug to an outlet. The red pilot lamp positioned in the right corner of the storage case 
lights as an indication of that the heating has started. Wait for 15-20 minutes for the curlers 
to heat, or wait until the yellow colour indicator on the storage case shifts to orange.

Make sure that the hair is dry when you start to use the curlers. Brush/comb the hair, take a 
hair section and place the curler behind the hair, approximately 5 cm from the roots (picture 
1). Wind the lower part of the hair section around the curler. Make sure to start approximately 
3 cm into the curler to make sure all hair fits the curler (picture 2). Trap the hair ends before 
you roll up the curler towards the roots (picture 3). Fold the ends of the curler as shown 
(picture 4). 

Note: if you have long hair it might be easier to take thinner hair sections and start 

to wind from the hair ends instead of 5 cm from the roots.

Continue in the same way. How large and defined the curl gets 
depends on how much hair you roll up on each curler and how 
you place them in the hair. If you want extra volume you can twist 
the hair section before you wind it up (see picture 5). See more 
styling advices further on in the instruction manual.

Leave the curlers in the hair until they cooled completely for best result.  

Always unplug the appliance after use and let it cool.

Note! The curlers gets very warm during use. Keep the heated parts away from scalp, face, 
neck and hands. Never use the appliance on wigs, extensions and artificial hair without 
testing on a small hair section first, otherwise the wig/artificial hair may melt.

15

5844_LU_1111.indd   15

2011-11-07   12:32:59

Summary of Contents for BJORN AXEN

Page 1: ...Flexi Curler St yling set 5844_LU_1111 indd 1 2011 11 07 12 32 54...

Page 2: ...Brugsanvisning dansk side 3 5 Bruksanvisning svenska sida 6 8 Bruksanvisning norsk side 9 11 K ytt ohjeet suomi sivu 12 14 Instruction manual english page 15 17 5844_LU_1111 indd 2 2011 11 07 12 32 54...
Page 3: ...s ind mod spolen inden spolen rulles op mod hovedbunden se billede 3 B j herefter spolens ender ind mod midten for at holde spolen p plads se billede 4 Bem rk Hvis h ret er meget langt kan det v re en...

Page 4: ...nes ender ind og lad spolerne sidde til h ret er helt afk let Reng ring og vedligeholdelse Tag stikket ud af stikkontakten og lad spolerne afk le helt inden reng ring Opbevaringstasken spolerne og kon...

Page 5: ...en eller hans servicev rksted eller af en tilsvarende uddannet person for at undg at der opst r fare 12 El installationen skal overholde g ldende version af St rkstr msbekendtg relsen med hensyn til e...

Page 6: ...ild 2 F nga upp h rtopparna mot spolen innan du rullar upp spolen mot h rbotten se bild 3 B j d refter in b da ndarna mot mitten p spolen f r att h lla den p plats se bild 4 Notera om du har l ngt h r...

Page 7: ...ing och underh ll Dra ur kontakten och l t spolarna svalna helt innan reng ring F rvaringsv skan spolarna och kontakten f r inte neds nkas i vatten eller andra v tskor och f r inte komma i direkt kont...

Page 8: ...den endast bytas av tillverkaren legitimerad serviceverkstad eller en beh rig person f r att undvika fara 12 Extra skydd rekommenderas genom installation av jordfelsbrytare med en m rkstr m av 30 mA...

Page 9: ...opp mot hodebunnen se bilde 3 B y s begge endene mot midten p rullen for holde den p plass se bilde 4 Husk hvis du har for langt h r kan det v re lettere ta smalere h rseksjoner og starte rulle opp h...

Page 10: ...g og vedlikehold Ta st pslet ut av kontakten og la rullene avkj le f r rengj ring Oppbevaringsvesken rullene eller st pslet m ikke dyppes i vann eller andre v sker og m ikke komme i kontakt med vann T...

Page 11: ...orisert person for unng at det oppst r noen fare 12 Det anbefales at el installasjonen ekstrabeskyttes i henhold til sterkstr msreglementet med jordfeilbryter HFI PFI HPFI rele brytestr m maks 30 mA K...

Page 12: ...iuspohjaa katso kuva 3 Taivuta sen j lkeen patukan p t keskelle jotta patukka pysyy paikoillaan katso kuva 4 Muista pitki hiuksia voi olla helpompi k sitell jos hiusosiot ovat edell mainittua kapeampi...

Page 13: ...ukoiden p t ja j t patukat hiuksiin kunnes hiukset ovat j htyneet t ysin Puhdistus ja hoito Irrota pistotulppa pistorasiasta ennen puhdistusta ja anna patukoiden j hty t ysin S ilytyslaukkua patukoita...

Page 14: ...t miseksi vaihdattaa valmistajan tai koulutetun huoltomiehen toimesta tai valtuutetussa huoltopisteess 12 Pistorasiaan on suositeltavaa asentaa lis suojaksi vikavirtasuojakytkin jonka laukaisuvirta on...

Page 15: ...ake sure all hair fits the curler picture 2 Trap the hair ends before you roll up the curler towards the roots picture 3 Fold the ends of the curler as shown picture 4 Note if you have long hair it mi...

Page 16: ...d completely Cleaning and maintenance Unplug the appliance and let it cool completely before cleaning The storage case curlers and plug may never be immersed in water or other liquids It must never co...

Page 17: ...manufacturer or his service agent or a similarly qualified person in order to avoid a hazard 12 The electrical installation must comply with the present legislation concerning additional protection i...

Page 18: ...5844_LU_1111 indd 18 2011 11 07 12 33 00...

Page 19: ...5844_LU_1111 indd 19 2011 11 07 12 33 00...

Page 20: ...SE LU 5844 071111 5844_LU_1111 indd 20 2011 11 07 12 33 00...

Reviews: