background image

Ports

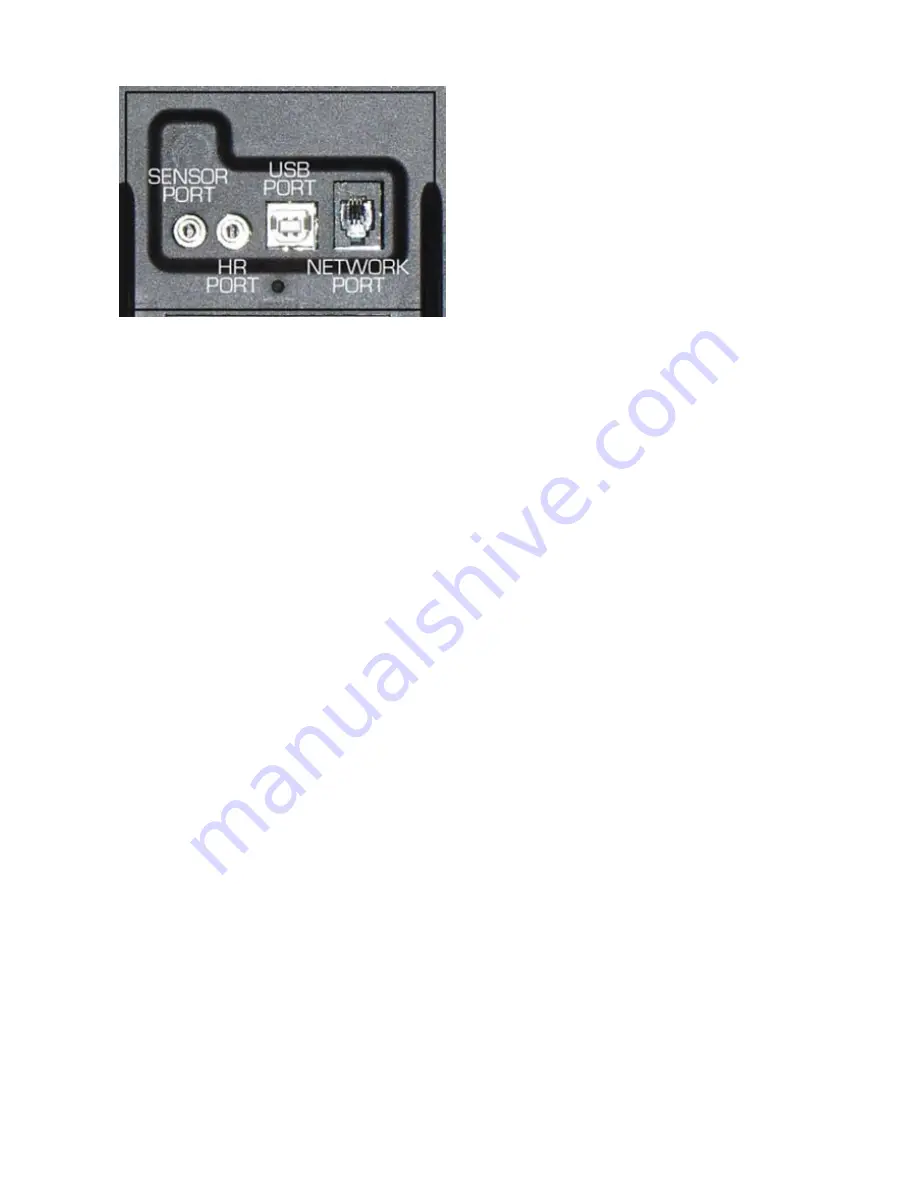
On the rear of the monitor there are four ports for specific cable connection.

The first small port is for the flywheel sensor cable (labelled Sensor Port)

The second small port is for the Polar Heart Rate receiver.(labelled HR Port)

The USB port is for connecting the monitor to a computer.

The Network port is for connecting to other Oartec monitors (not currently configured).

Batteries

The Oartec Workout Monitor uses 4 AA standard batteries and access to the battery compartment 

is by sliding open the battery cover located at the rear of the monitor beneath the Ports.

Troubleshooting

Issue: Monitor not giving any scores. Reading zeros when rowing.

1. Check the sensor is plugged in and in the correct port.

2. Check pulses procedure. If no pulses continue with steps 3 & 4.

3. Check for damage to the cable.

4. Contact your local Oartec agent for further advice or replacement cable.

Issue: Monitor not turning on

.

1. Replace batteries.

2. If the batteries have been replaced with new and in date batteries and still does not turn on contact your local 

Oartec agent for further advice or replacement monitor.

Issue: Monitor gives irregular speed and ratings.

1. Check pulses procedure. If there is a regular pulse at low speed check again at a progressively higher flywheel 

    speed. Listen for consistency of beeps as the speed of the flywheel increases.

2. If there are inconsistent beeps it means that the sensor is not detecting the 3 magnets per revolution and therefore 

    producing some irregular scores and ratings.

3. If this is the problem you identify please contact your local Oartec agent for further advice.


Check Pulses Procedure

1. Turn monitor ON.

2. Press the ARROW UP button. The small interval digits should appear in the centre bottom field of the display. 

3. Press the ARROW UP until the digit reads 01, then press READY. The top right corner field should then show a 

    number digit only.

4. Lightly pull the handle to get the flywheel moving. The flywheel contains 3 evenly spaced magnets and as each 

    magnet passes over the monitor sensor, there should be a beep. ie. 3 beeps per revolution.

5. Try moving the flywheel faster and listen for an even and consistent beep pattern.

6. If hearing an irregular pattern of beeps or missing beeps please contact your local Oartec agent for further advice.

Summary of Contents for TRAINING MONITOR

Page 1: ...tents Features Getting Started Technical Functions Software Updates Training Modes Just Row Mode Time and Distance Workouts Interval Workouts Time Repeat Intervals Distance Repeat Intervals Custom Workout Intervals Workout Memory Ports Batteries Troubleshooting ...

Page 2: ...e default display is set to show Time Stroke Rate Speed as Time 500m Distance Speed Speed can be displayed as Time 500m Watts Km Hr Miles Hr M Hr Metres Second M S Averages Average display field shows Av Time 500m Av Watts Av Km Hr Av Miles Hr Av Metres Second Stroke Count or clear field Technical Functions Technical display field shows Stroke Length Drive Ratio Av Strokes per Minute Heart Rate Dr...

Page 3: ...wer to be within range of the signal Drag The Drag feature is a numerical value given to the rate of deceleration of the flywheel With a heavy resistance setting the flywheel decelerates quicker and therefore the drag value is high A lighter resistance a lower drag value This Drag value is calculated every stroke and used in the algorithm to produce the rowing speed This Drag feature compensates f...

Page 4: ...ields Training Modes The OTM has a selection of 3 workout modes for different training sessions and methods These are Just Row mode Time or Distance mode Interval mode Software Updates From time to time Oartec will release software updates that might rectify unseen bugs in the software or add functionality to the monitor To view the current software installed on the monitor press ARROW UP button t...

Page 5: ... button To move to the next digit across use the ARROW ACROSS button Step 2 The flashing digit will be editable using the ARROW UP button To move to the next digit across use the ARROW ACROSS button Step 3 Set the desired Time using the ARROW buttons then press the READY button Step 3 Set the desired Distance using the ARROW buttons then press the READY button Start rowing and the Time will count ...

Page 6: ...e most recent workout can be recalled by turning the monitor ON and pressing the MEMORY button then using the ARROW button to scroll through the work interval During the rest period only the rest time is displayed and a beep countdown is activated in the last 5 seconds to lead into the next work period in the series Step 1 Turn the monitor ON Press INTERVAL Interval 1 will appear on the bottom cen...

Page 7: ... Rest period can be set to zero time if there is no Rest period needed between intervals Step 6 Press READY The set work distance and rest time can now be repeated so that the workout is made up of a series of the set work and rest periods Step 7 To enter the number of repeats press the TECH button Use the ARROW buttons to set the number of repeats then press READY Step 9 Press READY a final time ...

Page 8: ...No rest Interval 2 5000m row 2 min rest Interval 3 5mins warm down No rest Step 1 Turn the monitor ON Press INTERVAL Interval 1 will appear on the bottom centre display field Step 5 Press the ARROW ACROSS key to move to entering the values for Interval 2 Interval 2 will appear on the bottom centre display field Step 2 Press TIME Set the work value using the ARROW button then press READY Step 6 Pre...

Page 9: ... either TIME or DIST to activate the field If you want to change from Distance or Time mode for that interval press the relevant TIME or DIST button and edit using the ARROW buttons Press READY to confirm the new interval values When the setting or editing of the custom interval workout is complete press READY a final time to lock in the workout and prepare to row Please note that once the final R...

Page 10: ...AV display field in the top right of the screen press the AV button The OTM will store the results of the most recent workout until another workout is programmed Once the monitor has been reset the previous workout information is erased If the monitor powers down the memory can be recalled by turning the monitor ON and pressing the MEMORY button On completion of the 2000m workout the OTM will disp...

Page 11: ...n The information shown will be total time taken average speed in time 500m and the average strokes per minute Press the ARROW buttons to move from the F screen to the Intervals showing the results for each Interval segment Split Interval 1 Step 1 Turn the monitor ON Press Time or Distance Edit the workout Time or Distance or press TECH to change the Split Preset Step 2 Use the ARROW buttons to sc...

Page 12: ...ocal Oartec agent for further advice or replacement monitor Issue Monitor gives irregular speed and ratings 1 Check pulses procedure If there is a regular pulse at low speed check again at a progressively higher flywheel speed Listen for consistency of beeps as the speed of the flywheel increases 2 If there are inconsistent beeps it means that the sensor is not detecting the 3 magnets per revoluti...

Page 13: ......

Reviews: