background image

USB Playback

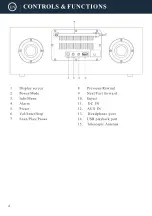
Plug in a USB stick (Ref.14) with files. Highlight and select your chosen folder/song with the 

Select dial.

There is no limit to maximum size of USB stick that can be used.

The USB format must be set to FAT32 or FAT16.

The USB playback supports WAV/MP3/WMA file types.

The maximum number of files that can be uploaded on the USB stick to play all is 5000

15

AUX In Mode

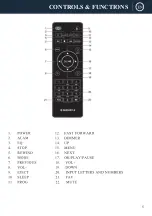
Press the ‘Mode’ button on the unit (Ref.2) or on the remote (Rem.6) repeatedly to scroll 

through to AUX-In playing mode. You can connect your phone or tablet with an AUX 

3.5mm cable that connects to the Audio-in jack on the back of the unit (Ref.12). Insert the 

AUX audio cable from the back of the DAB500 into the device that you wish to play media 

from. Now begin playing media from your device. Ensure that the volume on the device is 

switched up for the best sound quality.

Summary of Contents for DAB500

Page 1: ......

Page 2: ...CONTENTS 2 DAB Radio 10 6 13 15 20 21 22 9 FM Radio AUX IN...

Page 3: ...3...

Page 4: ...4...

Page 5: ...5 CONTROLS FUNCTIONS...

Page 6: ...this manual will refer to the radio button number e g Ref number in accordance with the diagrams on pages 4 The remote control can also be used with the relevant buttons as per the diagram on pages 5...

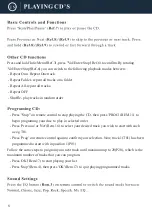
Page 7: ...utton Ref 10 to open the CD player tray Insert the disc into pressing gently to fit into its space Push gently the CD tray making sure is completely closed otherwise the CD will not be read Press Play...

Page 8: ...D then press PROG REM 11 to begin programing your disc to play in selected order Press Previous or Net Rem 16 to select your desired track you wish to start with such as e g T01 Press Prog on remote c...

Page 9: ...evice to the radio via Bluetooth The internet radio device will display as Oakcastle DAB500 Select this radio to connect and your radio should make a short sound meaning that it is connected Play your...

Page 10: ...to by pressing down the dial Ref 6 or the OK button Ref 17 when you have selected a station the screen will display the station and begin to play To choose the previous or next station go back to the...

Page 11: ...tions by multiplex and frequency Once the desired multiplex and frequency has been found select with the Navigation OK dial or the OK button on the remote Prune Invalid To remove stations that are lis...

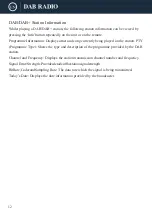
Page 12: ...ently being played on the station PTY Programme Type Shows the type and description of the programme provided by the DAB station Channel and Frequency Displays the station transmission channel number...

Page 13: ...Preset screen Alternatively if you want to save to preset number 1 99 press and hold the corresponding number on the remote control for 2 3 seconds With the Navigation OK dial Ref 6 or the remote scro...

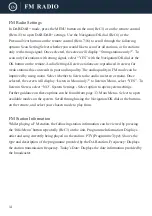
Page 14: ...Select whether to listen to the audio in stereo or mono Once selected the screen will display Listen in Mono only to listen in Mono select YES To listen in Stereo select NO System Settings Select opt...

Page 15: ...ed on the USB stick to play all is 5000 15 AUX In Mode Press the Mode button on the unit Ref 2 or on the remote Rem 6 repeatedly to scroll through to AUX In playing mode You can connect your phone or...

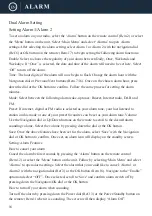
Page 16: ...as your alarm tone your last listened to station on this mode or one of your preset favourites can be set as your alarm tone Volume Use the Navigation dial or Up Down buttons on the remote to scroll t...

Page 17: ...the Sleep button on the remote Rem 10 Press the Sleep button repeatedly to switch between sleep times available There is an option between Sleep Off 15 30 45 or 60 minutes Once on the desired sleep t...

Page 18: ...for available Networks PBC Wlan setup Select to start a scan for available networks Press the WPS button on your WiFi modem to connect to the device View settings If connected to a network select to...

Page 19: ...d be advisable if your radio has any functionality issues Once asked to confirm reset select Yes with the Navigation OK dial or OK button on the remote Software Update Select for update settings Once...

Page 20: ...20...

Page 21: ...21 12 0V 2 0A DC 12 0V 2 0A...

Page 22: ...22...

Page 23: ......

Page 24: ......

Reviews: