background image

Page 5 of 14

888.901.3633 | +44 (0) 208 977 6614

www.nvtphybridge.com

Copyright © 2017 NVT Phybridge

2017/11

Most installations that use the NV-EC1701U transceiver 

involve the replacement of old analog equipment with new 

IP devices, while reusing the installed wire.

  To prevent damage, disconnect all analog equipment 

before installing the IP equipment. The NV-EC1701U uses 

the wire to deliver 55VDC.

Transceiver Configuration

NV-EC1701U  transceivers  must  be  configured  to 

communicate exclusively with other transceivers within their 

Network Group. The configuration process is described on 

page 3.

Connecting the Camera End

Install the new IP device. Mount the NV-EC1701U nearby 

or  within  328  feet  (100  meters).  Connect  an  RJ45  cable 

between the network connector (PoE) of the IP device and 

the RJ45 jack on the NV-EC1701U.

Connect the screw-terminal adaptor to the BNC jack on the 

NV- EC1701U and connect one wire conductor to a terminal 

marked “+”. Connect the other wire conductor to a terminal 

marked “-”. 

Observe polarity so that it will match that of 

the control-room end.

For most installations, the IP device’s power will be low 

enough, and the wire distance short enough, so that the IP 

device and its NV-EC1701U can receive power through the 

wire. In most cases, a power supply will not be needed at 

this end. For additional details, see pages 6 & 7.

Set the NV-EC1701 PoE toggle switch (located near the 

BNC connector) to ON if the connected IP device requires 

PoE to be delivered by the NV-EC1701 and to OFF if PoE 

should not be delivered by NV-EC1701. This setting relates 

to power delivery at the Ethernet RJ45 connection.

Connecting  the  Control-room End

Install a second NV-EC1701U at the control-room end of 

the wire.

Connect the screw-terminal adaptor to  the  BNC jack on the 

NV-EC1701U and connect one wire conductor to a terminal 

marked “+”. Connect the other wire conductor to a terminal 

marked “-”. Be sure to match the polarity of the remote-end  

NV-EC1701U.

If rack-mounting is desired, use the NV-RMEC16U-90 tray, 

which supports up to four NV-EC1701U transceivers.

Connect a class 2 (SELV) 55VDC power supply to the 

power jack on the NV-EC1701U.


This will provide power to the entire system, including the 

cameras. The Blue “Power” LEDs will illuminate on both 

transceivers.
If the LEDs do not light, check the wire polarity. If the blue 

LEDs blink, then the power supply is cycling on and off 

due  to  an  overload  condition.  Check  for  wire  faults  or 

excessive loading.

Connect an RJ45 patch-cord between the RJ45 jack on 

the NV-EC1701U and your ethernet switch.

The Green LEDs will illuminate when a network link is 

established, and will blink when data traffic is present.

MULTIPLE CAMERAS

The NV-EC1701U transceivers communicate with each 

other using a bus-architecture. This means that multiple 

remote NV-EC1701Us may be connected together to 

an  NV-EC1701U  at  the  control-room.  The  cables  are 

connected  together  using  the  screw-terminal  adaptor. 

Extra screw terminals are provided to allow easy 

connection.  Star,  daisychain,  or  any  combination  of 

topologies, including mixing of UTP and coax media may 

be used.

Unlike coax-based signal distribution, the high frequency 

signals that are transmitted can be susceptible to very 

small amounts of crosstalk from other NV-EC1701U 

network groups. For this reason, do not transmit signals 

from different network groups within adjacent wire pairs.

The NV-EC1701U transceiver supports full PoE, PoE+, 

and High Power cameras, as well as non-powered legacy 

devices.

Unlike conventional PoE, voltage-drop and load current 

must  be  confirmed  by  the  installer.  See  “High  Power 

Extended Distance Considerations” on page 6 and use 

the IP Distance Calculator at www.nvtphybridge.com.

NVT Phybridge’s Class 2 current limiting ensures safety 

of the installation during fault conditions, while delivering 

higher power (up to 90 watts) with more efficient allocation 

amongst loads. 

Up to two power supplies may be used 

within a network group.

PoE CONSIDERATIONS

INSTALLATION INSTRUCTIONS

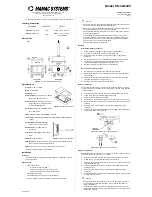
Figure 1 - Typical Installation

6 Watt IP Camera

Ethernet over Coax EoC Transceiver

Cat5 

Ethernet over Coax EoC Transceiver

55VDC Power Supply

Cat5 

Ethernet 

Switch

LAN/WAN

NV-EC1701U

NV-EC1701U

9

Complete Installation Guide

Model NV-EC1701U

EoC Ethernet over Coax Transceiver

with PoE, PoE+, or High Power PoE

Summary of Contents for NV-EC1701U

Page 1: ...ъщия тип и квалификация Juurdepääs interjööri selle üksuse tehakse ainult kvalifitseeritud tehnik Jahutuse tagamiseks seadme 2 tolline vaba ruum peab olema ümber kõik küljed üksus Selleks et vältida riski ning tulekahjuoht vaheta kaitse sama tüüpi ja hinnang Η πρόσβαση στο εσωτερικό της μονάδας πρέπει να γίνεται μόνο από εξειδικευμένο τεχνικό Για να εξασφαλιστεί η κατάλληλη ψύξη του εξοπλισμού πρέ...

Page 2: ...vaný technik Aby bolo zabezpečené dostatočné chladenie zariadenia musí byť okolo všetkých strán jednotky k dispozícii 2 palcový neobmedzený priestor Aby ste zabránili nebezpečenstvu výbuchu alebo požiaru vymeňte poistku rovnakého typu a typu Tämän laitteen sisätilojen saa suorittaa ainoastaan pätevä teknikko Laitteen riittävän jäähdytyksen varmistamiseksi on järjestettävä 2 tuuman esteettömät tila...

Page 3: ...tion Industrial temperature range Available in 1 4 device Eo2TM System Kits Limited lifetime warranty The NVT Phybridge Model NV EC1701U Eo2TM Ethernet over 2 Wire Transceiver is a compact media converter that allows 10 100 BaseT Ethernet and PoE power to be transmitted using UTP STP 18 2 or similar cable These devices are often used in legacy installations where existing wire is re used as part o...

Page 4: ...ify all system devices during and after deployment Un Joining a Transceiver If you need to move a transceiver from one Network Group to another it must first un learn its previous Network Group and be returned to an un joined state Do this by performing these steps Disconnect the transceiver from the old network Connect a 55 VDC power supply to a transceiver Wait until its green BNC LED is lit Usi...

Page 5: ...eivers Connect a class 2 SELV 55VDC power supply to the power jack on the NV EC1701U This will provide power to the entire system including the cameras The Blue Power LEDs will illuminate on both transceivers If the LEDs do not light check the wire polarity If the blue LEDs blink then the power supply is cycling on and off due to an overload condition Check for wire faults or excessive loading Con...

Page 6: ...ions When sharing the resources of a LAN the nature of the traffic must be well understood for it to operate efficiently For most end users the business use of their LAN is constantly changing critical for their day to day operations and not managed by the same group that manages their security IP video can often consume large amounts of bandwidth which may or may not be compatible with existing I...

Page 7: ...signature 55V power is provided on pins 1 2 and 5 4 while 3 6 and 7 8 are at 0 V The use of all four wire pairs ensures maximum distance even for high power loads such as P T Z cameras and 3 the coax cable where it is used by the control room NV EC1701U For fault safety never use more than two power supplies within a network Complete Installation Guide Model NV EC1701U EoC Ethernet over Coax Trans...

Page 8: ...ion The NV EC1701 has a power inlet connector that receives 55 volts from an external Class 2 SELV desk style power supply Power is distributed to 1 the transceiver s internal electronics 2 the RJ45 provided the connected camera or other device provides the appropriate 27K ohm PoE discovery signature 55V power is provided on pins 1 2 and 5 4 while 3 6 and 7 8 are at 0 V The use of all four wire pa...

Page 9: ...es instead Now read over to the right until you find your kind of wire Then look up feet or down meters to find your maximum wire distance If your wire is not among the examples simply measure its total resistance and find that value on the right side of the graph The maximum supported wattage is on the left Figure 5 Data Distance Chart Wire Distance 3 0 W 0 W 4 0 W 5 0 W 6 0 W 8 0 W 10 W 12 W 15 ...

Page 10: ... 18 2 or similar cable Impedance 25 to 100 Ohm Distance See page 9 Topology Bus architecture supports star daisy chain or any combination One control room NV EC1701U may support multiple remote NV EC1701Us Transmission Technology IEEE 1901 128 bit AES encryption Power Supply The AC DC Power supply is external and has the following characteristics Optional NVTPhybridge Power Supplies Power Consumpt...

Page 11: ...NC 1 4 BNC splitter adaptor NV RJ45A RJ45 Screw terminal adaptor NV PC4PR RJ45 Patch Cord 4 pair 3 1m Grey NV DPSC4 Detachable Power Supply Cord Splitter 1 4 2ft NV RMEC16U Rack mounting chassis 19 x 1U Holds up to 4 NV EC1701U transceivers plus 60W or 110W power supplies Includes NV DPSC4 Power Cord Splitter Transceivers and power supplies not included Product NV EC1701U Single transceiver only n...

Page 12: ...ystem NV EC1701U K2H 3 NV EC1701U Transceivers 1 NV PS55 110W Power Supply with IEC line cord 3 NV PC4PR patch cord Triple 60 Watt Eo2 Transmission System NV EC1701U KIT3 4 NV EC1701U Transceivers 1 NV PS55 60W Power Supply with IEC line cord 4 NV PC4PR patch cord Dual 110 Watt Eo2 Transmission System NV EC1701U K2H 4 NV EC1701U Transceivers 1 NV PS55 110W Power Supply with IEC line cord 4 NV PC4P...

Page 13: ... monitoring is called IGMP Snooping These switches and routers keep a state table and use it to determine to which ports to deliver each multicast stream In practice a multicast source camera sends its data not to the destination but to a fictitious Group IP Address Destination devices the NVR in response to an IGMP querier request send a request to the IGMP host asking to be included as a destina...

Page 14: ...extremely simple to use with no IP or MAC address configuration required Status LEDs indicate power and link connectivity activity for RJ45 and BNC ports NETWORK DIAGNOSTIC TOOLS NVT Phybridge has developed a Console Utility that can be downloaded from www nvtphybridge com Once installed on any Windows PC the application scours the network for NVTP devices and reports each of their MAC addresses a...

Reviews: