Tx Series Installation and Operation Instructions
│
Trinity
69
Fill
– Low Water Pressure
The Tx boiler is equipped with a water pressure sensor located in the return piping inside the boiler cabinet, see
Figure 19-1(d), item 24 for sensor location; the reading from the sensor is displayed on the Main Screen, see
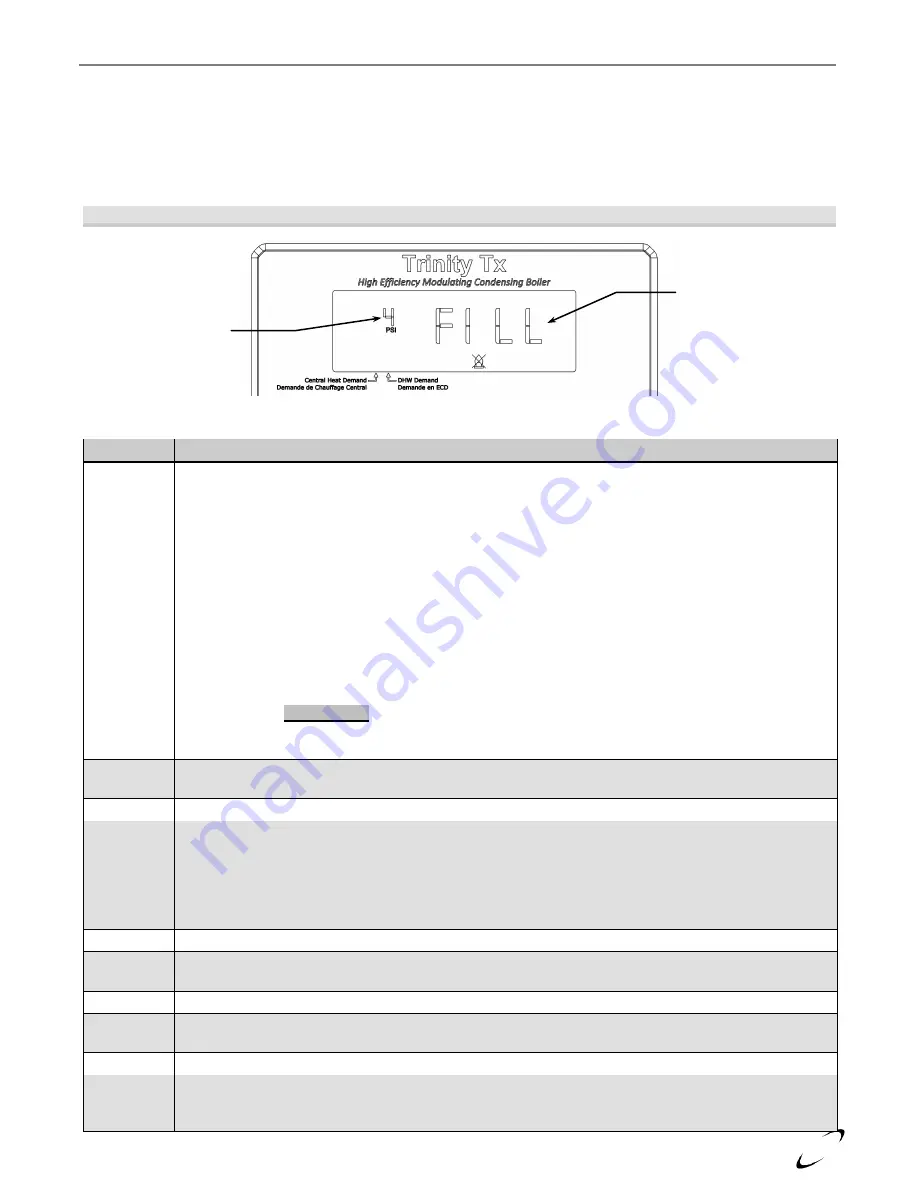
Figure 17-2. If the control senses a pressure below 7psi, burner operation is inhibited and “FILL” is displayed on
the screen, see Figure 17-7. As long as the water pressure is above 3psi the circulators will be permitted to
operate; otherwise they are only operated 5 seconds every minute.
Figure 17-7 Fill – Low Water Pressure
Table 17-3
Lockout and Error Code Descriptions
Code
Description
Loc 1
Ignition Error
– three unsuccessful ignition attempts in a row; perform the following checks:
1.
Check venting for blockages.
2.
Check condensate trap from proper draining.
3.
Static gas pressure – if insufficient check gas supply-lines and regulator.
4.
Gas pressure during ignition – if the static gas pressure is sufficient, check pressure during ignition
sequence, i.e. when gas valve opens.
a.
If pressure drops below minimum (4” for NG / 8” for LP), check gas supply-line and regulator.
b.
If pressure does not move, verify 120VAC at valve during ignition; if no power, check wiring
– replace control; if power is present – replace gas valve.
c.
If pressure drops slightly – proceed to next step
5.
Unit ignites but immediately goes out – check flame sensor (clean or replace) and flame sensor
cable, clean combustion chamber, replace control. If a combustion analyzer is available, adjust
throttle screw out 1 turn – check/adjust combustion once unit is operational.
6.
Unit fails to ignite – check spark electrode and cable (replace). Verify the spark electrode is
arcing.
WARNING!! – maintain clearance from ignition components while the power is on to
avoid risk of severe electrical shock.
7.
Unit ignites and runs – check combustion at maximum and minimum modulation rates.
Loc 2
Gas Valve Circuit Fault (Safety)
– control has sensed a fault in the gas valve electrical circuit, check for a
loose connection in the gas valve wiring harness. Also see “Loc 5”.
Loc 3-4
Controller Malfunction
– contact NTI, replace controller.
Loc 5
Limit Circuit Open (Safety)
– control has sensed a fault in the safety limit circuit; check the following:
1.
External Limit (Purple wire) – if an external limit device (i.e. LWCO) is connected to the purple
wire at the field wiring terminal, check to ensure it has not tripped, and that it is wired correctly.
2.
Internal Limit (Heat Exchanger Thermal Fuse) – the heat exchanger is equipped with a normally
closed thermal fuse; the fuse opens when the heat exchanger gets too hot. If the fuse is open,
contact NTI [see Figure 19-1(a), item 48].
Loc 6-9
Controller Malfunction
– contact NTI, replace controller.
Loc 10
Supply Sensor Fault
– controller has sensed an invalid reading at the Supply/Outlet sensor; check cable,
then replace sensor [see Figure 19-1(a), item 15].
Loc 11
Uncorrected Blocking Error
– a blocking error (Err) has lasted for 20 consecutive hours.
Loc 12
Incorrect Fan Speed
– measured fan speed is not reaching target fan speed within 60 seconds. Check
wiring to fan, replace fan.
Loc 13-26
Controller Malfunction
– contact NTI, replace controller.
Loc 27
Flame present 10 seconds after closing gas valve
– verify flame is going out immediately following the
end of a burner demand; check flame sensor (replace); check condensate drain for blockages; increase post
purge setting (Installer Menu setting 2-30).
Water Pressure
FILL
– indicates the
water pressure is too
low.


