OnTime Clock
Installation and User Guide
Firmware Version 1
All claims based on information publicly available at time of printing. All other product or service names mentioned
in this document may be trademarks of the companies with which they are associated.
© 2015 Novanex, Inc. | All rights reserved | page 13
4.9. Flush Mounting the Digital Clock
The flush mounting feature of the OnTime Clock provides an attractive, streamlined
mounting that blends with all room decors. This simple system hides the clock body,
while still giving full viewing access to the time face with no visible wiring.
The following is the recommended procedure for flush mounting.
1.
Ensure that the location that is chosen for mounting is pre-wired with a data
network feed.
2.
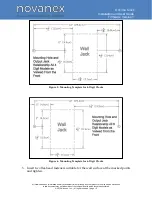
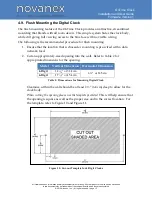
Cut an appropriately-sized opening into the wall. Refer to Table 2 for
appropriate dimensions for the opening.
Model Vertical Dimension Horizontal Dimension
4-Digit
12
3
/
8
” or
31.4 cm
6 ½”
or 16.5 cm
6-Digit
17
7
/
8
” or
45.4 cm
Table 2: Dimensions for Mounting Digital Clock
Clearance within the wall should be at least 2 ½”
(6.4 cm) deep to allow for the
clock body.
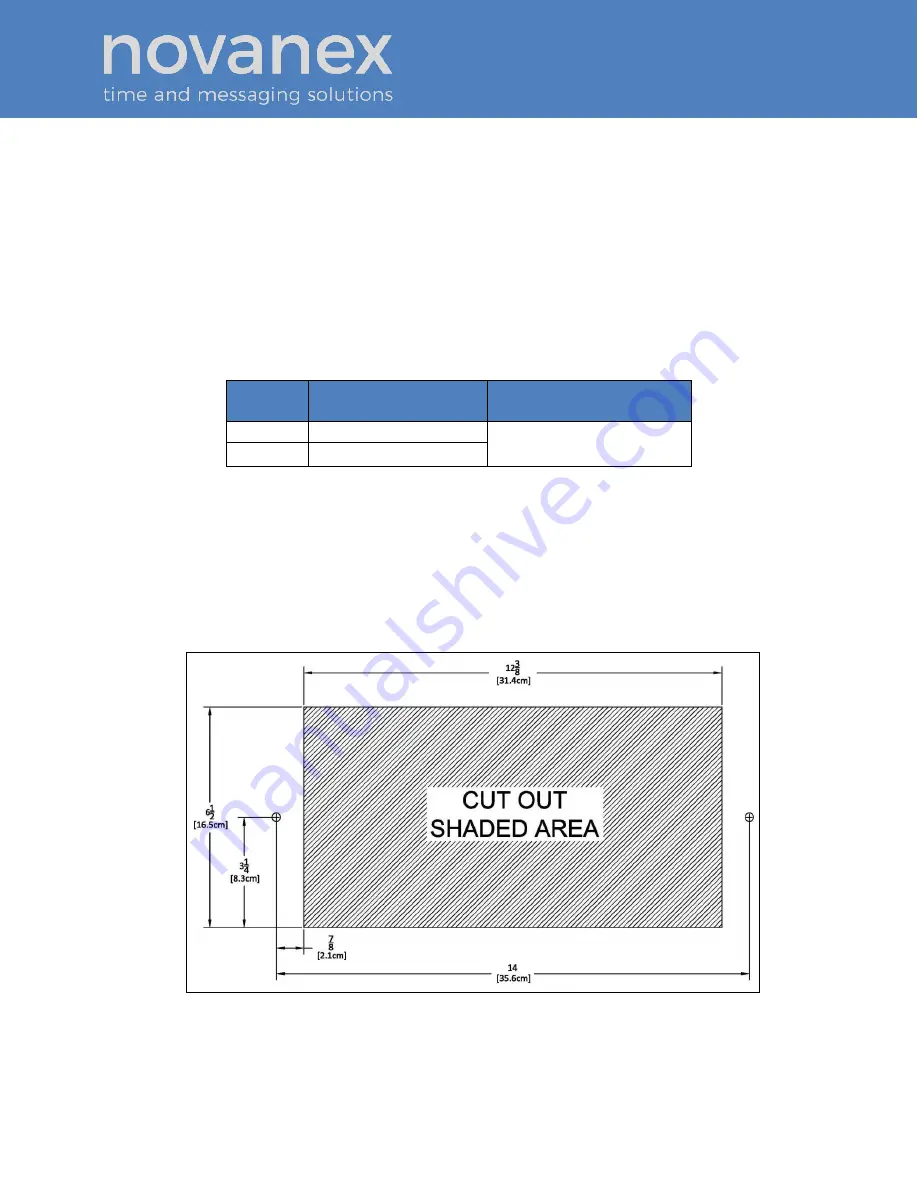
When cutting the opening please use the template provided.
This will help ensure that
the opening is square as well as the proper size and in the correct location. For
the template, refer to Figure 10 and Figure 11.
Figure 10: Cut-out Template for 4-Digit Clocks


