background image

10

Northstar NS3300 Pilot

3-1-1    AUTO key 


Press to engage 

AUTO

 mode. The autopilot is 

now steering the boat based on the selected 
steering mode. Press and hold for 2 seconds to 
engage 

H-STEER

 mode.

3-1-2 STBY 

key 

Press to disengage 

AUTO

 mode and set 

STBY

 mode. 

The autopilot is not steering the boat – the helmsman 
must steer the boat using the manual helm.

3-1-3 Dodge 

keys 


Press 

 or 

 to trigger an immediate dodge 

to port or starboard. Repeated presses of the 
same key increments dodge angle.

STBY

 mode:  Jogs the rudder left or right while 

the key is pressed

AUTO

 mode: 

Activates a dodge. Causes the vessel 

to deviate from the set course by a preset angle.

3-1-4 Turn 

key 

Press to display the turn menu. The boat follows 
a preprogrammed turn sequence. Select an item 
from the menu then press 

 or 

 to activate 

the turn in the corresponding direction.

Tip:

 Repeated pressing the 

 key will cycle 

through the menu selection.

3-1-5 MODE 

key 

Press to select steering mode.

Tip:

 Repeated pressing the 

 will cycle through 

the menu selection and will automatically select 
after 1 second.

3-1-6 Control 

Dial 

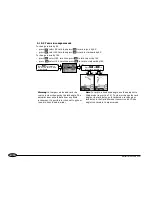
When using menus and adjusting settings, use to scroll 
through items and increment or decrement values.

STBY

 mode: Moves the rudder to port or to starboard 

half of a degree per click.

AUTO

 mode: Changes the set course by one degree per click.

Note:

 In GPS mode, the set course can not be adjusted as 

the course is controlled by the navigation instrument.

3-1-7  

ESC  key 

When using menus and adjusting settings, press to step 
back one level without saving changes.
When no menus or settings are displayed, press to jump 
back to the most recently used autopilot display screen.

3-1-8 ENT 

key 

When using menus and adjusting settings, press to 
choose selection or save setting.

Tip:

 When the showing the Basic, Pilot or Compass 

screen, pressing 


opens the Parameters menu.

3-1-9 MENU 

key 

Press to show the Options menu (where applicable).
Press twice to show the Setup menu.

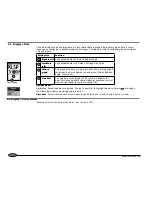
3-1-10 DISP key 

Shows the Display menu.

Tip:

 Repeated pressing the 

 key will cycle through 

the menu selection and will automatically select the 
highlighted entry after 1 second.

•  Briefly press the 

 key.

•  If there are no other autopilot display heads 

on the system, The NS3300 Pilot will turn on 
and enter 

STBY

 (Standby) mode.

Note:

 If the autopilot was switched off while 

still in 

AUTO

 mode, a warning message will be 

3-2  Turning the NS3300 Piloton

displayed to alert the user that there may have been a 
power interruption.

Note:

 When the autopilot is powered on, the Control Dial 

and Dodge keys are active and can operate the rudder at 
any time (see Power Steering modes 1-1-3)

Summary of Contents for Pilot System NS3300

Page 1: ...Northstar NS3300 Pilot System Reference Manual ...

Page 2: ...ISP key 10 3 3 Turning the NS3300 Pilot off 11 3 4 Backlight 11 3 5 Engaging autopilot 11 3 6 Disengaging autopilot 11 3 7 Setting the steering mode 11 3 8 Changing course 12 3 8 1 Changing course in compass mode 12 3 8 2 Changing course in GPS mode 12 3 9 Dodge 13 3 8 3 Changing set wind angle in wind mode 13 3 9 1 Dodging in compass mode 13 3 10 Turn modes 14 3 9 2 Dodging in GPS mode 14 3 9 3 D...

Page 3: ...GPS steering mode 33 7 2 1 GPS navigation data 33 7 2 2 Engaging and disengaging the autopilot in GPS mode 34 7 2 3 Arriving at waypoints 35 7 2 4 GPS gain 35 7 3 Wind steering mode 36 7 3 1 Wind steering data 36 7 3 2 True and apparent wind speed and direction 37 7 3 3 Engaging the autopilot in wind mode 38 7 3 4 Wind gain 39 8 Optimizing steering performance 40 8 1 Steering parameters 40 8 2 Pro...

Page 4: ...Pilot is not intended for use in extreme weather in adverse conditions or in water near other boats dangerous waters or land The NS3300 Pilot can not control the boat better than a helmsman In adverse conditions steer the boat manually Never leave the helm unattended Keep a watch at all times The helmsman should always monitor the course of the boat and the NS3300 Pilot and be ready to resume stee...

Page 5: ...s manual carefully before using the NS3300 Pilot Cleaning and maintenance Clean the parts of the NS3300 Pilot with a damp cloth or mild detergent Avoid abrasive cleaners petrol or other solvents Do not paint any part of the NS3300 Pilot except for the cables 1 1 1Operating modes The autopilot has three operating modes see sections 3 5 and 3 6 STANDBY The autopilot does not steer the boat except du...

Page 6: ...ition 1 1 4 Turn modes The NS3300 Pilot can follow a preprogrammed turn sequence The autopilot has three different turn modes see section 3 10 Tack Gybe Auto tacks OR Auto gybes the boat after a delay period The tack gybe angle and tack gybe delay can be customized 90º turn The boat turns through 90º 180º turn The boat turns through 180º Note Not all turn modes are available in all operating modes...

Page 7: ...hange from Wind mode to Compass or GPS modes when changing from sailing to motoring 1 Press then use the Control Dial to highlight the desired steering mode then press 1 Press The autopilot is now disengaged and you have complete steering control The key can be pressed at any time 2 Manually steer the boat using the boats steering helm 3 To re engage the autopilot press the key To regain control o...

Page 8: ...d or to turn the rudder to port or starboard Pressing Both will center the rudder 3 Release the button when the rudder is in the desired position Alternatively 1 Ensure the autopilot is in STBY by pressing the key 2 Turn the Control Dial until the on screen rudder indicator is in the desired position 3 The autopilot will turn the rudder until it is in the target position 2 7 Manually steering the ...

Page 9: ...u 5 DISP Opens display menu to change between pilot screens POWER Press and hold to turn instrument off Single press shows backlight control 7 Dodge Right Dodge to Starboard key repeated presses increments values Initiates tack gybe 90 turns and 180 turns 8 Dodge Left Dodge to Port key repeated presses increments values Initiates tack gybe 90 turns and 180 turns 9 STBY Places autopilot into standb...

Page 10: ...s the rudder to port or to starboard half of a degree per click AUTO mode Changes the set course by one degree per click Note In GPS mode the set course can not be adjusted as the course is controlled by the navigation instrument 3 1 7 ESC key When using menus and adjusting settings press to step back one level without saving changes When no menus or settings are displayed press to jump back to th...

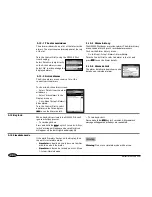
Page 11: ... When in AUTO mode Press and hold the key A warning pop up box will remind you to enter STBY mode before the unit can be turned off Press to close the pop up The NS3300 Pilot has a choice of white background Day and black background Night backlighting modes Either mode can be selected using the Control Dial The Backlight pop up may also be selected Menu Setup System Backlight menu Backlighting on ...

Page 12: ...ght changeable or gusty winds Take care when running downwind to avoid an accidental gybe Wind mode requires the wind instrument to be accurately calibrated Note To select GPS mode the autopilot must be receiving data from a compatible GPS instrument otherwise the GPS selection will not be available To engage the autopilot in GPS mode the GPS must be navigating to a waypoint or along a route other...

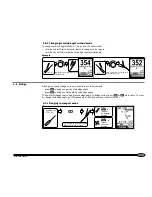
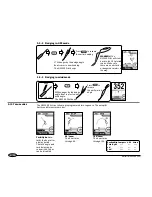
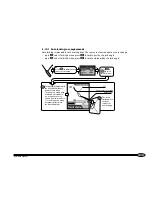
Page 13: ...ing 45 CTS 45 CTS changes by the dodge angle Boat comes to new heading Press to continue on the new heading Press to resume the earlier heading or 3 9 1 Dodging in compass mode Wind SWA 40 SWA changes to 39 Boat comes to new wind angle of 39 SWA 40 SWA changes to 41 Boat comes to new wind angle of 41 Wind 3 8 3 Changing set wind angle in wind mode To change set wind angle SWA in 1 steps turn the C...

Page 14: ... wind angle SWA changes by the dodge angle Boat comes to new wind angle The NS3300 Pilot beeps Wind SWA 40 3 9 3 Dodging in wind mode 90º turn The boat turns through 90º Tack Gybe Auto tacks the boat after a delay period The tack angle and tack delay can be customized Gybes can be disabled 180º turn The boat turns through 180º The NS3300 Pilot can follow a preprogrammed turn sequence The autopilot...

Page 15: ...ck to starboard by the tack angle Press to initiate a tack to port or starboard Press or to select turn direction The boat sails straight while the NS3300 Pilot counts down the tack delay The unit gives a long beep at 60 and 30 seconds to go a short beep every second from 10 seconds to 1 second to go and a long beep that finishes when the countdown ends CTS Course prior to tacking Delay count The ...

Page 16: ... to initiate a 90 or 180 turn to port or starboard Press or to select turn direction Warning In Compass mode auto tack the course to steer changes by the tack angle The autopilot does not use data from any wind instrument It is possible for the boat to gybe or to end in irons head to wind Note To tack to a fixed wind angle use the autopilot in Wind mode see section 7 3 To view or change the tack a...

Page 17: ...he tack or gybe but on the other side After the boat has reached the tack angle the boat turns again so that the SWA set wind angle is the same as the SWA before the tack but from the other side Wind SWA 40 Press select Tack Gybe then press initiate a tack to port The tack is finished when the boat reaches the new wind angle To cancel the tack at any time press At the end of the tack delay the cou...

Page 18: ... gybe at any time press End of tack boat is at new SWA End of tack boat is at new SWA The course changes by the gybe angle The course changes again so that the SWA is the same as the SWA before the tack The course changes so that the SWA is the same as the SWA before the tack To cancel the gybe at any time press Wind If SWA is more than 90 and the gybe angle is set to AUTO then the boat will chang...

Page 19: ... window is displayed and the alarm status icon is shown in the color corresponding to the severity of the alarm Press or to acknowledge and reset the alarm This action does not disable the alarm Alarms can be set Menu Setup Alarms menu see section 6 5 Severity Alarm tone Color Description Info Single beep Blue Information message does not affect autopilot operation Warning Moderate beeping Black A...

Page 20: ...y screen shows a list of up to 18 recorded alarm events To show the Alarm history screen Go to Menu Setup Alarms Alarm history Turn the Control Dial to select an alarm in the list and press to see the Alarm details 3 12 4 Alarm details The alarm details window shows extra detail on an individual alarm When keylock is activated the NS3300 Pilot will ignore most key presses To turn keylock on Press ...

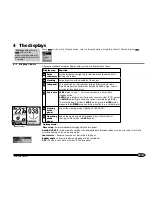
Page 21: ...S except for WIND mode digits show the current set wind angle SWA The colored ring is yellow in STBY mode green in AUTO mode magenta in H STEER mode and red when there is a critical alarm Steering mode panel Shows the steering mode COMPASS GPS WIND Operating mode panel Shows the operating mode Standby Auto H Steer Panel changes to blue when in AUTO mode Options menu Data setup Selects what data is...

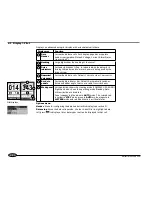
Page 22: ... Course error Bar data panels Customizable indicator bar Default Automatically switches between Rudder angle Course error and Cross track error Mode panel Left hand side shows the steering mode COMPASS GPS WIND Right hand side shows the operating mode Standby Auto H Steer inside a colored tab Panel changes to blue when in AUTO mode The colored tab is yellow in STBY mode green in AUTO mode magenta ...

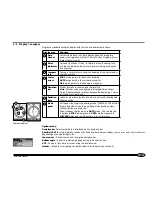
Page 23: ...p to indicate when the autopilot is driving the rudder and how much power is being used by the drive system Compass card Compass card rotates to show the heading of the vessel under the lubber mark Course arrow STBY mode points to the current heading AUTO mode points to the set course except for GPS mode points to the bearing to waypoint Deviation bar Moves laterally to show course information Not...

Page 24: ...There are two graph series that can be configured red and green Default Rudder angle Course error Time base The time base of the graph can be set from 2 minutes to 1 hour This is the amount of time it takes for new data to scroll from the right hand side to the left hand side Options menu Data setup Enters the data set up mode Use the Control Dial to highlight a data cell press to display a list o...

Page 25: ... have separate settings for the data header Header menu Data Turns the data header completely on or off 5 Data headers Data setup Enters the data set up mode The Data header expands to display all 6 possible data cells Some data cells may be blank Use the Control Dial to highlight a data cell press to display a list of data types that can be displayed in that cell Size Selects the size of the data...

Page 26: ...p when a key is pressed or Control Dial is rotated Auto power off Select to have the autopilot power off automatically every time the boat s ignition is switched off This applies only if the display unit is wired for Auto Power see installation manual About Displays information about the unit Factory Reset Resets all settings to the factory default settings A warning box asks Are you sure Select Y...

Page 27: ... Gybe angle then steers to the same set wind angle but on the opposing tack Vessel type can be selected to alter the performance characteristics of the autopilot depending on the vessel hull type Vessel type Select Planing Displacement or Sailing Warning Changing the vessel type causes the steering parameters to be reset to default values in the current profile 6 2 Setup Profiles 6 3 Setup Options...

Page 28: ...y The alarm will sound if the vessel battery voltage is below the setting Set OFF or a value in Volts Minimum 7 maximum 14 Volts High current The alarm will sound if the current drawn from the battery by the rudder drive system exceeds the setting Set OFF or a value in Amps Minimum 5 maximum 20 Amps Active alarms Displays a list of currently active alarms see section 3 12 2 Alarm history The NS330...

Page 29: ...omms NavBus group Use this when a group of Northstar instruments are connected together using NavBus to specify a group of instruments for backlighting if required Then if the backlight setting on one instrument in the group is adjusted the other instruments change automatically Otherwise select 0 6 8 Setup Calibrate Stand clear of the rudder and linkages so the autopilot can test the limits Testi...

Page 30: ...30 Northstar NS3300 Pilot Switches simulate mode on and off see section 3 14 6 9 Setup Simulate ...

Page 31: ... leave the helm unattended keep a watch at all times and be ready to resume steering the boat manually Do not try to turn the rudder by hand when the autopilot is engaged Local variations in magnetic field can affect the accuracy of the compass heading Such variations are the responsibility of the user 7 Steering modes The autopilot has three ways of steering the boat compass GPS and wind To selec...

Page 32: ...R hold AUTO The Pilot steers the boat automatically The NS3300 Pilot sets CTS course to steer to the current heading in this example 45 and starts steering on this course To disengage the Pilot press The Pilot returns to STBY mode Steer the boat manually Heading 45 CTS 45 Manually steer the boat to open waters Sail straight on the intended course 7 1 2 Engaging and disengaging the autopilot in com...

Page 33: ...ing to the destination from the boat COG Course over ground Direction in which the boat is moving over the ground CE Course error The difference between CTS and the boat heading CTS Course to steer Optimum course to steer to return to the plotted course DTG Distance to go Distance from the boat to the destination SOG Speed over ground The current boat speed over the ground This is not necessarily ...

Page 34: ...ers Start the GPS navigating to a waypoint either a waypoint on a route or a single waypoint XTE distance to GPS course GPS plotted course to a waypoint GPS plotted course When the NS3300 Pilot is engaged if the XTE is more than 0 05 nm or the boat heading is not within 30 of BRG then the NS3300 Pilot displays a warning Press to return to Compass mode or press to have the NS3300 Pilot steer the bo...

Page 35: ...int When the boat reaches the final waypoint the autopilot shows the following alarm The autopilot continues steering on the old course Select OK to change to Compass mode and continue sailing at the current heading Press to return to STBY mode Note To return to the last waypoint if the boat has passed the waypoint restart the GPS device navigating to the waypoint 7 2 4 GPS gain In GPS mode The GP...

Page 36: ...e course to steer to maintain the SWA set wind angle Course error The difference between APP wind angle and SWA set wind angle SWA Set wind angle The desired wind angle TRUE True wind angle The true wind angle at the boat P in front of the angle means the wind is from port S means that the wind is from starboard The autopilot has three ways of steering the boat compass GPS and wind To select an ap...

Page 37: ...ser to dead ahead than true wind direction Boat is at rest True wind speed is the same as apparent wind speed and true wind direction is the same as apparent wind direction True wind speed 20 kts Boat moving downwind Apparent wind speed is less than true wind speed and apparent wind direction is closer to dead ahead than true wind direction True wind speed 20 kts True wind speed 20 kts Boat speed ...

Page 38: ... Manually steer the boat to open waters Sail straight at the intended wind angle The NS3300 Pilot info data can display TRUE true wind angle or APP apparent wind angle see section 3 4 GPS plotted course The NS3300 Pilot sets CTS course to steer to the current heading in this example 40 sets SWA set wind angle to the current wind angle and starts steering at this wind angle SWA 40 Wind APP P40 For ...

Page 39: ...uch correction is applied to reduce any difference between the set wind angle and the actual wind angle A high setting will cause the autopilot to be strongly affected by changes in the wind A low setting will cause the autopilot to be very mildly affected by changes in the wind ...

Page 40: ...e course error The range is 1 trim slowly to 10 trim quickly and 0 OFF no trim effect C rudder Counter rudder gain derivative gain At the end of the turn counter rudder will steer in the opposite direction to help stop the turn at the desired heading If the boat is turning quickly towards the set course the autopilot with start to apply rudder in the opposite direction to prevent to boat steering ...

Page 41: ...cters Maximum number of alphanumeric characters is 8 Repeatedly press to finish editing Note When using more than one NS3300 Pilot profile names are not transferred between units So when naming profiles be sure to name the profile on each NS3300 Pilot How to use profiles 1 When the autopilot is installed the steering parameters in all the profiles are set to their default values 2 Select User 1 an...

Page 42: ...r rudder gain Decrease trim gain This causes wear on the steering linkage and uses power Decrease response Reduce ratio Reduce counter rudder gain Problem rudder turns too frequently Problem oscillations from side to side build up Decrease ratio Problem after a large course change boat takes too long to settle to new course Decrease counter rudder gain Problem after a large course change boat over...

Page 43: ...e correction is applied too quickly or too slowly If the boat encounters a sideways force then it will move off course sideways The Pilot will automatically bring the boat back to the correct heading by applying a few degrees of rudder called trim Trim gain sets how quickly the trim is applied Trim gain should be adjusted to trim the boat in about one minute Getting the Trim gain setting right can...

Page 44: ... of the course when the autopilot steering is optimized b Change to a profile suitable for boat speed and sea conditions see section 8 2 c If the boat drifts too far from the course adjust response ratio counter rudder gain GPS gain if autopilot is in GPS mode or wind gain if autopilot is in wind mode see section 8 1 9 Troubleshooting 4 When sailing a straight course the boat drifts off course a C...

Page 45: ...e NavBus 4 Blue NavBus 7 Yellow Factory use isolate do not cut 3 White Factory use isolate do not cut 8 Green External alarm switched to ground 30 V DC and 250 mA max 2 Brown 9V out Green connector NavBusexpansion Pin Wire color Signal 5 Red Factory use isolate do not cut 1 Black Power negative 6 Orange NavBus 4 Blue NavBus 7 Yellow Factory use isolate do not cut 3 White Factory use isolate do not...

Reviews: