set of failsafe settings. The blinking speed of the DRAM_LED increases,
indicating different test processes.
Due to memory tuning requirement, the system automatically reboots
when each timing set is tested. If the installed DIMMs still fail to boot
after the whole tuning process, the DRAM_LED lights continuously.
Replace the DIMMs with ones recommended in the Memory QVL
(Qualified Vendors Lists) at www.asus.com.
▪
If you turn off the computer and replace DIMMs during the tuning
process, the system continues memory tuning after turning on the
computer. To stop memory tuning, turn off the computer and unplug the
power cord for about 5–10 seconds.
▪
If your system fails to boot up due to BIOS overclocking, press the
MemOK! Button to boot and load the BIOS default settings. A message
will appear during POST reminding you that the BIOS has been restored
to its default settings.
▪
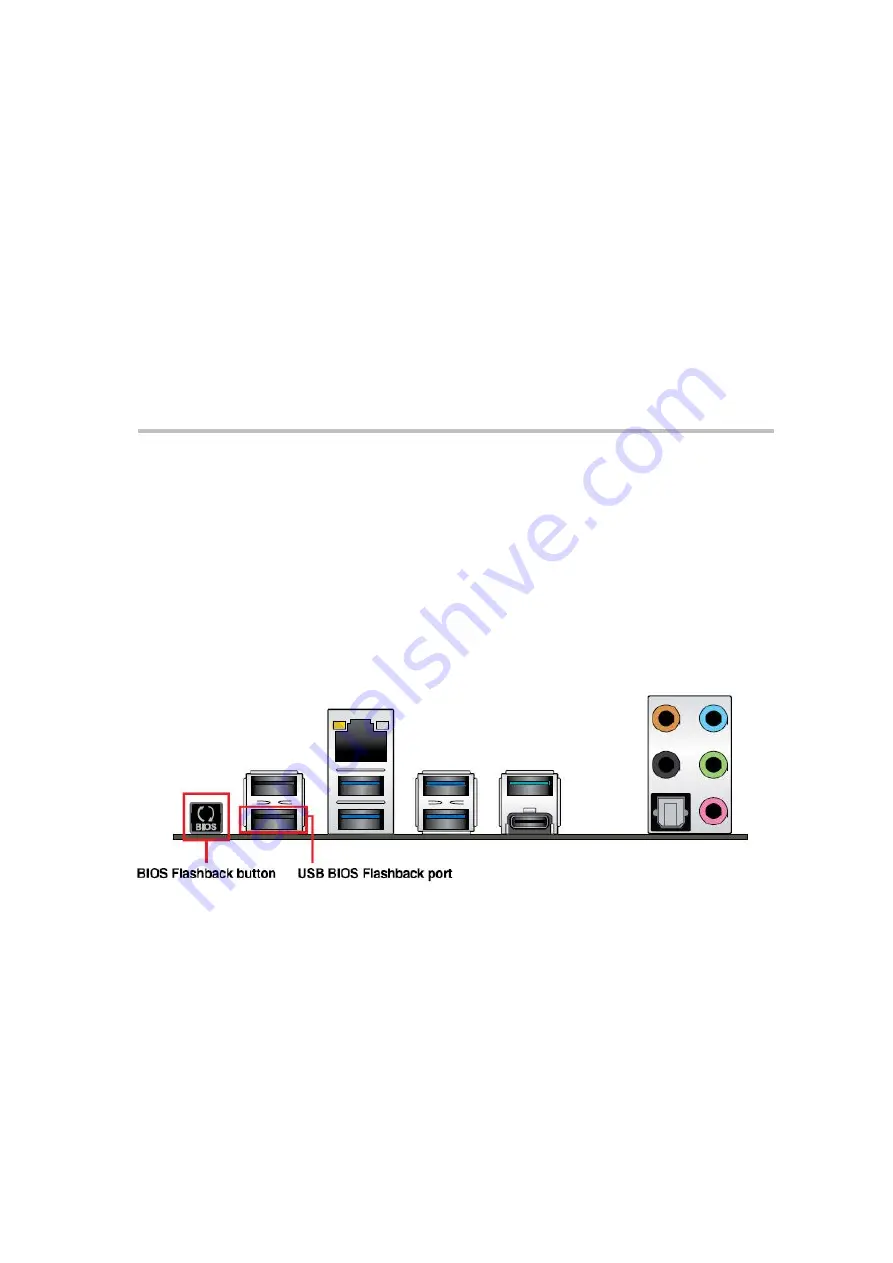
USB BIOS Flashback Button
USB BIOS Flashback allows you to easily update the BIOS without entering the BIOS or
operating system. Just connect the USB storage device containing the BIOS file into the
USB port, press USB BIOS Flashback button for three seconds, and the BIOS is updated
automatically.
To use USB BIOS Flashback:
1. Insert the USB storage device into the USB BIOS Flashback port.
• We recommend the use of a USB 2.0 storage device to save the latest BIOS version
for better compatibility and stability.
2. Rename the file as X299A.CAP, then copy it to your USB storage device.
3. Shut down your computer.
4. Press the BIOS Flashback button for three seconds until the Flashback LED blinks three
times, indicating that the BIOS Flashback function is enabled.
5. Wait until the light goes out, indicating that the BIOS updating process is completed.
Summary of Contents for Spirit X299-AS
Page 1: ...Spirit X299 AS User Guide Revision 2 0 August 2018...
Page 18: ...Specifications Summary Asus Desktop Board Prime X299 A specifications summary...
Page 19: ......
Page 20: ......
Page 21: ......
Page 22: ......
Page 23: ......
Page 26: ...Asus Motherboard Components...
Page 50: ...Q Code table...
Page 51: ......
Page 52: ......
Page 56: ......
Page 61: ...7 Twist reservoir counterclockwise 8 Screw reservoir mounting ring assembly onto motherboard...
Page 62: ...9 Attach cable connector from reservoir to fan assembly 10 Attach hoses from reservoir...
Page 65: ......
Page 76: ...Slide the optical drive out of the assembly 4...


