


on the connector. Do the same for
the third card.
Secure the card’s metal bracket to
the chassis back panel with a screw
(B) or the retention mechanism.
4.
Connect the two or three cards
together with the SLI or
CrossFire bridge (C) as shown.
5.
Connect the
cable to the
graphics cards according to the
manufacturer’s instructions.
6.
Installing PCI Express x1 Cards
While there are some graphics
cards that are PCI Express x1,
most cards that fit in this slot are
Network adapter cards or SATA,
USB, Serial or Parallel controller
cards. If you are installing a
single
x1 card,
install it in the
primary connector for optimum
performance. Follow these
instructions to install a PCI
Express x1 card:
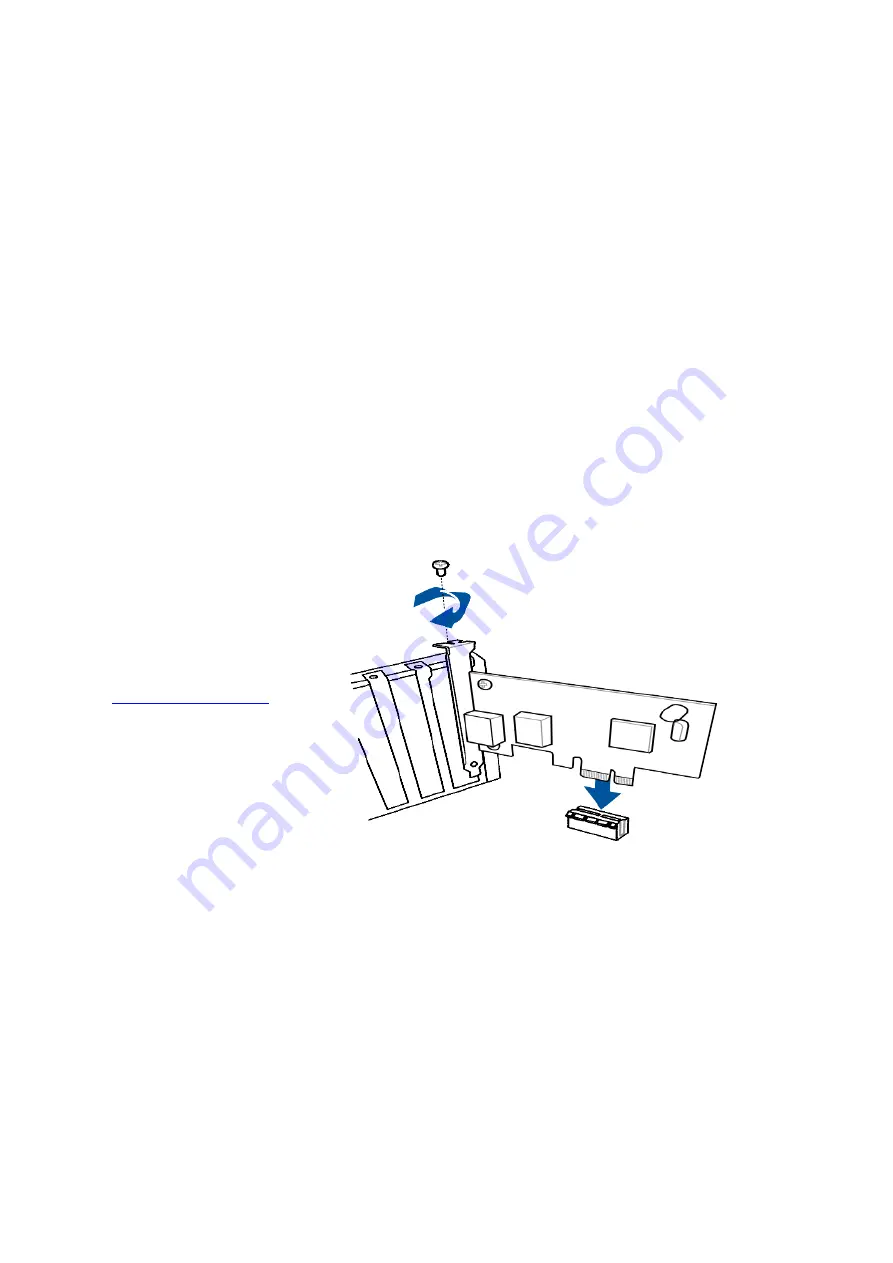
Observe the precautions in
"
" .
1.
Place the card in a
x1 conne ctor and
press down on the card
until it is completely seated
in the connector and the
card retention notch on the
card snaps into place
around the retention
mech anism pin on the
connector.
2.
Secure the card’s metal
bracket to the chassis back
panel with the retention
mechanism
3.
Summary of Contents for Spirit X299-AS
Page 1: ...Spirit X299 AS User Guide Revision 2 0 August 2018...
Page 18: ...Specifications Summary Asus Desktop Board Prime X299 A specifications summary...
Page 19: ......
Page 20: ......
Page 21: ......
Page 22: ......
Page 23: ......
Page 26: ...Asus Motherboard Components...
Page 50: ...Q Code table...
Page 51: ......
Page 52: ......
Page 56: ......
Page 61: ...7 Twist reservoir counterclockwise 8 Screw reservoir mounting ring assembly onto motherboard...
Page 62: ...9 Attach cable connector from reservoir to fan assembly 10 Attach hoses from reservoir...
Page 65: ......
Page 76: ...Slide the optical drive out of the assembly 4...


