Instruction Sheet
P/N 1029713A
Pneumatic Panel Assembly Service Kit - P/N 1028307
Use this service kit to replace the pneumatic panel assembly on any
ProBlue
adhesive melter.
WARNING: Risk of personal injury or equipment damage! Refer to
the safety information provided in the melter manual before servicing
the melter. Failure to comply with the safety information provided
can result in personal injury, including death.
Required Tools:
Phillips-head screwdriver
4-mm hex wrench
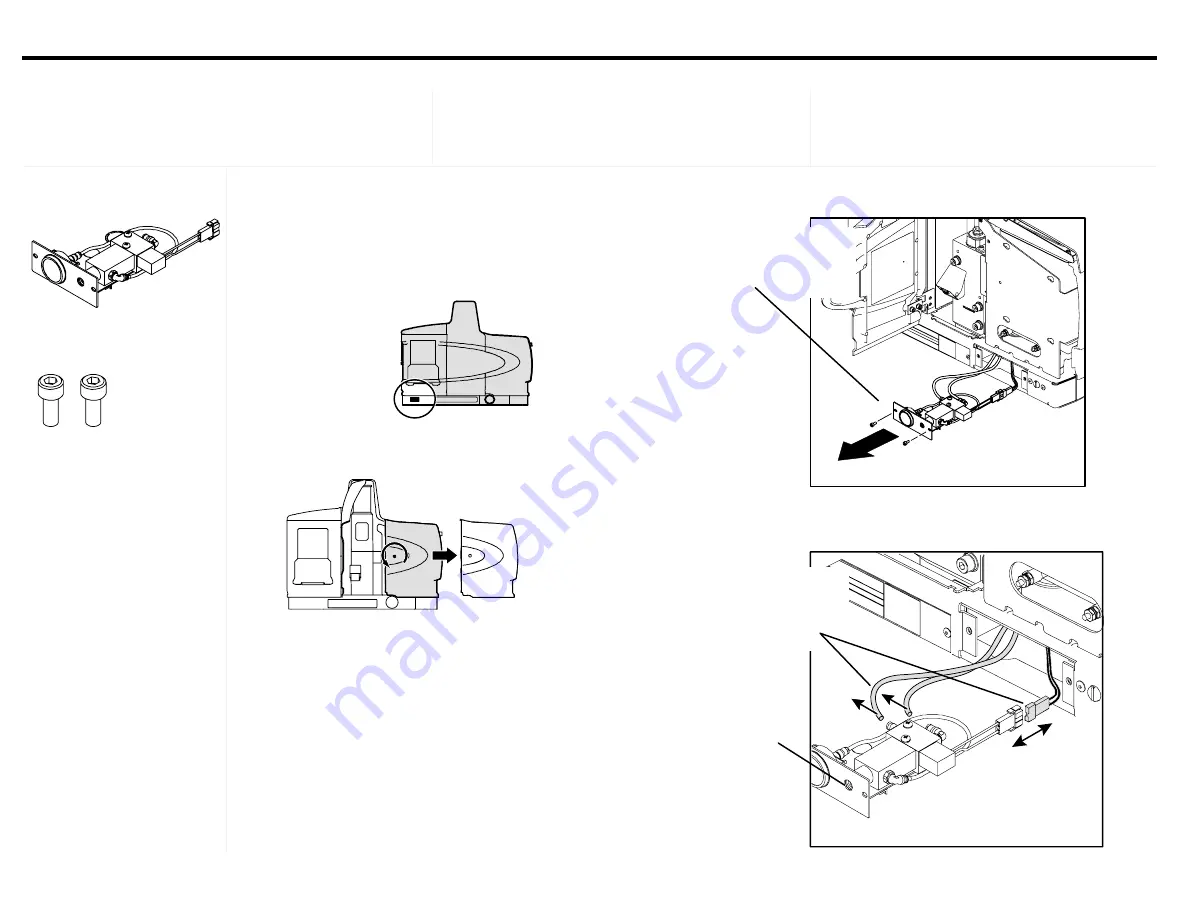
Pneumatic panel assembly
M5 screws (Spare)
1.
Disconnect the melter from the plant air supply.
3.
Remove the front panel.
2.
Switch the melter off.
4.
Remove the two M5 screws that secure the
pneumatic assembly, and then carefully remove
the assembly from the chassis.
6.
Reverse steps 1 through 4 to place
the melter back into operation.
7.
Adjust the operating air pressure.
5.
Disconnect the two 6-mm air lines and the
electrical quick-disconnect from the pneumatic
assembly, and then reconnect them to the new
assembly.


