15
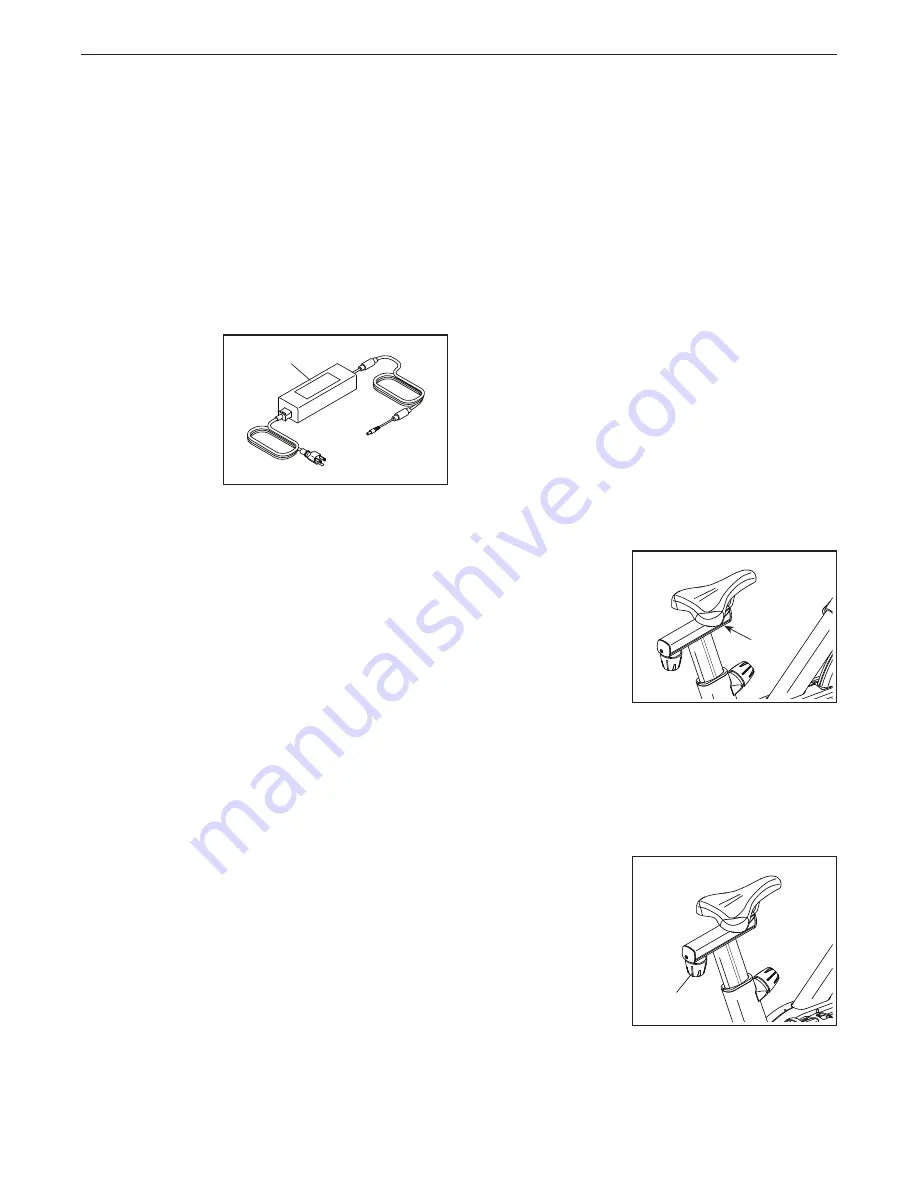
HOW TO PLUG IN THE POWER ADAPTER
IMPORTANT: If the studio cycle has been exposed
to cold temperatures, allow it to warm to room tem-
perature before you plug in the power adapter (A).
If you do not do this, you may damage the console
displays or other electronic components.
IMPORTANT: Always plug the power adapter (A)
into the studio cycle before you plug it into an
outlet.
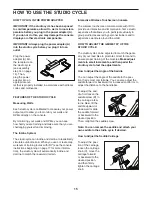
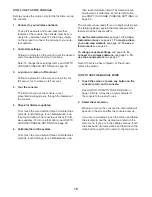
Plug the power
adapter (A) into
the receptacle on
the studio cycle
(see assembly
step 14 on page
14). Then,
plug the power
adapter into an
appropriate out-
let that is properly installed in accordance with all local
codes and ordinances.
FEATURES OF THE STUDIO CYCLE
Measuring Watts
Each studio cycle is calibrated to measure your power
output and to allow you to monitor your watts and
RPMs directly on the console.
By monitoring your watts and RPMs, you can see
how hard you are training and make sure that you are
challenging yourself and improving.
The Incline System
The studio cycle can incline and decline to realistically
simulate outdoor terrain. When you use or create map
workouts of training routes with iFit
®
(see the console
instructions beginning on page 17 for more informa-
tion), the studio cycle will automatically incline and
decline to match the real-world terrain.
Interactive Wireless Touchscreen Console
The wireless touchscreen console works with iFit to
provide an interactive and immersive in-home studio
experience that allows you to participate virtually in
group studio classes led by personal trainers and to
experience workouts around the world.
HOW TO ADJUST THE GEOMETRY OF THE
STUDIO CYCLE
The studio cycle can be adjusted to match the geom-
etry of your road bike to promote correct form and to
ensure proper training of the muscles.
Make adjust-
ments in small increments, and then pedal the
studio cycle to test the adjustments.
How to Adjust the Angle of the Saddle
You can adjust the angle of the saddle to the posi-
tion that is most comfortable. You can also adjust the
saddle forward or backward for increased comfort or to
adjust the distance to the handlebar.
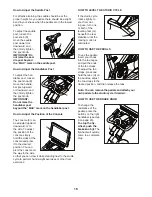
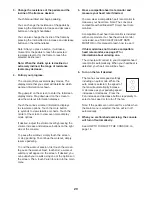
To adjust the sad-
dle,
first loosen the
saddle screw (B) in
the carriage a few
turns. Next, tilt the
saddle upward or
downward or slide
the saddle forward
or backward to the
desired position.
Then, retighten the saddle screw.
Note: You can remove the saddle and attach your
own saddle to the studio cycle if desired.
How to Adjust the Saddle Carriage
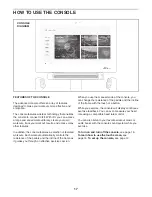
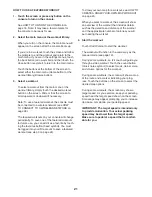
To adjust the posi-
tion of the carriage,
loosen the carriage
knob (C), move the
carriage forward
or backward to the
desired position,
and then firmly
tighten the carriage
knob.
A
B
C
HOW TO USE THE STUDIO CYCLE
Summary of Contents for Commercial S22i Studio Cycle
Page 4: ...4 STANDARD SERVICE PLANS...


