36
|
Nord Wave User Manual OS V1.00
When the Nord Wave Manager has completed an analysis
of the file, samples with root Key and Upper Key settings
are created and these settings are translated into zones.
These zones will be indicated in the Keyboard Grid at the
top of the Manager window.
The sample that is highlighted in yellow is the focused
7
sample, which means that this sample is active for further
editing and ready for playback.
Tip: Pressing the space bar on the computer key-
•
board, or clicking on the
u
symbol in the Player at
the upper right corner will start the playback of the
file.
The dot-marker on a key
8
( )
in the keyboard display indicates
that this is the Root Key of a sample. The sample is also
assigned to the corresponding range that surrounds the dot-
marked key, indicated in grey or blue.
If you right-click on a dotted key, you can disable a
sample temporarily from the Project which will be
indicated with a circle ( ). You can also de-assign the
sample – this means that it will be removed from the
Project.
Tip: Disabling a sample from a zone is a great way to
•
determine how many samples you need in order to
cover a particular range of a multi sampled instru-
ment or sound. Any settings that have been made to
a sample will be kept even if it is disabled. When you
re-enable a sample, these settings will be restored.
Tip: You can use the arrow keys on the computer
•
keyboard to quickly move the focus from one sample
to another.
Save the Project by selecting Save in the File menu or type
9
Ctrl+S on the computer keyboard.
Adding Audio files with individual samples
You may want to add audio files that only contain one
sample each. here is how you assign individual samples to
Zones:
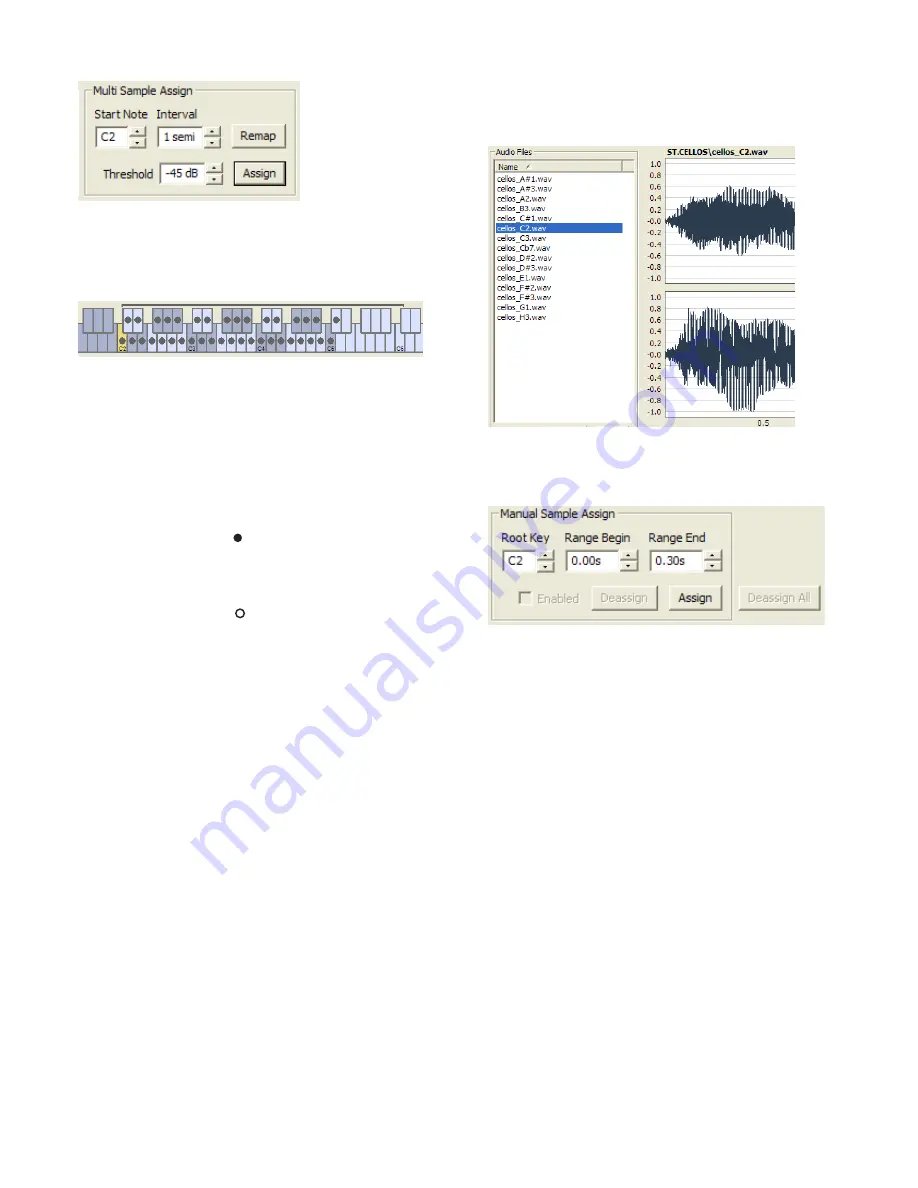
Open a new Project, select the Audio Files/Assign tab and click
1
the Add button.
Tip: The Nord Wave can use stereo or mono audio files
•
as sample sources, with up to 44.1 kHz sample rate,
16 bits resolution.
Navigate to a folder that contain the audio files you wish to
2
use, select the files and click Open to add them to the Project.
The files will be listed, one by one in the Audio Files area.
3
Select the first file that you wish to assign to a zone.
The waveform graph will show a representation of the
audio file.
Click and drag to select the entire waveform in the graph, and
4
look at the Manual Sample Assign area in the lower part of
the window.
Enter the Root Key; the key where the sample will play back
5
at its original pitch, and click Assign.
Select the next file and click and drag in the waveform graph
6
to select the entire audio snippet.
Enter the Root Key for the next sample/zone.
7
Note: The first zone that you create will span a range
F
of two octaves above the Root Key. The range of a
zone is determined by two parameters, the Root Key
and the Upper Key for each sample. The range is also
depending on any other sample that may be assigned
further down on the keyboard. A zone’s lower key
will reach all the way down to any previous sample’s
Upper Key or the F0 key if it is the “first” sample as-
signed. A sample will always reach down to the previ-
ous sample’s Upper Key.
Tip: A zone in a range cannot be empty, i.e. without
•
an assigned sample. If you want to have some keys
that are silent somewhere in a Sample Instrument,
just make a selection in the waveform graph of an
area that is silent (or Add an audio file that is short,
and contains no audio data). Then you map this silent
sample to a range of keys.
Single Sample Assign
If you have audio files on your hard drive where the file
name contains an identifier or marker of the file’s pitch, the
Single Sample Assign feature can automatically map these
samples.


