w w w . h a w k e y e e l e c t r o n i c s . c o m
N
OTICE
:
The display can also be surface mounted using
the Adjustable Surface Mount Bracket (1000-10).
Please visit our website or contact us by phone
for purchase information. You must attach the
extension rod to the mounting stud on the back of the display housing
before inserting the display into the Surface Mount Bracket.
STEP 2
Installing the Face and Bezel
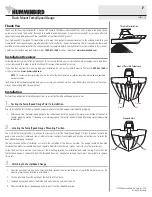
1. Place the face (B) over the display making
sure to line up the cut outs on the face with
the notches on the display.
2. While holding the bezel (A), place it over
the display and turn clockwise until the
bezel locks into place.
N
OTICE
:
Gold and Chrome Alloy Bezels can be purchased on our
website to match your factory dash or give your Digital Depth
Sounder a custom appearance (P/N: 1000.20, 1000.22).
STEP 3
Installing the Air Temperature Sensor
The air temperature sensor is already installed on the back of the display housing
and includes a short harness.
•
To install simply route the wire so that the end is located in the area where
you would like to take air temperature readings.
•
Keep in mind that the sensor is located at the end of the harness and
should be kept away from direct sunlight, enclosed compartments, and
external heat sources.
N
OTICE
:
The water temperature sensor is located in the transducer. It
will be installed and connected during the transducer
installation process.

