background image

Managing Your Network

Nokia IP30 User Guide

61

Viewing Active Connections

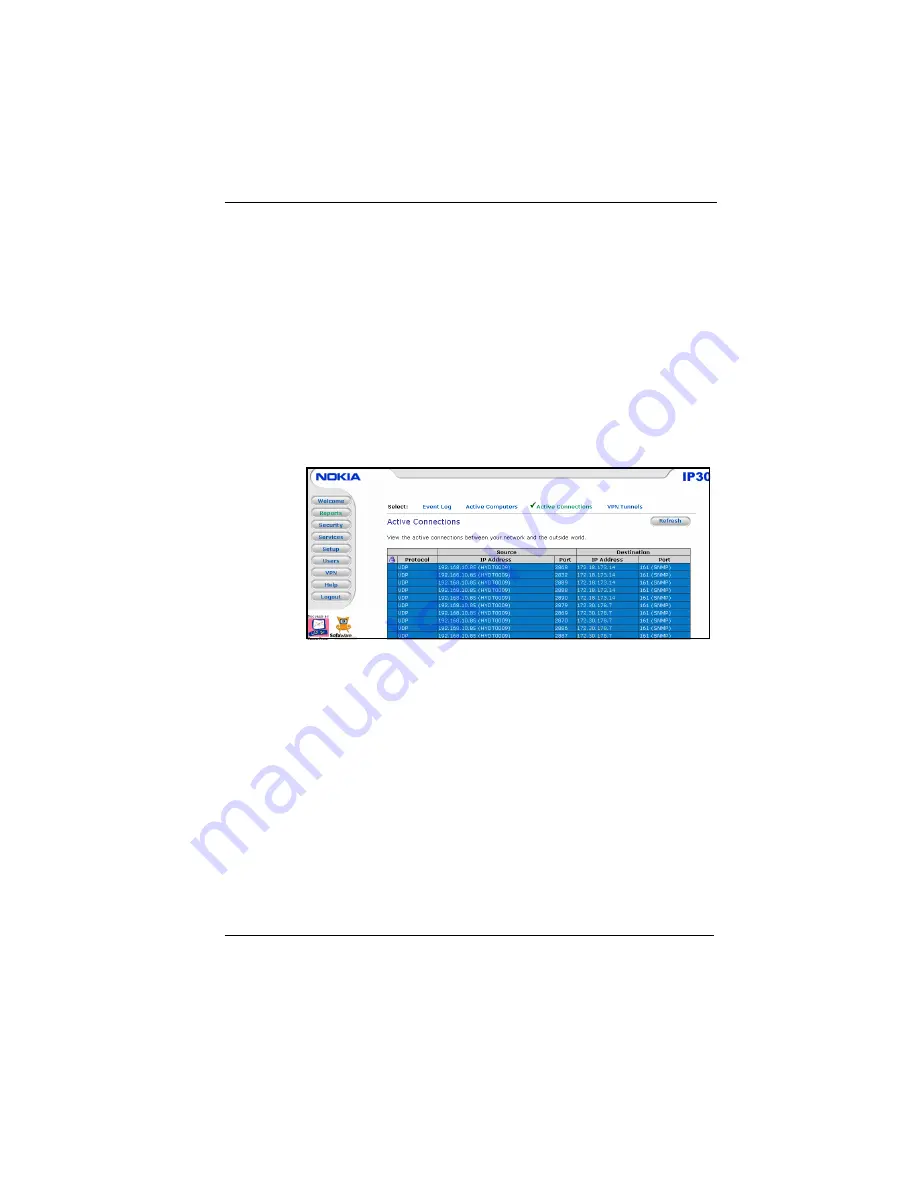
The Viewing Active Connections option allows you to view the 
currently active connections between your network and the external 
world. The active connections are displayed as a list, specifying 
source IP address, destination IP address and port, and the protocol 
used (TCP, UDP, and so on).
To view the active connections,

1.

In the Navigation Bar click Reports > Active Connections.
The Active Connections page appears.

2.

Do the following:

„

Click the Refresh button to refresh the display.

„

To view information on the destination machine, click on its IP 
address. 
The IP30 queries the Internet WHOIS server, and a window 
displays the name of the entity to whom the IP address is 
registered and their contact information. 

Viewing VPN Tunnels

You can view a list of currently established VPN tunnels. 

Summary of Contents for IP30 - Satellite Plus - Security Appliance

Page 1: ...N450829001 Rev A October 2002 NokiaIP30 User Guide ...

Page 2: ...uppliers be liable for any direct indirect incidental special exemplary or consequential damages including but not limited to procurement of substitute goods or services loss of use data or profits or business interruption however caused and on any theory of liability whether in contract strict liability or tort including negligence or otherwise arising in any way out of the use of this software e...

Page 3: ...Summit Avenue Southwood Farnborough Hampshire GU14 ONG UK Tel 00800 5543 1816 or 1 44 0 8700 555 777 email ipsecurity emea nokia com Asia Pacific Tel 358 9 692 7156 email ipsecurity apac nokia com Web Site https support nokia com Email tac support nokia com Americas Europe Voice 1 888 361 5030 or 1 613 271 6721 Voice 44 0 125 286 8900 Fax 1 613 271 8782 Fax 44 0 125 286 5666 Asia Pacific Voice 65 ...

Page 4: ......

Page 5: ...a IP30 Firewall 14 Nokia IP30 Tele 14 Nokia IP30 Satellite 14 Nokia IP30 Satellite Plus 15 Nokia IP30 Features and Compatibility 15 Connectivity 15 Security 15 Management 16 Security Services 16 VPN 16 Package Contents 17 Network Requirements 17 IP30 Rear Panel 17 IP30 Front Panel 18 2 Installing the IP30 21 Before You Install the IP30 21 Windows 98 Millennium Operating Systems 22 ...

Page 6: ...outes 41 Installing Your Product Key 42 3 Configuring the IP30 45 Logging On to the IP30 45 Accessing the IP30 securely 46 Nokia IP30 GUI 48 Logging Off 49 Managing Your Network 49 Viewing Network Activity Information 49 Quick Internet Connection and Disconnection 50 Configuring Network Settings 51 Enabling and Disabling the DHCP Server 51 Changing IP Addresses 52 Enabling and Disabling NAT 53 Acc...

Page 7: ...E mail Anti Virus Scan When Locally Managed 77 Selecting Protocols for Scanning 78 Snoozing Anti virus When Remotely Managed 78 Automatic and Manual Updates 79 Software Updates for Locally Managed IP30 80 Software Updates for Centrally Managed IP30 80 Refreshing Your Service Center Connection 81 Configuring Your Account 81 Configuring for Nokia Horizon Manager 82 Managing Users 83 Changing Your Pa...

Page 8: ...heck Point SmartCenter FP3 101 Setting Up Check Point SmartCenter FP3 101 Setting up IP30 Satellite 102 IP30 Satellite in NAT and No NAT Modes 102 No NAT Mode 103 NAT Mode 104 IP30 Satellite to Windows 2000 104 Using IP30 Tele 105 Adding VPN Sites by Using IP30 Tele 105 Adding VPN Sites by Using IP30 Satellite 110 To add or edit VPN sites by using IP30 Satellite 110 Configuring a Remote Access VPN...

Page 9: ...us 127 Resetting the IP30 to factory defaults 127 Rebooting the IP30 129 Running Diagnostics 129 A Specifications 133 Technical Specifications 133 Safety Precautions 133 B Warranty 135 C End User License Agreement 143 D Compliance Information 153 Compliance Statement 154 FCC Notice US 155 Index 157 ...

Page 10: ...10 Nokia IP30 User Guide ...

Page 11: ... Quick Start Guide and the IP30 Online Help that is part of the graphical user interface GUI in the device Document Organization This guide is organized into the following chapters Chapter 1 Introduction provides the information you need to know before you install the Nokia IP30 Chapter 2 Installing the IP30 explains how to install the device operating system requirements protocols and how to esta...

Page 12: ... conventions including notices menu items and IP address notation conventions used in this guide Cautionary Icons Warning Warnings advise the user that bodily injury might occur because of a physical hazard Note Notes provide information of special interest or recommendations Menu Items Items in Nokia IP30 menus are separated by the greater than sign with spaces before and after the sign For examp...

Page 13: ...ll unauthorized traffic The IP30 is a hardware appliance and is easy to install It allows you to share your Internet connection among several computers other network devices and enables advanced home and office networking besides providing protection for your entire network With the IP30 home users can subscribe to security services such as firewall security updates parental control and so on Busi...

Page 14: ...es virtual private networking VPN functionality in addition to the Firewall The IP30 Tele contains a VPN client that enables employees working from home to securely connect to the corporate network The IP30 Tele supports telecommuting and enables you to connect to a corporate network Up to 5 computers and users can use it Nokia IP30 Satellite The Nokia IP30 Satellite provides all the benefits of F...

Page 15: ...p to 25 computers and users Nokia IP30 Features and Compatibility The IP30 provides the following features Connectivity Four port 10 100 Mbit s Ethernet switch Internet connection sharing network address translation NAT PPPoE and PPTP support DHCP server and client MAC Cloning Security Advanced Stateful Inspection Firewall security Protection from Denial of Service DoS attacks Anti spoofing protec...

Page 16: ... Services Automatic firewall security updates Parental control Content filtering E mail anti virus protection Centralized logging and intrusion detection VPN management VPN IPSEC VPN remote access server Nokia IP30 Satellite only IPSEC VPN site to site gateway Nokia IP30 Satellite only IPSEC VPN remote access client Nokia IP30 Tele and Satellite only Support for IKE hybrid mode authentication AES ...

Page 17: ... RJ 45 10BaseT or 100BaseT network interface card installed on each computer TCP IP network protocol installed on each computer CAT5 network cable with RJ 45 connectors for each computer Internet Explorer 5 0 or later or Netscape Navigator 4 5 and later Note Nokia recommends to use either Microsoft Internet Explorer 5 5 or higher or Netscape Navigator 4 7 or higher IP30 Rear Panel All physical con...

Page 18: ...ying power to the device Connect the power adapter to this jack The device connects to the power source RESET Used to reboot reset the IP30 to its factory defaults Use a sharp object to press this button Short press reboots IP30 Long press 7 seconds resets the IP30 to its factory defaults This results in loss of all security services and passwords DO NOT RESET UNIT WITHOUT CONSULTING NOKIA SUPPORT...

Page 19: ...ing quickly Green System boot up Flashing slowly Green Establishing Internet connection On Green Normal Operation Flashing Red Hacker attack blocked On Red Error LAN 1 4 WAN LINK ACT off 100 Off Link is down LINK ACT On 100 Off 10 Mbps link established for the corresponding period LINK ACT On 100 On 100Mbps link established for the corresponding port LINK ACT Flashing Data is being transmitted or ...

Page 20: ...1 Introduction 20 Nokia IP30 User Guide ...

Page 21: ...our computer if not installed Configuring the TCP IP settings for different platforms Connecting the IP30 to the Network Configuring the IP30 for Internet Connection Before You Install the IP30 Before you connect and set up the IP30 you must check the following If TCP IP is installed on your computer If your computer s TCP IP settings to make sure it obtains its IP address automatically The follow...

Page 22: ...Network window check if TCP IP appears in the network components list and if it is already configured with the Ethernet card installed on your computer If TCP IP is already installed and configured on your computer skip this section To Install TCP IP 1 In the Network window click Add The Select Network Component Type window appears 2 Choose Protocol and click Add The Select Network Protocol window...

Page 23: ...apter The TCP IP Properties window opens 2 Click Gateway tab and remove any installed gateways 3 Click DNS Configuration tab and click Disable DNS 4 Click the IP Address tab and select Obtain an IP Address automatically Note Nokia recommends that you use DHCP to assign IP addresses instead of assigning a static IP address to your PC To assign a static IP address select Specify an IP address and en...

Page 24: ...up Connections window appears 3 Right click the Local Area Connection icon and select Properties from the drop down menu The Local Area Connection Properties window appears 4 Check for TCP IP in the Component list and if it is configured with the Ethernet card that is installed on your computer If TCP IP does not appear in the Components list install it as described in the following section To Ins...

Page 25: ...tocol TCP IP Properties window opens 2 Select Obtain an IP address automatically Note Nokia recommends that you use DHCP to assign IP addresses instead of assigning a static IP address to your PC To assign a static IP address select Specify an IP address and enter an IP address in the range of 192 168 10 129 254 Enter 255 255 255 0 as the Subnet Mask Click OK to save the new settings 3 Click Obtai...

Page 26: ...ies Installing Your Network Plan your network and the location of the IP30 then install your network To install the network 1 Connect the LAN cable Connect one end of the Ethernet cable to one of the LAN ports at the back of the unit Connect the other of the ethernet cable to the computer hubs or another network device PC Laptop Computers PC Hub Nokia IP30 Wireless Bridge Mac Cable DSL Modem Inter...

Page 27: ...ed PWR at the back of the device 4 Plug in the AC power adapter to the wall electrical outlet Warning The AC adapter is compatible with either 120 V AC or 230 V AC input power Verify that the wall outlet voltage is compatible with the voltage specified on your power supply Failure to observe this warning can result in injuries or damage to equipment Figure 4 Rear Panel Connections Configuring the ...

Page 28: ... step Advanced Setup offers advanced setup options Note You must configure the Internet connection on initial operation and after all reset to defaults operations Administrator Password 1 Enter http my firewall 2 On the IP30 Login page enter a password Re enter the password to confirm Note The password must be between five to eleven alphanumeric characters To change the Password click Setup on the...

Page 29: ...Advanced Setup For further information see Using Advanced Setup To have the Setup Wizard take you through the configuration process step by step see Using the Setup Wizard Using the Setup Wizard The Setup Wizard allows you to configure your IP30 for Internet connection quickly and easily through the use of a user friendly interface The setup wizard automatically pops up on successful login You can...

Page 30: ...nternet connection method to use for connecting to the Internet and click Next Note For Static WAN IP address choose LAN regardless of the connection type Note If you select DSL Modem do not use dial up software to connect to the Internet 3 Click Next A Connecting message appears followed by a Connected message Once connected the wizard prompts you to register your details and set up your subscrip...

Page 31: ...tings If you selected cable connection in the previous procedure the Host Name screen appears MAC Cloning Some ISPs require registration of MAC addresses of the computer behind the cable modem before an Internet connection can be established The Safe gateway takes the place of the computer behind the Cable modem and the local user can use MAC Cloning to enter the ...

Page 32: ...lick Next The Confirmation message appears 3 Click Next The system attempts to connect to the Internet At the end of the connection process the Connected message appears Once connected the wizard will prompt you to register your details and set up your subscription options which vary from product to product 4 Follow the instructions until the wizard is done and then click Finish DSL Connection Set...

Page 33: ... Using PPPoE If you selected PPPoE the PPPoE Configuration window appears In the PPPoE dialog box enter the following 1 Your Username Password and confirm the Password 2 The service name This is optional 3 Click Next The system attempts to connect to the Internet through the DSL connection At the end of the connection process the Connected message appears Once connected the wizard prompts you to r...

Page 34: ...ss of the DSL modem in the Server IP field 4 The IP address required to access the DSL modem in the Client IP field 5 The Subnet Mask of the DSL modem in the Subnet Mask field 6 Click Next The Connecting message appears while the system attempts to connect to the Internet through the DSL connection At the end of the connection process the Connected message appears Using Automatic DHCP If you enabl...

Page 35: ... will prompt you to register your details install the product key and set up your subscription options which may vary from product to product 2 Follow the instructions until the wizard is done and then click Finish Using Advanced Setup You can configure the advanced features in the IP30 using Advanced Setup To configure the Internet connection 1 Click Cancel on the Welcome page of the Setup Wizard...

Page 36: ...rom the Connection Type drop down list select the Internet connection you are using or intend to use The display changes according to the connection type you selected Perform the following procedures in accordance with the connection type you choose LAN Connection If using a LAN connection enter the following ...

Page 37: ...IP address by which your internal IP addresses will be hidden NAT c Select the Subnet mask that applies to the IP address you e entered d Enter the IP address of the default gateway of your Service Center e Enter the Primary DNS server IP address f Enter the Secondary DNS server IP address 3 To assign an IP address automatically using DHCP but not configure DNS servers automatically do the followi...

Page 38: ...r the Host name This field is optional some ISPs might require it and they will provide the host name If you are not using automatic configuration of DNS servers do the following a Clear the Obtain DNS servers automatically check box b Enter the Primary DNS server IP address c Enter the Secondary DNS server IP address 2 Click Apply ...

Page 39: ...te If your service center did not provide you with a service name leave this text box empty You can set the maximum transmission unit size MTU Nokia recommends that you leave this field empty However to modify the default MTU consult with your service center 3 If you are not using automatic configuration of DNS servers do the following a Clear the Obtain DNS servers automatically check box b Enter...

Page 40: ...e PPTP server as given by your Service Center 4 Enter the IP address of the PPTP client as given by your Service Center 5 Select the PPTP client subnet as given by your Service Center You can configure the MTU size Nokia recommends that you leave this field empty Consult your Service Center to modify the default MTU 6 If you are not using automatic configuration of DNS servers do the following a C...

Page 41: ...gh a specified router In IP30 Satellite upto 5 static routes can be configured in LAN or when using a Cable modem To configure a Static Route 1 Click Setup Static Routes The Static Routes page appears 2 Click New Route The Static Route dialog box appears 3 Enter the following information Destination Network Subnet Mask IP address of the gateway 4 Click Add Route Note Static Routes can be added onl...

Page 42: ...n you purchase the device You can purchase and upgrade to any of the other versions of the IP30 To install a product key 1 In the Navigation Bar click Setup The Internet page appears 2 Click the Firmware tab The Firmware page appears 3 In the Advanced area click Upgrade The Setup Wizard opens with the Install License dialog box displayed ...

Page 43: ...nfiguring the IP30 for Internet Connection Nokia IP30 User Guide 43 4 Select Product Key 5 In the Product Key field enter the new product key 6 Click Next The Installed New Product Key dialog box appears ...

Page 44: ...Upgrade You can upgrade the IP30 to a new firmware version of the product If you are subscribed to Software Updates firmware updates are performed automatically These updates include new product features and protection against new security threats If you are not subscribed to the Software Updates service you must update your firmware manually To update firmware manually 1 In the Navigation Bar cli...

Page 45: ...5 3 Click Firmware Update The Firmware Update page appears 4 Click Browse A browse window appears 5 Select the firmware file that you have purchased 6 Click Upload 7 The IP30 firmware is updated this may take one minute Upon updating the the IP30 restarts automatically ...

Page 46: ...2 Installing the IP30 46 Nokia IP30 User Guide ...

Page 47: ...form to configure the IP30 Logging On to the IP30 Once connected to the internet you can configure your IP30 You can configure and manage the IP30 using the GUI To access the user interface of the IP30 1 Open your Web browser enter http my firewall Click Enter The Nokia IP30 initial login page appears ...

Page 48: ...At the initial Login When you reset the device to defaults Note The password should be five to eleven alphanumeric characters After the initial login the Welcome screen appears Accessing the IP30 securely You can access the IP30 graphical user interface GUI through HTTPS either remotely or locally from your internal network Note First configure HTTPS to access the IP30 GUI from a remote location ...

Page 49: ...t yet known to the browser so a Security Alert appears Click Yes to install the security certificate of the IP30 that you are trying to access If using Internet Explorer 5 0 or later do the following a Click View Certificate The Certificate information screen appears with the General tab displayed b Click Install Certificate The Certificate Import Wizard opens c Click Next The Certificate Store ap...

Page 50: ...f the web interface If you are using IP30 Tele Satellite Satellite Plus the Navigation Bar includes the following additional main menus VPN lets you manage configure and log on to VPN sites Users allows you to manage users 2 The Main Frame displays the relevant information and controls related to the selected topic These topics differ depending on whether you use IP30 Firewall Tele or Satellite 3 ...

Page 51: ...m one of the following procedures If you are connected locally click Logout The Logout screen appears If you are connected through HTTPS close the browser Managing Your Network You can manage and configure your network connection and settings and view information on the connection in terms of status connection duration and activity Viewing Network Activity Information You can view network activity...

Page 52: ...on duration if it is active Activity details the amount of data packets sent and received in the active connection Internet provides information on the user s IP and MAC addresses as well the connection mode used Click Setup to go back to the setup page Quick Internet Connection and Disconnection Click the Connect or Disconnect button depending on the connection status to establish quick Internet ...

Page 53: ...IP30 to its factory default settings To reset the IP30 to its factory default settings choose Setup Firmware Factory Defaults Enabling and Disabling the DHCP Server The IP30 operates as a DHCP Dynamic Host Configuration Protocol server enabled by default This allows the IP30 to configure all the devices on your network automatically If you have another DHCP server configured in your network you mu...

Page 54: ...n the TCP IP settings Changing IP Addresses You can change the IP address of your IP30 With IP30 Satellite you can also change the entire range of IP addresses in your network You might want to do this if for example you are adding the IP30 to a large existing network and do not want the network IP address range to change or if you are using a DHCP server other than the IP30 that assigns addresses...

Page 55: ...ngs the settings are reset 5 Do one of the following If your computer is configured to obtain its IP address automatically using DHCP and the DHCP server in your IP30 is enabled restart your computer Your computer obtains an IP address in the new range Otherwise manually reconfigure your computer to use the new address range using the TCP IP settings Enabling and Disabling NAT Network Address Tran...

Page 56: ...ou can allow users to access IP30 from a remote location through the Internet To allow remote access you must first configure HTTPS Note If your IP30 is managed from a central location the central location must configure HTTPS access for you To configure HTTPS 1 In the Navigation Bar click Setup HTTPS The HTTPS Configuration page appears ...

Page 57: ... IP address Warning If HTTPS is enabled the IP30 settings can be changed remotely so make sure all IP30 passwords are difficult to guess 3 Click Apply The HTTPS configuration is saved You can now access IP30 from a remote location through the Internet Managing IP30 Firewall from a Remote Location You can manage an IP30 from a remote location using a Safe object configured on Check Point SmartCente...

Page 58: ... of a security update implemented by your service center Events highlighted in red indicate connection attempts that your firewall blocked Events highlighted in orange indicate attempts that your custom security rules blocked The logs detail the date and time the event occurred and its type If the event is a communication attempt that was rejected by the firewall the event details include the sour...

Page 59: ...IS server and a window displays the name of the entity to whom the IP address is registered and their contact information This information is useful in tracking down hackers Viewing Active Computers The Viewing Active Computers option allows you to view the currently active computers on your network The active computers are graphically displayed each with its name IP address and settings DHCP Stat...

Page 60: ...ese computers might not be able to access the Internet through the IP30 Note To increase the number of computers that your license allows you must upgrade your product If desired click the Refresh button to refresh the display 2 To view node limit information a Click Node Limit The Node Limit window appears with installed software product and the number of nodes used b Click Close to close the win...

Page 61: ...protocol used TCP UDP and so on To view the active connections 1 In the Navigation Bar click Reports Active Connections The Active Connections page appears 2 Do the following Click the Refresh button to refresh the display To view information on the destination machine click on its IP address The IP30 queries the Internet WHOIS server and a window displays the name of the entity to whom the IP add...

Page 62: ... tunnel is closed when not in use Note Although the VPN tunnel is automatically closed the site remains open and if you attempt to communicate with the site the tunnel is re established Remote Access VPN sites configured for site to site VPN gateways A tunnel is created whenever your computer attempts to communicate with a computer at the VPN site The tunnel is closed when not in use Remote Access...

Page 63: ... VPN site s name Username The User logged on to the VPN site Encryption Type The type of encryption used to secure the connection followed by the type of authentication used to verify the user s identity This information is presented in the following format Encryption Type Authentication Type Established Time The Time when the VPN Tunnel is established This information is presented in the followin...

Page 64: ... these services and the subscription process see Using Subscription Services Setting the Firewall Security Level You can control the firewall security level on the Firewall page This level can be adjusted to three states Low security enforces basic control on incoming connections while permitting all outgoing connections Medium security enforces strict control on all incoming connections while per...

Page 65: ...t any public Internet servers Web server mail server and so on in your network you can skip this section You can selectively allow incoming network connections into your network For example you can set up your own Web server mail server Telnet server or an FTP server Note If you configure a virtual server you can not create an additional Allow Rule To allow a service to be run on a host 1 In the N...

Page 66: ... appropriate check box in the VPN Only column is enabled 4 To allow only connections made through a VPN select the VPN Only check box 5 In the Host IP text box of the selected service or application type the IP address of the computer that will run the service one of your network computers or click the corresponding This Computer button to allow your computer to host the service 6 Click Apply A su...

Page 67: ...efined rules have priority over the default rules By default in the Medium security level the IP30 blocks all connection attempts from the Internet WAN to the LAN and allows all outgoing connection attempts from the LAN to the Internet WAN Allow and Block Rules The Allow and Block rules provide you with greater flexibility in defining and customizing your security policy You can allow additional i...

Page 68: ...ppears 2 Click Allow tab to create a new Allow rule or click the Block tab to create a new Block rule Depending on the tab you select the Allow Rules or the Block Rules page appears Note In IP30 Firewall or Tele the Allow Rules page does not contain a VPN Only column and the Block Rules page does not contain an Also VPN column ...

Page 69: ...If you are creating a Block rule type the Internet IP address whose defined ports should not be accessible from a specific computer inside your network Note When in No NAT mode you can leave the Internet IP field empty The rule then applies to the entire Internet When you create Allow rules in NAT mode you need to provide an IP address This way the IP30 knows to which computer to forward incoming ...

Page 70: ...net but to the VPN as well 9 Click Add The new rule is added to the list of rules To delete an existing rule 1 In the Navigation Bar click Security The Firewall page appears 2 Click the Allow tab to delete an Allow rule or click the Block tab to delete a Block rule The Allow and Block Rules page appears 3 Click the Delete icon of the rule you wish to delete A confirmation message appears 4 Click O...

Page 71: ...ress page appears 2 In the DMZ IP Address text box type the IP address of the computer you wish to define as DMZ Alternatively you can click This Computer to define your computer as DMZ 3 Click Apply The selected computer is now defined as DMZ Using Subscription Services Subscription services offer valuable features such as automatic software and security policy updates content filtering Anti viru...

Page 72: ...tion services option allows you to configure and start your services subscription To start your subscription 1 In the Navigation Bar click Services The Account page appears 2 In the Service Account area click Connect The Setup Wizard opens with the first Subscription Services dialog box displayed ...

Page 73: ...nect to a Service Center check box is selected 4 Enter the desired service center IP address or the domain name in the Service Center text box as given to you by your service provider 5 Click Next The Connecting screen appears The second Subscription Services dialog box appears ...

Page 74: ...ields provided by your service provider 7 Click Next The Connecting screen appears The third Subscription Services dialog box appears with a list of services to which you are subscribed 8 Click Next The final Subscription Services dialog box appears with a success message 9 Click Finish The following things happen ...

Page 75: ...s area lists the services available in your service plan The following information is displayed for each service Canceling Subscription Services You can cancel your subscription to the services provided by your service center Name Name of the service Subscription status of your subscription to the service Subscribed or Not Subscribed Status Status of the service Connected You are connected to the ...

Page 76: ...ck Finish The following things happen You are disconnected from the service center The services to which you were subscribed are no longer available on your IP30 Web Filtering When enabled access to Web content is restricted according to the categories specified under Allow Categories Enabling Web Filtering When Locally Managed You can enable and disable Web filtering when your IP30 is locally man...

Page 77: ... blocked categories are marked and will require the administrator password for viewing Note If the configured plan is remotely managed but with services locally managed then you can modify the services using the IP30 GUI To allow and block a category 1 In the Allow Categories area select the desired category 2 Click Apply Snoozing Web Filtering When Remotely Managed If the IP30 is remotely managed...

Page 78: ...ettings If the service is enabled the On Off is set to On 2 Click Snooze Web Filtering is snoozed for all internal network computers The Snooze button changes to Resume The Web Filtering Off popup window opens Note Closing the Web Filtering Off popup window does not cause the Web Filtering service to resume 3 To re enable the service click Resume either in the popup window or on the Web Filtering ...

Page 79: ... all known viruses and vandals Enabling E mail Anti Virus Scan When Locally Managed You can enable the Anti virus scanning for outgoing SMTP and incoming POP3 email traffic To enable or disable email anti virus scan when locally managed 1 In the Navigation Bar click Services Anti Virus The Anti Virus page appears 2 Drag the On Off slider upwards or downwards Anti virus scanning is enabled or disab...

Page 80: ... If your IP30 is remotely managed contact your service center to change these settings To enable virus scanning for a protocol 1 Select the desired protocol 2 Click Apply Snoozing Anti virus When Remotely Managed If the IP30 is remotely managed your service center can remotely control this service If you are having problems sending or receiving email you can snooze the Anti virus service temporari...

Page 81: ...n changes to Resume The Anti virus Off popup window opens Note Closing the E mail Anti Virus Off popup window does not cause the Anti Virus service to resume 3 To re enable the service click Resume either in the popup window or on the Anti virus page The service is re enabled for all internal network computers The Resume button changes to Snooze If the Anti virus Off popup window was open it close...

Page 82: ...ote When the Software Update service is set to Automatic you can still manually check for updates See step 5 3 To set the IP30 so that software updates must be checked for manually drag the Automatic Manual lever downwards The IP30 does not check for software updates automatically 4 To manually check for software updates click Update Now The system checks for new updates and installs them Software...

Page 83: ...rvices settings To refresh your Service Center connection 1 In the Navigation Bar click Services Refresh IP30 reconnects to the Service Center Your service settings are refreshed Configuring Your Account The configure option allows you to access your service center which offers additional configuration options for your account To configure your account 1 In the Navigation Bar click Services Config...

Page 84: ... 1 In the Navigation Bar Click Services Configure Select Nokia Horizon Manager The Nokia Horizon Manager wizard window opens 2 Enter the following information IP Address of NHM Port Number Port Number 6654 is the default port Retry Timeout The default timeout is 2 minutes Host Name Select Allow HTTPS from NHM 3 Click Connect Managing Users Nokia IP30 Firewall and Tele have a single user called adm...

Page 85: ...ng Users Setting Up Remote VPN Access for Users Changing Your Password You can change your password at any time How this task is performed depends on the IP30 that you are using Firewall Tele or Satellite To change password using IP30 Firewall and Tele 1 In the Navigation Bar click Password The Password page appears ...

Page 86: ...ing IP30 Satellite 1 In the Navigation Bar click Users The Users page appears 2 In the username row click Edit The Edit User page appears 3 Edit the Password and Confirm password fields Note Use 5 to 25 alphanumeric characters for the new password 4 Click Apply Your changes are saved Adding Users You can perform this task only with IP30 Satellite The number of IP30 users you can add is limited acc...

Page 87: ...Click Apply The new user is saved The Edit User page appears Viewing and Editing Users You can perform this task only with IP30 Satellite To view or edit users 1 In the Navigation Bar click Users The Users page appears 2 In the desired user s row click Edit The Edit User page appears with the user s details The options that appear on the page depend on the software and services you are using 3 To ...

Page 88: ...25 alphanumeric characters for the new password Re enter the user s password Administrator Allows the user to log on to my firewall This option cannot be disabled for the admin user VPN Remote Access Allows the user to connect to this IP30 using their VPN client For further information on setting up VPN remote access see Setting Up Remote VPN Access for Users This option is available in IP30 Satel...

Page 89: ...ess for Users You can setup VPN access for users only with IP30 Satellite If you are using IP30 as a VPN server you can allow users to access it remotely through their VPN clients a Check Point SecureClient Check Point SecuRemote IP30 Tele or another IP30 Satellite To set up remote VPN access for a user 1 Enable your VPN server using the procedure in Setting Up Your IP30 as a VPN Server 2 Add the ...

Page 90: ...3 Configuring the IP30 90 Nokia IP30 User Guide ...

Page 91: ...PN gateway can be connected to another VPN gateway and enable the two connected networks to function as a single network A connection between two VPN sites is called a VPN tunnel VPN tunnels encrypt and authenticate all traffic through them Through these tunnels you can safely use your company s network resources when you work at home For example you can securely read email use your company intran...

Page 92: ...ow to install a license see Installing Your Software License Both Tele and Satellite enable a number of solutions to support your VPN connectivity needs that are explained in the subsequent sections Figure 5 VPN Topologies SecuRemote Check Point v4 1 NG FP1 FP2 Safe gateway RAS community FP3 DAIP Check Point v4 1 NG FP1 FP2 Safe gateway Star VPN community Windows 2000 server and host VPN Clients I...

Page 93: ...ble 5 VPN Topologies VPN Client Gateway SecuRemote VPN Client Satellite Tele Satellite Tele Check Point v4 1 NG FP1 FP2 FP3 Tele Check Point FP3 RAS Community Satellite Gateway Satellite Gateway Satellite Gateway VPN 1 Check Point v4 1 NG FP1 FP2 FP3 Satellite Check Point FP3 DAIP object Satellite Check Point FP3 Star Community Satellite Windows 2000 ...

Page 94: ...nnect to an IP30 Satellite VPN server Note In this configuration the IP30 Satellite VPN server must have a static IP address domain name Below is a sample implementation of the VPN client to IP30 Satellite VPN server solution in which two IP30 devices a Check Point SecuRemote and a Check Point SecureClient act as VPN clients that download topology information from the IP30 Satellite VPN server ...

Page 95: ...lite To set up IP30 Satellite 1 Add a User refer Managing Users to Add a User 2 Enable Remote Access for the User 3 Enable VPN server Ext 66 93 53 4 22 Int 192 168 10 1 22 nt Satellite Automatic mode VPN 192 168 1 0 22 192 168 10 1 22 192 168 11 0 22 IP30 Tele IP30 Satellite Ext 66 93 53 3 22 Int 192 168 11 1 22 IP30 HUB Ext 66 93 53 2 22 Int 192 168 1 1 22 ...

Page 96: ...only a manual mode VPN connection To select the VPN gateway to which you want to establish a VPN connection go to http my vpn Figure 7 IP30 Tele as VPN Client If the VPN client is enabled the IP30 GUI Navigation Bar includes a VPN menu option In addition the Reports pages includes an additional VPN Tunnels submenu that allows you to view the active VPN tunnels Note You can use IP30 Tele only in NA...

Page 97: ...a VPN client to establish a VPN connectivity with a Check Point server using version 4 1 NG FP1 FP2 or FP3 Setting up IP30 Tele Configure a VPN Tunnel between an IP30 Tele and an IP30 Satellite On IP30 Tele VPN client add a VPN site Setting up Check Point Server Open the Check Point policy editor and select Firewall 1 VPN 1 workstation object that will receive the Safe VPN session request IP30 Tel...

Page 98: ...IP30 Tele and Check Point FP3 on IP30 Tele VPN client add a VPN site Setting up Check Point FP3 Configure a Safe gateway dynamic object on the Check Point SmartBoard To set up Check Point FP3 1 Create a Safe gateway as a dynamic object 2 Create a user and add the user to the VPN users group 3 Create a remote access VPN community Include FP3 firewall object in the participating gateway Include the ...

Page 99: ...gateways must have a static IP address The Figure below shows a sample implementation of the Satellite to Satellite solution with three Satellite devices Each IP30 device acts as a Site to Site VPN gateway for a fully secure network The networks communicate through VPN connections Figure 8 Satellite to Satellite 192 168 12 0 22 192 168 20 0 22 192 168 10 1 22 Satellite Ext 66 93 53 4 22 Int 192 16...

Page 100: ... Shared Secret a password that is known to both the IP30 Satellite devices Satellite to VPN 1 Site to Site VPN The IP30 Satellite to VPN 1 or Check Point v4 1 NG FP1 FP2 or FP3 configuration enables you to establish site to site VPN connections between an IP30 Satellite site to site VPN gateway and a VPN 1 site to site VPN gateway Note In this solution model both the VPN 1 and IP30 Satellite Site ...

Page 101: ...tellite on the VPN 1 server 2 Enter the Shared Secret a password that is known to both the IP30 Satellite and the VPN 1 Server Note For information on setting up VPN 1 refer to the Check Point Virtual Private Networks 192 168 10 0 22 Satellite Ext 66 93 53 4 22 Int 192 168 10 1 22 192 168 1 0 22 VPN 1 Hub Ext 66 93 53 2 22 Int 192 168 1 1 22 Check Point Firewall 1 NG 192 168 11 0 22 Satellite Ext ...

Page 102: ... Point FP3 1 Define a DAIP object Enable IKE 2 Use VPN export tool to create a p12 certificate from the internal certificate defined for the DAIP object 3 Configure a rule set with the following Source internal network of the IP30 DAIP object Destination internal network of FP3 Select Encrypt Push the policy on to the FP3 firewall object 4 Import the certificate to the computer to which the IP30 S...

Page 103: ...en creating a VPN connection between IP30 Satellite and Check Point FP3 select Use Certificate instead of Use Shared Secret IP30 Satellite to Check Point SmartCenter FP3 The IP30 Satellite can be used as a VPN server to establish a VPN connectivity with SmartCenter FP3 server using Safe gateway with a static IP address VPN Star Community Setting Up Check Point SmartCenter FP3 Configure the Check P...

Page 104: ...cret a password that is known to both the IP30 Satellite and the VPN 1 Server IP30 Satellite in NAT and No NAT Modes VPN configuration allows you to choose how your VPN should function Use of NAT and No NAT modes offers great flexibility No NAT is the default mode of operation in which the protected networks at each site are known and predefined NAT mode allows you to define VPNs at peer gateway s...

Page 105: ...tion of traffic within a VPN is required between hosts with routable IP addresses Note You can only use No NAT mode with IP30 Satellite The Figure below shows a site to site VPN in No NAT mode Both VPN peers are considered site to site VPN gateways and traffic is directly established from the source host to the destination host In this example hosts on either network can initiate traffic to hosts ...

Page 106: ...ty page to port forward the inbound traffic to the defined host Solution B Satellite to Satellite Site to Site VPN IP30 Satellite supports the creation of site to site VPN connections between two or more IP30 Satellite devices Hosts on either network can directly initiate traffic to hosts on the peer network The IP30 Satellite is configured through the IP30 GUI Security page to port forward the in...

Page 107: ...ient functionality in your IP30 If you have subscribed to Security services then connect with your service provider or enterprise and receive a security subscription If you are using the IP30 in a standalone mode add the license manually Adding VPN Sites by Using IP30 Tele With IP30 Tele you can define only remote access VPN sites To define site to site VPN gateways you must have IP30 Satellite VP...

Page 108: ...e click Edit in the desired VPN site s row The Nokia VPN Site Wizard opens as shown in the Figure below 3 Click Next The VPN Gateway Address dialog box appears 4 Enter the IP address of the VPN gateway to which you want to connect as given by the network administrator 5 Click Next The VPN Network Configuration dialog box appears ...

Page 109: ...de the network configuration manually Note Downloading the network configuration is only possible if you are connecting to a Check Point VPN 1 or Nokia IP30 Satellite VPN Gateway Specify Configuration 7 If you chose Specify Configuration in the preceding procedure a dialog box appears 8 Enter the destination network address and subnet mask of the site to which you want to connect Note Obtain the d...

Page 110: ...enticate using the specified Username and Password each time a VPN tunnel is created If you choose Automatic Login enter the Username and Password 11 Click Next The Contacting VPN Site screen appears Note Automatic Login must be enabled by the management center You can subscribe to this feature 12 Click Next The Site Name dialog box appears 13 Enter a name for the VPN site 14 Click Next The VPN Si...

Page 111: ...Login page appears 2 Follow steps 9 to 13 in Specify Configuration The VPN Sites page updates with the added VPN sites If you edited a VPN site the modifications are reflected in the VPN Sites list Adding VPN Sites by Using IP30 Satellite You can define each VPN site according to the function you want IP30 Satellite to perform when connecting to the site VPN Client Define the VPN site as a Remote ...

Page 112: ...menu click VPN Sites The VPN Sites page appears with a list of VPN sites 3 Do either of the following To add a VPN site click New Site To edit a VPN site click Edit in the desired VPN site s row The IP30 VPN Site Wizard opens with the Welcome to the VPN Site Wizard dialog box displayed 4 Do one of the following Select Remote Access VPN to establish remote access from your VPN client to a VPN serve...

Page 113: ...configures your VPN settings by downloading the network topology definition from the VPN server Note Downloading the network configuration is only possible if you are connecting to a Check Point VPN 1 or IP30 Satellite VPN gateway To provide the network configuration manually select Specify Configuration 2 Click Next The following things happen in the order below If you chose Specify Configuration...

Page 114: ...ect Manual Login To enable the IP30 to log on to the VPN site automatically do the following a Select Automatic Login b Enter a user name and password to be used for logging on to the VPN site Note While Automatic Login provides all of the computers on your home network with constant access to the VPN site Manual Login connects only the computer you are currently logged onto to the VPN site and on...

Page 115: ...If you selected site to site VPN the VPN Network Configuration dialog box appears To configure a site to site VPN gateway 1 In the Destination network column enter up to three destination network addresses at the VPN site to which you want to connect 2 In the Subnet mask column select the subnet masks for the destination network addresses Note Obtain the destination networks and subnet masks from ...

Page 116: ...dy to complete your VPN site Continue at Completing Site Creation Completing Site Creation Once you configure a VPN site the Site Name dialog box appears To complete VPN site creation 1 Enter a name for the VPN site You may choose any name 2 Click Next The VPN Site Created screen appears 3 Click Finish The VPN Sites page reappears If you added a VPN site the new site appears in the VPN Sites list ...

Page 117: ...n Bar click VPN The VPN Server page appears 2 Drag the On Off lever to On The VPN server is enabled 3 Follow the procedures in Setting Up Remote VPN Access for Users Deleting a VPN Site You can delete a VPN site by using both IP30 Tele and IP30 Satellite To delete a VPN site 1 In the navigation bar click VPN The VPN Server page appears 2 Click VPN Sites The VPN Sites page appears with a list of VP...

Page 118: ...e my vpn page When you log on a VPN tunnel is established Only the computer from which you logged on can use the tunnel To share the tunnel with other computers in your home network you must log on to the VPN site from those computers using the same username and password Note You can use a single username and password for each VPN destination gateway Logging On Using IP30 GUI To log on to a VPN si...

Page 119: ...ng the VPN site you specified a network configuration the IP30 attempts to create a tunnel to the VPN site The VPN Login Status box appears The Connecting screen appears Once the IP30 has finished connecting the Status field changes to Connected The VPN Login Status box remains open until you log off of the VPN site Once the IP30 has finished connecting the status changes to connected The VPN Logi...

Page 120: ...me and password in the appropriate fields 4 Click Connect If the IP30 is configured to automatically download the network configuration the IP30 downloads the network configuration If when adding the VPN site you specified a network configuration the IP30 attempts to create a tunnel to the VPN site The VPN Login Status box appears The Status field tracks the progress of the connection Once the IP3...

Page 121: ... All open tunnels from the IP30 to the VPN site are closed and the VPN Login Status box closes Note Closing the browser or dismissing the VPN Login Status box also terminates the VPN session within a short time Using VPN Certificates The VPN Certificates are used to authenticate a VPN connection established between Check Point SmartCenter FP3 and the dynamically configured IP30 using DAIP The manu...

Page 122: ...n Bar click VPN Certificate The VPN Certificate screen appears 2 Click Install Certificate The Certificate Upload screen appears 3 Click Browse Select the p12 certificate 4 Click Upload The screen prompts you to enter the Certficate Passphrase used when creating the p12 certificate 5 Click OK ...

Page 123: ...D is on If not check the network cable to the modem and make sure the modem is turned on Check if the LAN LINK ACT LED for the port used by your computer is on If not check if the network cable linking your computer to the IP30 is connected properly Using your web browser go to http my firewall and see whether connected appears on the status bar Make sure that the IP30 network settings are configu...

Page 124: ...s connected properly Try surfing to 192 168 10 1 instead of to my firewall Note 192 168 10 is the default value and it may vary if you changed it in the My Network page Check your TCP IP configuration according to Chapter 2 Restart the IP30 and your broadband modem by disconnecting the power and reconnecting after 5 seconds If your web browser is configured to use an HTTP proxy to access the Inter...

Page 125: ...For each of the accounts configured in the mail window do the following a Click Properties then click the Connection tab b Clear the Always connect to this account using check box c Click OK 10 Click Close 11 Close all active browsers and try again I run a public Web server at home but it cannot be accessed externally although it is accessible to the computers on my network What should I do Surf t...

Page 126: ... detailed in Resetting theIP30 to factory defaults Note that this will erase all your settings I purchased IP30 Tele or IP30 Satellite but I only seem to have IP30 Firewall functionality What should I do Your have not installed your product key See Installing Your Product Key I cannot connect to a VPN site using IP30 Satellite or IP30 Tele What should I do Check whether there is a problem with you...

Page 127: ...values and am unable to correct my error What should I do Reset the network to its default settings using the button on the back of the IP30 unit I am using the IP30 with another DSL Cable router and I am having problems with some applications The IP30 performs Network Address Translation NAT It is possible to use the IP30 behind another device that performs NAT such as a DSL router or Wireless ro...

Page 128: ...g I cannot connect to the HTTPS server in the DMZ What should I do Ensure that HTTPS access to the Device is disabled I cannot establish HTTPS session to the device even when the HTTPS access to the Device is permitted what should I do Ensure that the Browser supports 128 bit cipher strength I cannot send SMTP or POP3 traffic across the Box what should I do Do ONE of the following The solutions ar...

Page 129: ...ite or Satellite Plus configured using VPN Communities What should I do Check for the following error messages in Report Event Log Error Message Verify Failed to Create VPN tunnel Client Encrypt Notification Ensure that on the FP3 management station the authentication mechanism followed is 3DES SHA1 Failed to Create VPN tunnel Could not validate my certificate Ensure that the certificate used in t...

Page 130: ... 1 In the Navigation Bar click on Setup The Internet page appears Error Message Verify Failed to Create VPN tunnel payload malformed Ensure that the safe gateway object defined for this device at Smart Center FP3 uses the same shared secret Extended Authentication Failure Check for the correct Username Password given for the VPN site during login Error Message Verify Failed to Create VPN tunnel pa...

Page 131: ...lts The IP30 allows you to reset its settings to factory defaults When you reset the IP30 it reverts to the state it was originally in when you purchased it and your firmware reverts to the version that shipped with the IP30 You can reset to factory defaults using the GUI or by manually pressing the Reset button located at the back of the IP30 Warning This operation erases all your settings and pa...

Page 132: ... a sharp object press the RESET button on the back of the IP30 steadily for a few seconds and then release it 3 Allow the IP30 to boot up until the system is ready PWR SEC LED flashes slowly or illuminates steadily in green light Warning If you choose to reset the IP30 by disconnecting the power cable and then reconnecting it be sure to leave the IP30 disconnected for at least three seconds or the...

Page 133: ...0 hardware firmware license network status and subscription services This information is useful for troubleshooting You can copy and paste it into the body an email and send it to technical support To run diagnostics 1 In the Navigation Bar click Setup The Internet page appears 2 Click the Firmware tab The Firmware page appears 3 Click Diagnostics Technical information about the IP30 appears in a ...

Page 134: ...5 Troubleshooting 134 IP30 ...

Page 135: ...dures provided in this User Guide Failure to follow the instructions may result in damage to equipment and or personal injuries Before cleaning the IP30 unplug the power cord Use only a soft cloth dampened with water for cleaning Table A 6 Specifications Height 1 2 inches Input AC Power 9VAC Width 8 0 inches Power Consumption 13 5 W Length 4 8 inches Power Supply 100 VAC 120 VAC or 230 VAC Weight ...

Page 136: ...o expose the IP30 to liquid or moisture Do not expose the IP30 to extreme high or low temperatures Do not drop throw or bend the IP30 since rough treatment could damage it Do not use any accessories other than those approved by Nokia Failure to do so may result in loss of performance damage to the product fire electric shock or injury and will void the warranty Do no disassemble or open the IP30 F...

Page 137: ... UNDERSTANDING THAT ARE INCONSISTENT WITH THE TERMS HEREIN THE SOFTWARE IS LICENSED ONLY ON THE CONDITION THAT THE CUSTOMER ACCEPTS THE TERMS OF THIS AGREEMENT BY OPENING THE PACKAGE AND OR BY MAKING USE OF THE ENCLOSED SOFTWARE YOU AGREE TO BE BOUND BY THE TERMS OF THIS AGREEMENT IF YOU DO NOT AGREE TO THE TERMS OF THIS AGREEMENT PLEASE IMMEDIATELY RETURN THE SOFTWARE IN THE PRODUCT PACKAGE TO TH...

Page 138: ... to such copy all copyright confidentiality and proprietary notices that appear on the original Customer shall not otherwise in whole or in part copy the Software or documentation modify the Software or create derivative works thereof reverse compile or reverse assemble all or any portion of the Software rent lease distribute sell or use for time sharing purposes the Software or use or allow the S...

Page 139: ...e Customer shall call its reseller for warranty services All repair services are provided by Nokia s authorized reseller from whom the Customer has purchased the product on which the Software is imbedded c Exclusions The above warranty does not apply if the Software or the equipment on which it resides 1 has been altered except as authorized by Nokia 2 has not been installed operated repaired or m...

Page 140: ... PRODUCT 4 LIMITATION OF LIABILITY IN NO EVENT WILL NOKIA ITS SUPPLIERS OR RESELLERS BE LIABLE UNDER ANY CONTRACT NEGLIGENCE STRICT LIABILITY TORT OR OTHER THEORY FOR DIRECT SPECIAL CONSEQUENTIAL INCIDENTAL OR INDIRECT DAMAGES INCLUDING WITHOUT LIMITATION LOSS OF PROFIT OR DATA WHETHER OR NOT THEY BEEN ADVISED OF THE POSSIBILITY OF SUCH LOSS IN THE EVENT THAT ANY EXCLUSION CONTAINED HEREIN SHALL B...

Page 141: ...strictions laws or regulations Customer will indemnify and hold harmless Nokia for any violation or alleged violation by Customer of such laws rules policies procedures restrictions or regulations 6 CONFIDENTIAL INFORMATION Customer agrees that aspects of the Software and documentation including the specific design and structure of individual programs and the composition of the whole constitute tr...

Page 142: ...n made or furnished hereunder Customer may terminate the License at any time by destroying all copies of the Software and documentation The provisions of Sections 2 4 6 9 and 10 shall survive any termination 9 APPLICABLE LAW This Agreement shall be governed by and construed in accordance with the laws of the State of California and the United States without regard to conflicts of laws provisions t...

Page 143: ...vernmental user the following shall apply The Software and documentation licensed in this agreement are commercial items and are deemed to be commercial computer software and commercial computer software documentation Consistent with the Federal Acquisition Guidelines and related laws any use modification reproduction release performance display or disclosure of such commercial software or commerc...

Page 144: ...B Warranty 144 IP30 ...

Page 145: ...AGREEMENT WRITTEN APPROVAL IS NOT A PREREQUISITE TO THE VALIDITY OR ENFORCEABILITY OF THIS AGREEMENT AND NO SOLICITATION OF ANY SUCH WRITTEN APPROVAL BY OR ON BEHALF OF YOU SHALL BE CONSTRUED AS AN INFERENCE TO THE CONTRARY IF YOU HAVE ORDERED THIS PRODUCT AND SUCH ORDER IS CONSIDERED AN OFFER BY YOU SOFAWARE S ACCEPTANCE OF YOUR OFFER IS EXPRESSLY CONDITIONAL ON YOUR ASSENT TO THE TERMS OF THIS A...

Page 146: ... defined amount of Service Customers 1 2 Licensed Configuration means to the extent applicable as indicated on the License Key the choice of features and the maximum number of nodes an internal computing device with an IP address on the trusted side of the firewall or any other hardware or software specifications as declared by You in Your purchase order or request for License Key if the Product p...

Page 147: ... 2 1 License Subject to the terms and conditions of this Agreement SofaWare hereby grants only to You a non exclusive non sublicensable non transferable license to install and use the Product in accordance with the relevant end user documentation provided by SofaWare for the Licensed Configuration You have no right to receive use or examine any source code or design documentation relating to the P...

Page 148: ...pher reverse translate decompile disassemble or otherwise reverse engineer or attempt to reconstruct or discover any source code or underlying ideas or algorithms or file formats or programming or interoperability interfaces of the Products by any means whatsoever You will not develop methods to enable unauthorized parties to use the Product or to develop any other product containing any of the co...

Page 149: ...return all Product to the representative that supplied the Product 3 MAINTENANCE AND SUPPORT SofaWare has no obligation to provide support maintenance upgrades modifications or new releases under this Agreement Any purchase of upgrades shall be subject to this End User License Agreement unless otherwise determined by SofaWare 4 TITLE AND INTELLECTUAL PROPERTY All right title and interest in and to...

Page 150: ... AND LIMITATION OF LIABILITY 7 1 Limited Warranty SofaWare warrants to You that the encoding of the software program on the media on which the Product is furnished will be free from defects in material and workmanship and that the Product shall substantially conform to its user manual as it exists at the date of delivery as can be found on SofaWare s web page www sofaware com or www s box com for ...

Page 151: ...FOR LOSS OF OR CORRUPTION OF DATA OR FOR COST OF PROCUREMENT OF SUBSTITUTE GOODS OR TECHNOLOGY IRRESPECTIVE OF WHETHER SOFAWARE HAS BEEN ADVISED OF THE POSSIBILITY OF SUCH DAMAGES SOFAWARE S MAXIMUM LIABILITY FOR DAMAGES SHALL BE LIMITED TO THE LICENSE FEES RECEIVED BY SOFAWARE UNDER THIS LICENSE FOR THE PARTICULAR PRODUCT S WHICH CAUSED THE DAMAGES Some jurisdictions do not allow the exclusion or...

Page 152: ...t Administration Act of 1979 as amended any successor legislation and the Export Administration Regulations EAR issued by the Department of Commerce International Trade Administration and Bureau of Export Administration You warrant that You will comply in all respects with the export and reexport restrictions applicable to the Product and will otherwise comply with the EAR or other United States l...

Page 153: ...eir respective proprietors The Third Parties Software may be used only in connection with the Products The provisions of this Agreement shall apply to all Third Party Software Providers and to Third Party Software as if they were the Product and SofaWare respectively 9 3 Government Restricted Rights This provision applies to Product acquired directly or indirectly by or on behalf of any Government...

Page 154: ...C End User License Agreement 154 IP30 ...

Page 155: ...ild Drive Mountain View CA 94043 2215 USA declares that the product Product name IP0530 Model number IP530 Product options All Serial number 1 to 100 000 Date first applied 2000 conforms to the following standards Safety EN60950 1992 A1 A2 1993 A3 1995 A4 1997 A11 1998 with Japanese National Deviations EMC EN50024 EN55022A 1998 CISPR 22 Class A 1985 EN61000 3 2 EN61000 3 3 ...

Page 156: ...ll Nokia Telecommunications 2 Heathrow Blvd 284 Bath Road Heathrow Middlesex UB7 ODQ England Compliance Statement This hardware complies with the following standards Emissions FCC Part 15 Subpart B Class A US and Canada EN55022A CISPR 22 Class A European Community CE EN6100 3 2 European Community CE EN6100 3 3 European Community CE Immunity EN50024 European Community CE EN61000 4 2 EN61000 4 3 EN6...

Page 157: ... and can radiate radio frequency energy and if not installed and used in accordance with the instruction may cause harmful interference to radio communications However there is no guarantee that interference will not occur in a particular installation If this device does cause harmful interference to radio or television reception the user is encouraged to try to correct the interference by one or ...

Page 158: ...D Compliance Information 158 IP30 Caution Caution Caution Any changes or modifications not expressly approved by the grantee of this device could void the user s authority to operate the equipment ...

Page 159: ...ption Services 73 Changing IP Addresses 52 Changing Your Password 83 Compliance Specifications 152 compliance standards emission 153 safety 153 Configuration Download 109 Configuration Specify 107 configure HTTPS 54 Configure Network Settings 51 Configuring Your Account 81 Configuring Nokia Horizon Manager 82 Configuring Remote Access VPN Site 111 Configuring Site to Site VPN Gateway 114 ...

Page 160: ...SL PPTP 40 Connectivity 15 Creating Rules 65 Creating Allow and Block Rules 65 D Diagnostics 129 DMZ 68 E E mail Anti Virus 77 E mail Anti Virus Enabling 77 emissions 152 Enabling NAT 53 Enabling DHCP Server 51 F FCC Notice 153 Frequently Asked Questions 121 I immunity 152 Installing Your Network 26 IP30 GUI 48 IP30 Satellite in NAT and No NAT Modes 102 IP30 Satellite to Check Point FP3 100 ...

Page 161: ...cting to Network 26 IP30 Front Panel 18 IP30 Logging Off 49 IP30 Logging On 45 IP30 Rear Panel 17 IP30 Rebooting 128 IP30 Remote Access 54 IP30 secure accessing 46 IP30 Setting up the Security Policy 62 L Logging Off of a VPN Site 120 Logging On Through my vpn 119 Logging on to a VPN Site 117 Logging On Using IP30 GUI 117 M Mac Cloning 32 Management 16 Managing Your Network 49 Millennium 22 N Netw...

Page 162: ...oE Using 33 PPTP Using 34 Precautions safety 131 Product Key Installing 42 Q Quick Internet Connection 50 R Reset to factory defaults 127 S safety 153 Satellite to Satellite 97 Satellite to VPN 1 98 Scanning Protocols 78 SecuRemote to Satellite 92 Security 15 Security Services 16 Setting the Firewall Security Level 62 Setting Up IP30 Satellite as VPN Server 115 Setup Wizard 29 Software Updates 80 ...

Page 163: ...on 22 TCP IP Settings 23 TCP IP Installation 22 TCP IP installation 24 TCP IP Settings 23 TCP IP settings 25 Tele to Satellite 94 Troubleshooting 121 U Updates Automatic and Manual 80 Users Adding 85 Users Deleting 87 Users Managing 83 Users Remote VPN Access 88 Users Viewing and Editing 85 V Viewing Active Computers 57 Viewing Active Connections 58 Viewing Event Log 55 Viewing Firmware Status 126...

Page 164: ...rk Activity Information 49 Viewing Reports 55 Viewing Services Information 73 Viewing VPN Tunnels 59 VPN 16 VPN Configuration 89 W Web Filtering 74 Web Filtering Enabling 74 Web Filtering Snoozing 75 Windows 98 22 Windows 2000 24 Windows XP 24 ...

Reviews: