PANEL5000
‐
A121
User
Manual
19
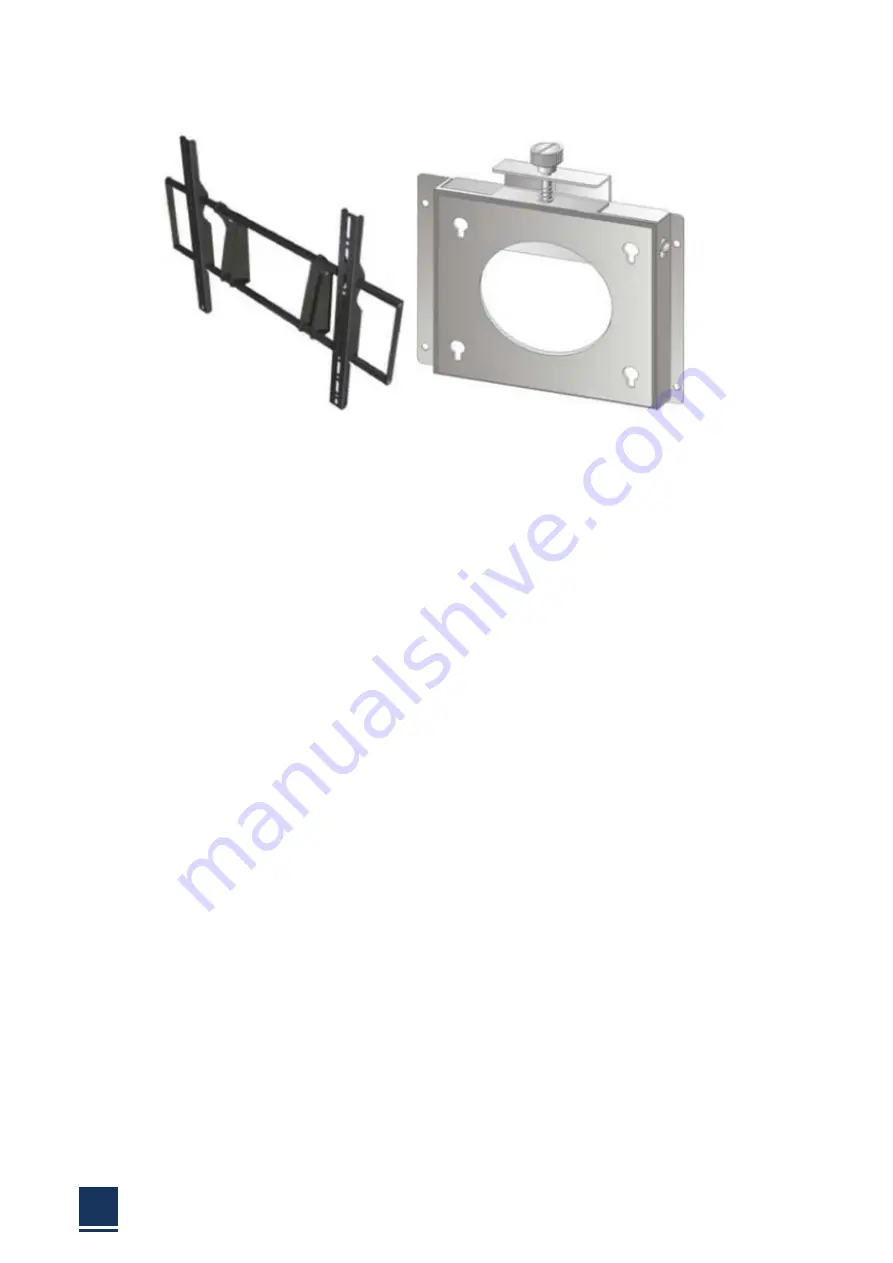
Figure
2
‐
9:
Wall
mount
Step
1:
Select
the
location
on
the
wall
for
the
wall
‐
mounting
bracket.
Step
2:
Carefully
mark
the
locations
of
the
four
bracket
screw
holes
on
the
wall.
Step
3:
Drill
four
pilot
holes
at
the
marked
locations
on
the
wall,
for
the
bracket
retention
screws.
Step
4:
Align
the
wall
‐
mounting
bracket
screw
holes
with
the
pilot
holes.
Step
5:
Secure
the
mounting
‐
bracket
to
the
wall
by
inserting
the
retention
screws
into
the
four
pilot
holes
and
tightening
them
Step
6:
Insert
the
four
monitor
mounting
screws
provided
in
the
wall
mounting
kit
into
the
four
screw
holes
on
the
real
panel
of
the
flat
panel
monitor
and
tighten
until
the
screw
shank
is
secured
against
the
rear
panel
Step
7:
Align
the
mounting
screws
on
the
monitor
rear
panel
with
the
mounting
holes
on
the
bracket.
Step
8:
Carefully
insert
the
screws
through
the
holes
and
gently
pull
the
monitor
downwards
until
the
monitor
rests
securely
in
the
slotted
holes.
And
ensure
that
all
four
of
the
mounting
screws
fit
snuggly
into
their
respective
slotted
holes.
Step
9:
Secure
the
panel
monitor
by
fastening
the
retention
screw
of
the
wall
‐
mounting
bracket.
2.3.4
Panel
mounting
To
mount
the
PANEL5000
‐
A121
flat
panel
monitor
into
a
panel
(not
standard
attached),
please
follow
the
steps
below:
Step
1:
Select
the
location
on
the
panel
to
mount
the
flat
panel
monitor.
Step
2:
Cut
out
a
section
from
the
panel
that
corresponds
to
the
rear
panel
dimensions
of
the
flat
panel
monitor.
Take
care
that
the
panel
section
that
is
cut
out
is
smaller
Summary of Contents for PANEL5000-A121
Page 1: ...PANEL5000 A121 User Manual 1 User Manual Ver1 0 PANEL5000 A121 Industrial Touch Screen Monitor...
Page 7: ...PANEL5000 A121 User Manual 7 Chapter 1 OVERVIEW...
Page 12: ...PANEL5000 A121 User Manual 12 1 5 Dimensions Figure 1 5 PANEL5000 A121 dimensions...
Page 13: ...PANEL5000 A121 User Manual 13 Chapter 2 INSTALLATIONS...
Page 29: ...PANEL5000 A121 User Manual 29 Figure 2 18 Press NEXT to continue Figure 2 19...
Page 30: ...PANEL5000 A121 User Manual 30 Press NEXT to continue Figure 2 20 Press INSTALL to continue...
Page 33: ...PANEL5000 A121 User Manual 33 Figure 2 36 Figure 2 37...
Page 35: ...PANEL5000 A121 User Manual 35 Chapter 3 System Maintenance...
Page 37: ...PANEL5000 A121 User Manual 37 A Safety Precautions...
Page 41: ...PANEL5000 A121 User Manual 41 B Hazardous Materials Disclosure...
Page 44: ...PANEL5000 A121 User Manual 44 Chapter 5 Appendix A...


