6
7
Connecting your equipment and first usage
3.1
Installation
3
The UPS can protect your equipment from all power
problems such as surge, blackouts, brownouts and line
noise. When AC power is present and the ON/OFF switch
is turned
ON
, the UPS is always charging the battery and
provides power to the equipment from AC line directly.
A reliable built-in battery can provide stable power in
order for you to complete your work, save your data and
safely shut down your system when there is a utility power
blackout.
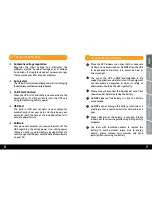
The UPS is simple to operate and install. Please read the
following steps before connecting any equipments to this
UPS:
NOTE:
If backlight shuts off, you may activate it by touching the
screen.
Step 1.
Connect the UPS to a grounded AC power outlet.
Do
NOT plug
LASER PRINTERS
into any of the
outlets.
Do
NOT plug any
SURGE STRIPS
into any of the
outlets.
CAUTION
Step 2.
Please turn
ON the ON/OFF switch and charge the
battery at least 6 hours for a full load before you
start to use the UPS.
Step 3.
Plug your PC or peripheral equipment (printer, tv,
scanner, fax, speakers etc.) into the power outlets
of the UPS
(these will provide emergency battery
backup power during blackouts as well as surge
protection from surges and spikes).
Do not attach
powerfull sound sistems and woofers or non
computer-related items, such as medical
equipment, life-support equipment, microwave
ovens, or vacuum cleaners to the UPS !
Step 4.
Connect the phone/network/internet cables to the
RJ11/RJ45 outlet.
UPS Mode
LCD Display
Description
Overload
in Battery
Mode
icon will flash
When overload
occurs, alarm will
beep every 0.5
seconds.
Deutsch
Engli
sh
Română
български
M
agy
ar
Srpski


