background image

1  USAGE

This is an electric hand-held fast multiple needle scaler for
scaling workpieces such as slags and spatters.

2  CHECK THE CONTENTS OF THE

PACKAGE

Check the contents and make sure that the tool does not have
any damage due to an accident during the transportation, if
any. The contents should correspond to the list as follows.
Just in case there are some damages or missing parts, contact
the sales agent from whom you purchased the tool or an
authorized dealer.

THE CONTENTS OF THE PACKAGE AND ACCESSORIES

3  Names of Part

4  Caution for Use

      WARNING

Use of power is limited to the power specified by the rating

plate.

Check to see that the earth leakage breaker is installed.

Even when using power supply in which the earth leakage
breaker is set, it should be used after grounding for the
purpose of more safety.

Note that power cord which is too long may cause a voltage

drop.  Do not use another electric tool together.

When performing maintenance, inspection, replacement or

adjustment of parts, make sure to disconnect the attachment
plug from the receptacle.

Do not remove a rating plate. Please contact sales agent for

replacement if they are taken off or damaged.

If you feel discomfort or pain while using this tool, stop using

it and have a doctor examine you.

Check if it conforms to noise regulation in the area.

Do not operate it without any work as it may cause some

damage on the head of Needles. [Fig 1]

[Fig 1]

3

Needle Head

Side Handle

Holder Cover

Handle Holder

Cylinder A'ssy

Anvil Guide A'ssy

A

5  PREPARATION

      WARNING

When the preparation is made, switch off and
take off the plug.

5-1 How to fix a Side Handle

  [Fig. 2]

Put the Holder Cover on the Handle Holder and fix it at an
arbitrary position with a Side Handle.

[Fig 2]

5-2 How to change a Needle

  [Fig 3]

To remove: Loosen the Hex. Socket Cap Screw with Hex.
Socket Screw Key and take out an Anvil Guide Ass'y from the
Cylinder Ass'y.  The Needles with the Needle Supporter can
be removed.  Replace them with the new ones.
To fix: Fix them without any clearance at A.  The procedure is
the opposite of the removal.

[Fig 3]

Package Contents

Q'ty

check

ELECTRIC NEEDLE SCALER

1

Needle 3

φ×

180

15

Hex. Socket Screw Key 6

1

Instruction Manual

1

NITTO  KOHKI

Flame

Push Button

Switch

Switch Handle

Oil Cup

Side Handle

Needle

Anvil Guide
A'ssy

Cylinder A'ssy

Extension Cable

max. Length

Sectional Area

20 m

0.75 mm

2

 Over

30 m

1.25 mm

2

 Over

50 m

2 mm

2

 Over

Summary of Contents for EJC-32A

Page 1: ...d Pressure Level No Load 84 6 Load dB A 84 9 Sound Power Level No Load 95 6 Load 95 9 Vibration Level Body m s2 m s2 16 8 2 2 Uncertainty K Handle 14 8 2 6 Specifications Due to continuous product dev...

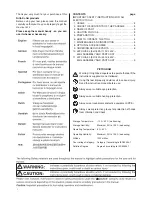
Page 2: ...ARTS LIST 7 11 JET CHISEL EJC 32A 220V 240V 50Hz ASSEMBLY AND PARTS LIST 9 PICTOGRAM Warning It might be dangerous to operate the tool if the instructions supplied are not followed Using this tool imp...

Page 3: ...e cable regularly Contact the sales agents to repair it when it is defective When an extension cable is used check regularly and change it when it is damaged The grip should be kept dry and clean Main...

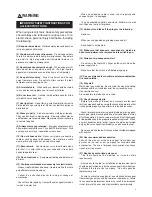
Page 4: ...ntact sales agent for replacement if they are taken off or damaged If you feel discomfort or pain while using this tool stop using it and have a doctor examine you Check if it conforms to noise regula...

Page 5: ...necessary it may cause the Needle bent broken or the tool damaged Needles are consumable When even one piece is broken stop the operation promptly take the left head of the Needle and substitute a new...

Page 6: ...riorates and may cause a breakdown so they should be replaced with the new ones in accordance with the following procedure Fig 8 Fig 8 Removal q Completely loosen the Switch Handle fastening screws an...

Page 7: ...ow Fig 14 Fig 14 r Put the lead wire in the groove in the Brush Holder Retainer so that it does not become caught in the Motor Fig 15 Fig 15 t Press Switch Handle A into the Frame while you fit the Co...

Page 8: ...Y AND PARTS LIST CAUTION The illustration is for information only Users should never disassemble parts Contact the sales agent from whom you purchased the tool or authorized dealer should the tool nee...

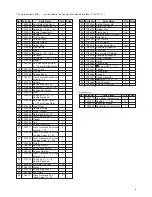
Page 9: ...0511 Cross Recessed Pan Head 8 Screw 5 15 38 TP02655 Cross Recessed Pan Head 2 Tapping Screw 5 40 39 TP02656 Cross Recessed Pan Head 2 Tapping Screw 5 100 40 TP16309 Pinion 1 41 TQ03268 Bearing Bracke...

Page 10: ...AND PARTS LIST CAUTION The illustration is for information only Users should never disassemble parts Contact the sales agent from whom you purchased the tool or authorized dealer should the tool need...

Page 11: ...1 Cross Recessed Pan Head 8 Screw 5 15 38 TP02655 Cross Recessed Pan Head 2 Tapping Screw 5 40 39 TP02656 Cross Recessed Pan Head 2 Tapping Screw 5 100 40 TP16309 Pinion 1 41 TQ03268 Bearing Bracket 1...

Page 12: ...Printed in JAPAN TQ12916 2 NITTO KOHKI CO LTD...

Reviews: