background image


15°

Vertical

Backward

.9.

.8.

Use the original box to repackage the inverter, seal with adhesive tape with the desiccant 

inside the

box

.

4.2 Product Storage

To select a location for the inverter, the following criteria should be considered:

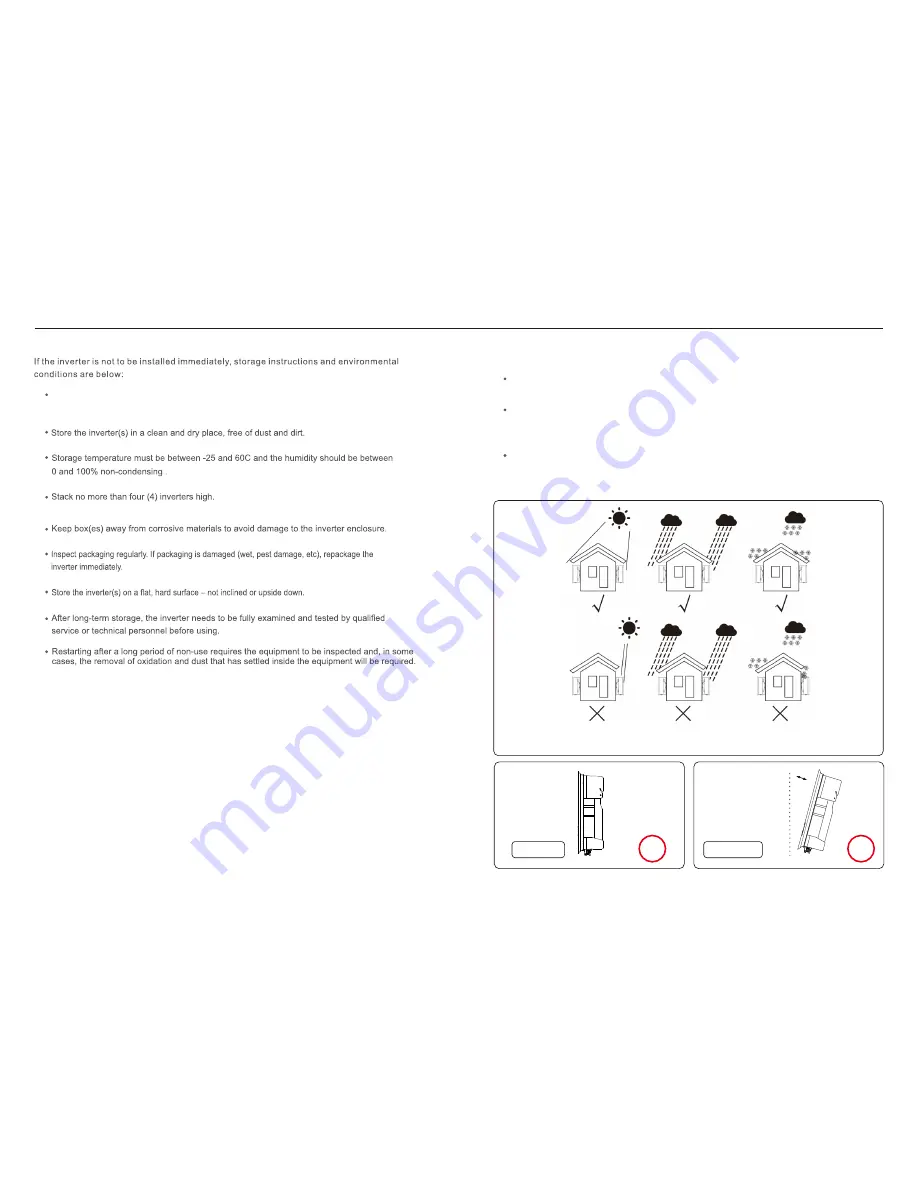
Do not install in small closed spaces where air can

not circulate freely. To avoid 

overheating, always make sure the flow of air around the inverter is not blocked. 

Exposure to direct sunlight will increase the operational temperature of the inverter and 

may cause output power limiting. Ginlong recommends inverter installed to avoid

direct sunlight or raining.

To avoid over heating ambient air temperature must be considered when choosing 

the inverter installation location. Ginlong recommends using a sun shade minimizing 

direct sunlight when the ambient air temperature around the unit exceeds 104°F/40°C.

5.1 Select a Location for the Inverter

5.


Installation

Figure 5.1 Recommended Installation locations

4.


Product handing and storage

Summary of Contents for Solis 4G

Page 1: ...Ltd Ningbo Ginlong Technologies Co Ltd No 57 Jintong Road Binhai Industrial Park Xiangshan Ningbo Zhejiang 315712 P R China Tel 86 0 574 6578 1806 Fax 86 0 574 6578 1606 If you encounter any problem...

Page 2: ...ts 3 3 Keypad 3 4 LCD 5 Installation 5 1 Select Location for the Inverter 5 2 Mounting the Inverter 5 3 Electrical Connections 7 Operation 6 Start Stop 6 1 Start the Inverter 6 2 Stop the Inverter 1 1...

Page 3: ...ctor x2 User manual x1 Installation and Operation Manual Solis 4G Three Phase Inverter 5 10kW Ver 1 1 Ginlong Ningbo Technologies Co Ltd 1 Introduction 1 Introduction If anything is missing please con...

Page 4: ...h the local and national electrical safety standards WARNING Please don t connect PV array positive or negative to ground it could cause serious damage to the inverter CAUTION The PV array Solar panel...

Page 5: ...ys The keypad is used for Scrolling through the displayed options the UP and DOWN keys Access to modify the adjustable settings the ESC and ENTER keys The two line Liquid Crystal Display LCD is locate...

Page 6: ...not blocked Exposure to direct sunlight will increase the operational temperature of the inverter and may cause output power limiting Ginlong recommends inverter installed to avoid direct sunlight or...

Page 7: ...ed hexagon head tapping screws HJ0108 10 50mm fished expandable tubular using the percussion drilling with the 10mm drill need to stay vertically on the wall And the drill hole must be vertically on t...

Page 8: ...5 3 Electrical Connections Inverter designs quick connect terminal so top cover needn t open during electrical connection The sign meaning located the bottom of inverter as shown below in table 5 1 Al...

Page 9: ...el all inverters should be connected to the same ground point to eliminate the possibility of a voltage potential existing between inverter grounds B insulation stripping length is 2mm 3mm longer than...

Page 10: ...the Inverter The steps to assemble the DC connectors are listed as follows 1 Strip off the DC wire for about 7mm Disassemble the connector cap nut see Figure 5 13 3 Crimp the contact pin to the wire...

Page 11: ...e is required to be used Please make sure the resistance of cable is lower than 1 50hm If the wire is longer than 20m preferred to 6mm cable Please fixed cable with PH1 cross screwdriver Each inverter...

Page 12: ...ion 6 Start Stop 6 1 Start the Inverter To start up the Inverter it is important that the following steps are strictly followed 1 Switch the grid supply main Switch AC ON first 2 Switch the DC switch...

Page 13: ...ing the ENTER key locks Figure 7 2 a or unlocks Figure 7 2 b the screen b a Figure 7 2 Locks and Unlocks the Screen of LCD 7 Operation 7 Operation Table 7 1 Information list V_DC1 350 8V I_DC1 5 1A V_...

Page 14: ...ter menu Advanced Info and Advanced settings need password Select Advanced Info from the Main Menu The screen will require the password as below YES ENT NO ESC Password 0000 Figure 7 5 Enter password...

Page 15: ...s history of changing settings Only for maintance personel 7 4 7 Communication Data The screen shows the internal data of the Inverter see Figure 7 14 which is for service technicians only 01 05 01 25...

Page 16: ...is function is used to set the new password for menu Advanced info and Advanced information see Figure 7 18 Figure 7 18 Set new password YES ENT NO ESC Password 0000 Enter the right password before se...

Page 17: ...international grid tied standards and safety and electromagnetic compatibility requirements Before delivering to the customer the inverter has been subjected to several tests to ensure its optimal ope...

Page 18: ...BT current 12Power FAULT 12V power supply fault 1 Restart inverter or contact installer IG AD Grid current sampling fail DSP B FAULT Comm failure between main and slave DSP Table 9 1 Fault message and...

Page 19: ...60 850 Start up voltage Volts 180 Max short circuit input current Amps Rated DC voltage Volts Rated grid frequency Hertz 3 N PE 400 47 52 or 57 62 Max DC input voltage Volts MPPT voltage range Volts M...

Page 20: ...160 850 Start up voltage Volts 180 Max short circuit input current Amps Rated DC voltage Volts Rated grid frequency Hertz 3 N PE 400 47 52 or 57 62 Max DC input voltage Volts MPPT voltage range Volts...

Page 21: ...ort circuit input current Amps Rated DC voltage Volts Rated grid frequency Hertz 3 PE 208 220 240 47 52 or 57 62 Max DC input voltage Volts MPPT voltage range Volts Max input current Amps MPPT number...

Reviews: