background image

129

Technical Notes / Troubleshooting

Troubleshooting

If the camera fails to function as expected, check the list of common problems below before 
consulting your retailer or Nikon representative.  Refer to the page numbers in the right-
most column for more information.

Problem

Solution

Camera takes time to turn on.

Delete fi les or folders.

65, 74, 

105

Viewfi nder is out of focus.

Adjust viewfi nder focus or use optional diopter adjust-
ment lenses.

17, 122

Viewfi nder is dark.

Insert a fully-charged battery.

12

Displays turn off  without warning.

Choose longer delays for Custom Setting 27 (

Monitor 

off 

) or 28 (

Auto meter off 

).

98, 99

Unusual characters displayed in con-
trol panel.

See “ A Note on Electronically-Controlled Cameras,” be-
low.

Displays in control panel or view-
fi nder are unresponsive and dim.

The response times and brightness of these displays 
varies with temperature.

Fine lines are visible around active 
focus area or display turns red when 
focus area is highlighted. 

These phenomena are normal for this type of viewfi nd-
er and do not indicate a malfunction.

Menu item is not displayed.

Select 

Full

 for 

CSM / setup menu

.

101

Menu item can not be selected.

Rotate mode dial to another setting or insert memory 
card.  Note that 

Battery info

 option is only available 

when camera is powered by EN-EL3e battery.

107

Image size can not be changed.

Image quality set to 

NEF (RAW)

.

34

Metering can not be changed.

Digital Vari-Program mode selected or autoexposure 
lock in eff ect.

24, 94

Exposure compensation not avail-
able.

Choose mode 

P

S

, or 

A

.

45

Can not measure white balance.

Subject is too dark or too bright.

60

Image can not be selected as source 
for preset white balance.

Image was not created with D80.

82

White balance bracketing unavail-
able.

• NEF (RAW) or NEF + JPEG option selected for image 

quality.

• 

 (

Choose color temp.

) selected for white balance.

•  Multiple exposure in progress.

34, 59, 

84

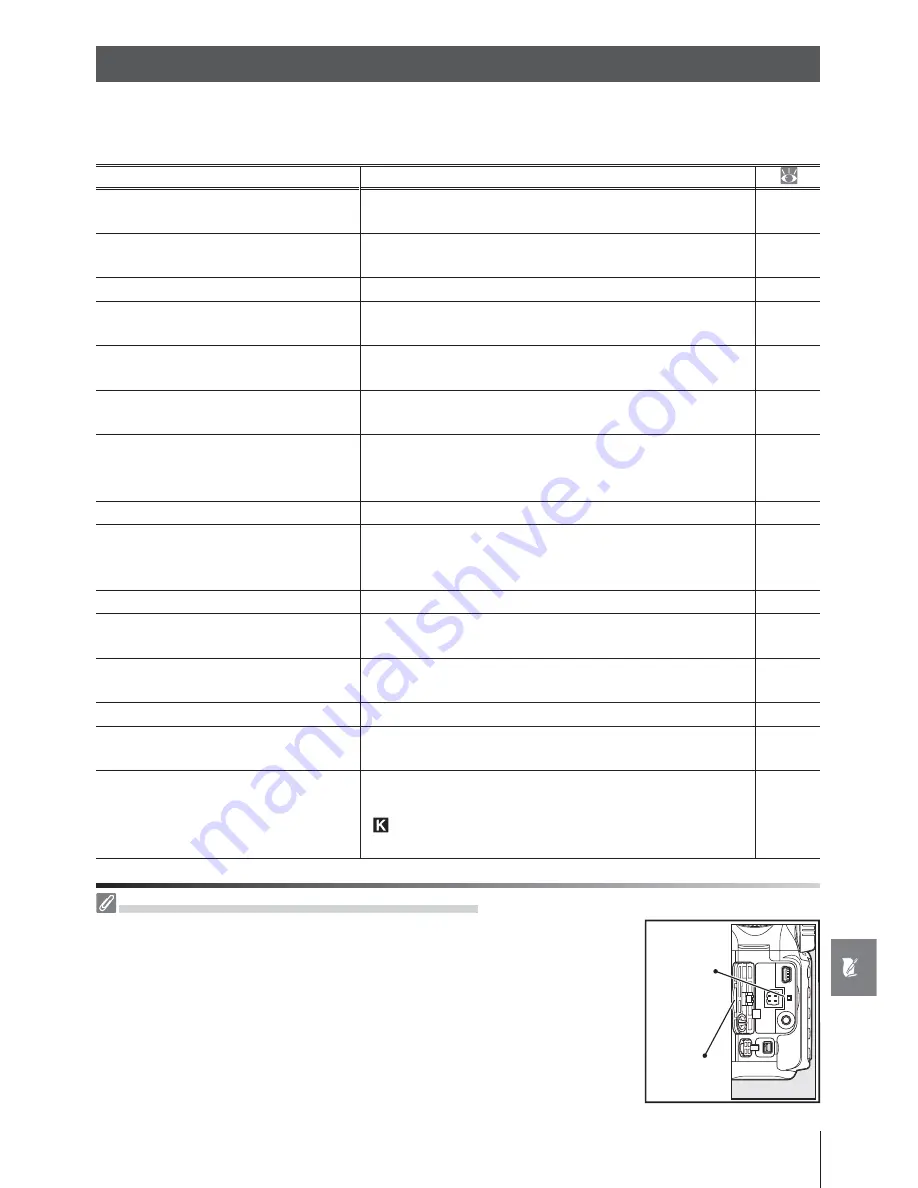
   A Note on Electronically-Controlled Cameras

In extremely rare instances, unusual characters may appear in the control 
panel and the camera may stop functioning.  In most cases, this phenom-
enon is caused by a strong external static charge.  Turn the camera off , re-
move and replace the battery (note that the battery may be hot) or discon-
nect and reconnect the AC adapter, and turn the camera on again.  If the 
problem persists, turn the camera off  and press the reset switch (see right; 
note that this resets the clock).  In the event of continued malfunction, con-
tact your retailer or a Nikon-authorized service representative.

Connector 

cover

Reset 

switch

Summary of Contents for D80

Page 1: ... N 4 2 4HE IKON UIDE TO IGITAL 0HOTOGRAPHY WITH THE ...

Page 2: ...Find the solution here The Q A Index See pages vii ix Know what you want to do but don t know the function name Find it from the question and answer index See pages v vi The Table of Contents Find items by function or menu name Digitutor Digitutor a series of watch and learn manuals in movie form is available at the following website http www nikondigitutor com index_eng html Help Use the camera s...

Page 3: ...Guide More on Photography All Modes P S A and M Modes More on Playback Connecting to aTelevision Computer or Printer Playback Options The Playback Menu Shooting Options The Shooting Menu Custom Settings Basic Camera Settings The Setup Menu Creating Retouched Copies The Retouch Menu ...

Page 4: ...s Batteries may leak or explode if improperly handled Observe the following precautions when handling batteries for use in this product Use only batteries approved for use in this equip ment Do not short or disassemble the battery Be sure the product is off before replacing the bat tery If you are using an AC adapter be sure it is un plugged Do not attempt to insert the battery upside down or backw...

Page 5: ...installation This equipment gen erates uses and can radiate radio frequency energy and if not installed and used in accordance with the instructions may cause harmful interference to radio communications However there is no guarantee that interference will not occur in a particular installation If this equipment does cause harmful interference to ra dio or television reception which can be determi...

Page 6: ...ued by the government licenses issued by public agencies and private groups ID cards and tickets such as passes and meal coupons Comply with copyright notices The copying or reproduction of copyrighted creative works such as books music paintings woodcuts prints maps drawings movies and photographs is governed by national and international copyright laws Do not use this product for the purpose of ...

Page 7: ...ng a Closer Look Playback Zoom 64 Protecting Photographs from Deletion 65 Deleting Individual Photographs 65 Connecting to a TV Computer or Printer Connecting to a TV Computer or Printer 66 66 Viewing Photographs on TV 66 Connecting to a Computer 67 Before Connecting the Camera 67 Connecting the USB Cable 67 Printing Photographs 69 Printing Via Direct USB Connection 69 Menu Guide Menu Guide 74 74 ...

Page 8: ...d 102 World Time 103 LCD Brightness 103 Video Mode 103 Language 103 USB 104 Image Comment 104 Folders 105 File No Sequence 106 Mirror Lock Up 106 Dust Off Ref Photo 106 Battery Info 107 Firmware Version 108 Auto Image Rotation 108 Creating Retouched Copies The Retouch Menu 109 D Lighting 110 Red Eye Correction 111 Trim 111 Monochrome 112 Filter Effects 112 Small Picture 112 Image Overlay 114 Technic...

Page 9: ... my camera Servicing the camera x 126 How do I clean the camera or lens Cleaning the camera 124 Camera Setup Question Key phrase Page How do I focus the viewfinder Viewfinder focus 17 How do I keep the monitor from turning off Monitor off 98 How do I set the clock World time 103 How do I set the clock for daylight savings time How do I change time zones when I travel How do I adjust monitor brightness...

Page 10: ...ure Exposure P S A and M modes 45 51 How do I freeze or blur moving objects Mode S shutter priority auto 48 How do I blur background details Mode A aperture priority auto 49 Can I make photos brighter or darker Exposure compensation 54 How do I make a time exposure Long time exposures 51 How do I use the flash Flash photography flash mode 40 42 Can the flash fire automatically when needed How do I kee...

Page 11: ...ew my photos on TV Television playback 66 Can I set a slide show to music Pictmotion 75 77 How do I copy photos to my computer Connecting to a computer 67 68 How do I print photographs Printing photographs 69 73 Can I print photos without a computer Printing via USB 69 73 Can I print the date on my photographs Time stamp DPOF 71 73 How do I order professional prints Print set 73 How do I bring out...

Page 12: ...s in Europe and Africa http www europe nikon com support For users in Asia Oceania and the Middle East http www nikon asia com Visit these sites to keep up to date with the latest product information tips answers to frequently asked questions FAQs and general advice on digital imaging and photography Additional informa tion may be available from the Nikon representative in your area See the follow...

Page 13: ...ks tips additional informa tion that may be helpful when using the camera This icon marks notes information that should be read before using the camera This icon indicates that more information is available elsewhere in this manual or in the Quick Start Guide This icon marks settings that can be ad justed using camera menus This icon marks settings that can be fine tuned from the Custom Settings me...

Page 14: ... release button 11 15 Lens mount 11 16 Mirror 106 125 17 Depth of field preview button 49 18 Grip 21 19 Sub command dial 10 91 20 FUNC button 92 21 Eyelet for camera strap 8 22 AF assist illuminator 28 87 Self timer lamp 37 38 Red eye reduction lamp 39 23 Shutter release button 22 23 24 Power switch 11 19 Illuminator switch 3 25 exposure compensation button 54 reset button 44 26 shooting mode butto...

Page 15: ... 21 3 Diopter adjustment control 17 4 AE L AF L button 31 94 5 DK 5 viewfinder eyepiece cap 8 6 Main command dial 10 91 7 Memory card slot cover 15 8 Focus selector lock 30 9 Memory card access lamp 15 23 10 button 9 11 Battery chamber cover latch 13 12 Battery chamber cover 13 13 Multi selector 14 Tripod socket 15 playback zoom button 64 QUAL image quality size button 34 35 16 thumbnail button 63 ...

Page 16: ... M Manual 50 Match shutter speed and aperture to your creative intent Point and Shoot Modes Digital Vari Programs Selecting a Digital Vari Program automatically optimizes settings to suit the selected scene making creative photography as simple as rotating the mode dial Auto 19 Camera adjusts settings automatically to produce optimal results with point and shoot simplicity Recommended for first tim...

Page 17: ...ivity indicator 43 ISO AUTO indicator 43 3 Battery indicator 19 4 Flash sync mode 40 41 5 Image quality 34 6 Image size 35 7 White balance mode 58 8 Number of exposures remaining 19 Number of shots remaining before memory buffer fills 36 PC mode indicator 68 Preset white balance recording indicator 60 9 K appears when memory remains for over 1000 exposures 10 Shooting mode 36 Self timer remote contr...

Page 18: ...k 94 12 Shutter speed 48 50 13 Aperture f number 48 50 14 Electronic analog exposure display 50 Exposure compensation 54 15 Flash compensation indicator 55 16 Exposure compensation indicator 54 17 Number of exposures remaining 19 Number of shots remaining before memory buffer fills 36 Preset white balance recording indicator 60 Exposure compensation value 54 Flash compensation value 55 PC connection...

Page 19: ...attery 12 13 The EN EL3e is for use with the D80 Use Only Nikon Brand Electronic Accessories Nikon cameras are designed to the highest standards and include complex electronic circuitry Only Nikon brand electronic accessories including lenses Speedlights battery chargers batteries and AC adapters certified by Nikon specifically for use with this Nikon digital camera are engineered and proven to oper...

Page 20: ... eyepiece cup by placing your fingers underneath the flanges at either side and slid ing it off as shown at right The Camera Strap Attach the camera strap as shown below The BM 7 LCD Monitor Cover A clear plastic cover is provided with the camera to keep the moni tor clean and protect it when the camera is not in use To attach the cover insert the projection on the top of the cover into the match ing...

Page 21: ...ouch Create retouched copies of existing photographs 109 The multi selector and OK button are used to navigate the camera menus Move cursor up Increase number Move cursor down Decrease number Return to previous menu Display sub menu Press OK to select highlighted option Slider shows position in current menu If icon is displayed help for the current item can be viewed by pressing button Choose from...

Page 22: ... option 8 Make selection Menu items that are displayed in gray are not cur rently available Press the shutter release button halfway to exit the menus and return to shooting mode 19 28 The monitor will turn off Using the Command Dials The main command dial can be used to move the cursor up and down the sub command dial to move the cursor left and right The sub command dial can not be used to make a...

Page 23: ...e lens in the direction shown until it clicks into place If the lens is equipped with an A M or M A M switch select A autofocus or M A autofocus with manual priority Detaching Lenses Be sure the camera is off when removing or exchanging lenses To remove the lens press and hold the lens release button while turning the lens clockwise After removing the lens replace the camera body cap and rear lens ...

Page 24: ...amp will blink as the battery charges About two and a quarter hours are required for an exhausted battery to fully charge 1 4 Charging is complete when the CHARGE lamp stops blink ing Remove the battery from the charger and unplug the charger EN EL3e Rechargeable Li ion Batteries The EN EL3e shares information with compatible devices The camera uses this information to display the battery charge s...

Page 25: ...EL3 or EN EL3a batteries for D100 D70 series or D50 cameras Do not use the battery at ambient temperatures below 0 C 32 F or above 40 C 104 F During charging the temperature should be in the vicinity of 5 35 C 41 95 F For best results charge the battery at temperatures above 20 C 68 F Battery capacity may drop if the battery is used at a tem perature below the temperature at which it was charged I...

Page 26: ...light saving time options 6 Highlight On if daylight saving time is in effect 7 Display date menu 8 Press multi selector left or right to select item up or down to change 9 Set clock and return to shooting mode Monitor will turn off automatically To change the order in which the year month and day are displayed select World time Date format from the setup menu 103 Using Camera Menus The language men...

Page 27: ...panel shows the number of exposures remaining the card is ready for use If the message shown at right is displayed in the monitor format the card as described in Camera Error Messages and Displays 133 The Access Lamp Do not remove the battery or disconnect the power source while the memory card access lamp is lit Failure to observe this precaution could result in damage to the card The Write Prote...

Page 28: ...Formatting Memory Cards Format cards in the camera Performance may drop if they are for matted in a computer Formatting memory cards permanently deletes all photographs and other data they may contain Be sure all data you wish to keep have been copied to another storage device before formatting the card Camera Off Display If the camera is turned off with a battery and memory card inserted the number...

Page 29: ...focus diopter can be adjusted in the range 2 1m 1 Corrective lenses available sepa rately 122 allow diopters of 5 3m 1 1 Remove the lens cap and turn the camera on 2 Rotate the diopter adjustment control until the focus brack ets are in sharp focus When operating the diopter adjustment control with your eye to the viewfinder be careful not to put your fingers or fingernails in your eye Focus brackets...

Page 30: ...s is attached the shutter release will be disabled Tutorial PhotographyandPlayback Auto Meter Off At default settings the viewfinder display and the aperture and shutter speed indicators in the control panel will turn off if no operations are performed for about six seconds auto meter off reducing the drain on the battery Press the shutter release button halfway to reactivate the display Exposure mete...

Page 31: ...escription Battery fully charged Battery partially discharged Low battery Ready fully charged spare battery blinks blinks Shutter release disabled Change battery Battery level not displayed when camera is powered by optional AC adapter 1 3 The exposure count displays in the control panel and view finder show the number of photographs that can be stored on the memory card Check the number of exposur...

Page 32: ... 2 Rotate the focus mode selector to AF autofocus 3 Check settings in the control panel The default settings for mode are listed below Option Default Flash sync mode Auto 40 Image quality JPEG Normal 34 Image size Large 35 Shooting mode Single frame 36 Autofocus mode Auto select 29 AF area mode Auto area AF 30 ...

Page 33: ...rso for support and place one foot half a pace ahead of the other to keep you upper body stable 4 2 Frame a photo in the viewfinder with the main subject po sitioned in any of the eleven focus areas Focus area Using a Zoom Lens Use the zoom ring to zoom in on the subject so that it fills a larg er area of the frame or zoom out to increase the area visible in the final photograph select longer focal l...

Page 34: ...may light 5 2 When the focus operation is complete the selected focus areas will be briefly high lighted a beep will sound and the in focus indicator will appear in the view finder the beep may not sound if the subject is moving While the shutter release button is pressed halfway focus will lock and the number of exposures that can be stored in the memory buffer will be displayed in the viewfinder Sel...

Page 35: ...To save battery power when the flash is not in use return it to its closed position by pressing it gently downward till the latch clicks into place For more information on using the flash see page 40 The Built in Flash If additional lighting is required for correct exposure in mode the built in flash will pop up automatically when the shutter release button is pressed halfway Flash range varies with ...

Page 36: ... in Flash If additional lighting is required for correct exposure in or mode the built in flash will pop automatically when the shutter release button is pressed halfway In addition to the D80 offers a choice of six Digital Vari Program modes Selecting a program automatically optimizes settings to suit the selected scene making creative pho tography as easy as rotating the mode dial Mode Description...

Page 37: ...er small objects The camera automatically focuses on the subject in the center focus area Use of a tripod is recommended to prevent blur Sports High shutter speeds freeze motion for dynamic sports shots in which the main subject stands out clearly The built in flash and AF assist illumina tor turn off automatically Night Landscape Slow shutter speeds are used to produce stunning night landscapes The...

Page 38: ...ed by rotating the main command dial or pressing the multi selector left or right To end playback and return to shooting mode press the shutter release button halfway Deleting Unwanted Photographs To delete the photograph currently displayed in the monitor press the button A confirmation dialog will be displayed Press the button again to delete the image and return to playback To exit without delet...

Page 39: ...to 48 Choose whether to blur background objects Mode A Aperture Priority Auto 49 Choose shutter speed and aperture manually Mode M Manual 50 Choose a metering method lock exposure adjust exposure and flash level Exposure 52 Make colors look natural Take photos under unusual lighting White Balance 58 See the Menu Guide for information on other operations that can only be performed in P S A and M mod...

Page 40: ...ly when shooting moving subjects in AF A autofocus mode If the lens does not support autofocus or the camera is unable to focus using autofocus use manual focus 32 A M Selection Autofocus with Manual Priority If the lens is equipped with A M selection or an M A M switch select A autofocus or M A autofocus with manual priority The AF Assist Illuminator If the subject is poorly lit the AF assist ill...

Page 41: ... contains fine details Example Focus area contains both foreground subject and distant buildings Example A field of flowers or other subjects that are small or lack variation in brightness Autofocus Mode Controls used button The following autofocus modes are available when the focus mode selector is set to AF Autofocus mode Description AF A Auto select default setting Camera automatically selects sin...

Page 42: ...or lock to the position This allows the multi selector to be used to select the focus area 3 Use the multi selector to select the focus area in the viewfinder or control panel while the exposure meters are active 18 The focus selector lock can be returned to the L locked po sition following selection to prevent the selected focus area from changing when the multi selector is pressed Custom Settings...

Page 43: ...om the shutter release button AF S autofocus modes 29 Focus will lock automatically when the in focus indicator appears and remain locked until you remove your finger from the shutter release button Focus can also be locked by pressing the AE L AF L button see below An AE L icon will be displayed in the viewfinder 3 Recompose the photograph and shoot Focus will remain locked between shots as long as...

Page 44: ...e between the lens mounting flange 11 and the focal plane is 46 5mm 1 83 in Manual Focus Controls used Focus mode selector lens focusing ring Manual focus is available for lenses that do not support autofocus non AF Nikkor lenses or when autofocus does not produce the desired results 29 To focus manually set the focus mode selec tor to M and adjust the lens focusing ring until the image displayed o...

Page 45: ...ory meaning that fewer such images can be stored on the memory card Changes to image quality and size are reflected in the number of exposures remaining as displayed in the control panel and viewfinder 19 Small Image size Large High Image quality Low Image Quality and Size JPEG Fine JPEG Normal JPEG Basic Large file size Small file size S M L Image Quality Image Size and File Size See the Appendix for...

Page 46: ...JPEG image NEF RAW JPEG Normal Two images are recorded one NEF RAW image and one normal quality JPEG im age NEF RAW JPEG Basic Two images are recorded one NEF RAW image and one basic quality JPEG image Image quality can be set by pressing the QUAL button and rotating the main command dial until the desired setting is displayed in the control panel Image quality can also be adjusted from the shoot ...

Page 47: ...om the shooting menu 81 File Names Photographs are stored as image files with names of the form DSC_nnnn xxx where nnnn is a four digit number between 0001 and 9999 assigned automatically in ascending order by the camera and xxx is one of the following three letter extensions NEF for NEF images or JPG for JPEG images The NEF and JPEG files recorded at a setting of NEF JPEG have the same file names bu...

Page 48: ... manual focus manual or shutter priority auto exposure a shutter speed of s or faster and memory remaining in memory buffer To choose a shooting mode press the button until the desired setting is displayed Buffer Size The number of images that can be stored in the memory buffer at cur rent settings is shown in the exposure count displays in the viewfinder and control panel while the shutter release bu...

Page 49: ...ress the shutter release button halfway to focus and then press the button the rest of the way down to start the self tim er The self timer lamp will start to blink and a beep will begin to sound Two seconds before the photograph is taken the self timer lamp will stop blinking and the beeping will become more rapid At default settings the shutter will be released ten seconds after the timer starts...

Page 50: ...ter release button on the remote control can be used to release the shutter 4 In modes other than M remove the viewfinder eyepiece cup and insert the supplied DK 5 eyepiece cap as shown This pre vents light entering via the viewfinder interfering with expo sure 5 Aim the transmitter on the ML L3 at the infrared receiver on the camera and press the shutter release button on the ML L3 In delayed remot...

Page 51: ... flash during the two second count down in delayed remote mode will cancel the two second timer Wait for the flash to charge and then press the shutter release button on the ML L3 to restart the timer In flash sync modes that support red eye reduction the red eye reduction lamp will light for about one second before the shutter is released In delayed remote mode the self timer lamp will blink for two...

Page 52: ...es The flash will pop up as required when the shutter release button is pressed halfway and fire when a photograph is taken Using the Built in Flash P S A and M Modes 1 Rotate the mode dial to select the desired mode 2 Press the button to raise the flash 3 Press the button and rotate until the desired flash mode is displayed in the control panel 41 4 Select a metering method and set exposure 5 Take pi...

Page 53: ... reduction Red eye reduction Use for portraits Red eye reduction lamp lights before flash fires reducing red eye AUTO Auto flash When lighting is poor or subject is back lit flash pops up automatically when shutter release button is pressed halfway and fires as required If this icon is not displayed flash will only pop up when button is pressed SLOW Slow sync Shutter speed slows automatically to captur...

Page 54: ... lenses If the flash fires in continuous shooting mode 36 only one picture will be taken each time the shutter release button is pressed The shutter release may be briefly disabled to protect the flash after it has been used for several con secutive shots The flash can be used again after a short pause See the Appendix for more about the built in flash including flash control shutter sync speeds and rang...

Page 55: ...Program modes is Auto the default setting for P S A and M modes 100 ISO sensitivity can be selected by pressing the ISO button and rotating the main command dial until the desired setting is displayed in the control panel ISO sensitivity can also be adjusted from the shooting menu 83 High ISO NR 83 The higher the ISO sensitivity the more likely pictures are to be subject to noise in the form of ra...

Page 56: ...34 81 JPEG Normal Image size 35 81 Large ISO sensitivity 43 83 Digital Vari Program Auto P S A M 100 White balance 58 60 82 Auto Autofocus mode 29 AF A Focus area 30 Center Metering 52 Matrix AE lock hold 53 Off Fine tuning reset to 0 Choose color temp re set to 5000K Focus area not displayed if Auto area AF is se lected for Custom Setting 2 AF area mode Option Default Flexible program 47 Off Exposu...

Page 57: ...s the roles played by the main and sub com mand dials in setting shutter speed and aperture P S A and M modes offer control over a variety of advanced settings including exposure 52 white balance and image optimization Each of these modes offers a different degree of control over shutter speed and aperture Mode Description P Programmed auto 47 Camera sets shutter speed and aperture for optimal exposu...

Page 58: ...e relationship between shutter speed and aperture can be likened to filling a cup from a tap In this analogy the amount of water needed to fill the cup is the amount of light needed for optimal exposure If the cup overflows the picture will be overexposed If the cup doesn t fill the picture will be underexposed The amount the tap is opened is the aperture and the length of time the tap is opened the s...

Page 59: ...me exposure While flexible program is in ef fect a indicator appears in the control panel To restore default shutter speed and aperture settings rotate the main command dial until the indi cator is no longer displayed choose another mode or turn the camera off In this mode the camera automatically adjusts shutter speed and aperture for optimal ex posure in most situations This mode is recommended fo...

Page 60: ...eds to suggest motion by blurring moving subjects high shutter speeds to freeze motion To take photographs in shutter priority auto 1 Rotate the mode dial to S 2 Rotate the main command dial to choose the desired shutter speed 3 Frame a photograph focus and shoot Flashing Shutter Speed Display See Camera Error Messages and Displays 132 for information on what to do if flashing or indicators appear ...

Page 61: ...ture Priority Auto Depth of Field Depth of field is the distance to which objects behind and in front of the focus point appear to be in focus Large apertures low f numbers reduce depth of field blurring objects behind and in front of the main subject Small apertures high f numbers increase depth of field bringing out details in the background and foreground note that depth of field is also influenced ...

Page 62: ...g exposure displays see below 3 Frame a photograph focus and shoot Electronic Analog Exposure Display If a CPU lens is attached and a shutter speed other than is selected the electronic analog ex posure displays in the control panel and viewfinder show whether the photograph would be under or over exposed at current settings Depending on the option chosen for Custom Setting 10 EV step 89 the amount...

Page 63: ...button is held down Optional ML L3 remote control required 123 Select mode M choose a shutter speed of bulb and then select delayed remote or quick response remote mode 38 Shutter opens when the shutter release button on the remote control is pressed and until the button is pressed a second time or remains open for thirty minutes To prevent loss of power before the exposure is complete use a fully...

Page 64: ...imately 2 5 of frame Circle is centered on current focus area making it possible to meter off center subjects if non CPU lens is used or if Auto area AF is selected for Custom Setting 2 87 camera will meter center focus area Ensures that subject will be correctly exposed even when background is much brighter or darker To choose a metering method press the button and rotate the main command dial unt...

Page 65: ...s area press the AE L AF L button to lock exposure While exposure lock is in effect an AE L indicator will appear in the viewfinder 3 Keeping the AE L AF L button pressed recompose the photo graph and shoot Adjusting Shutter Speed and Aperture While exposure lock is in effect the following settings can be adjusted without altering the metered value for exposure Mode Setting Programmed auto Shutter sp...

Page 66: ...yed in the control panel Exposure compen sation can be set to values between 5EV underexposure and 5EV overexposure in increments of EV In general choose positive values to make the subject brighter negative values to make it darker At values other than 0 a icon will be displayed after you release the button The current value for exposure compensation will be displayed in the viewfinder when the bu...

Page 67: ...sed to make the main subject appear brighter or reduced to prevent un wanted highlights or reflections Press the button and rotate the sub command dial until the desired value is displayed in the control panel Flash compensation can be set to values between 3EV darker and 1EV brighter in increments of EV In general choose positive values to make the subject brighter negative values to make it darke...

Page 68: ...command dial to choose the number of shots in the bracketing sequence two or three Progress indicator No of shots 2 Press the button and rotate the sub command dial to choose the bracketing incre ment from values between 0 3EV and 2 0EV Bracketing increment Understanding the Bracketing Display Number of shots Progress indicator Description 3 shots unmodified negative positive 2 shots unmodified posi...

Page 69: ... is turned off before all shots in the sequence have been taken bracketing will resume from the next shot in the sequence when the camera is turned on 3 Compose a photograph focus and shoot The camera will vary exposure and flash level with each shot At default settings the first shot will be taken at the current values for exposure and flash compensation and the following shots at modified values If t...

Page 70: ...rature from list of values 59 White balance preset Use gray or white object or existing photograph as reference for white balance 59 To select a value for white balance press the WB button and rotate the main command dial until the desired setting is displayed in the control panel White balance can also be adjusted from the shooting menu 82 Fine Tuning White Balance Controls used WB button sub com...

Page 71: ...ave to be heated to radiate light in the same wavelengths While light sources with a color temperature in the neighborhood of 5 000 5 500K appear white light sources with a lower color temperature such as incandescent light bulbs appear slightly yellow or red Light sources with a higher color temperature appear tinged with blue The color temperatures for each of the white bal ance settings support...

Page 72: ...it fills the viewfinder and press the shutter release button all the way down The cam era will measure a value for white balance and use this value when preset white balance is selected No photograph will be recorded To exit without measuring a new value for white balance press the WB button 5 If the camera was able to measure a value for white balance the displays will flash as shown at right for ab...

Page 73: ... on the Camera The following operations can be performed in full frame playback To Use Description View additional photographs or Press multi selector to right or rotate main command dial right to view photographs in order recorded Press multi selector left or rotate main command dial left to view photographs in re verse order View photo infor mation or Press multi selector up or down or rotate su...

Page 74: ... 79 4 ISO sensitivity2 43 5 White balance white balance fine tuning 58 6 Image size image quality 34 35 7 Tone compensation 80 8 Sharpening 80 9 Color mode hue 80 10 Saturation 80 11 Image comment3 104 12 Frame number total number of images Shooting Data Page 2 1 Filter name is displayed if photo was taken with filter option se lected for Optimize image Black and white Custom 2 Displayed in red if I...

Page 75: ...ect photo Protect highlighted photograph 65 Exit to shooting mode Shutter button or To turn monitor off and return to shooting mode press shutter release button halfway or press the button View menus View menus 74 Highlights Highlights are the brightest portions of the image Details may be lost washed out in areas of highlights that are over exposed 1 Protect status 65 2 Retouch indicator 109 3 Ima...

Page 76: ...image not visible View other areas of image in monitor Keep multi selector pressed to scroll rapidly to other areas of frame Navigation window is displayed when zoom ratio is altered area currently visible in monitor is indicated by yellow border View other images Rotate main command dial to view same location in other im ages at current zoom ratio Cancel zoom Return to full frame playback Delete ...

Page 77: ...t The photograph will be marked with a icon To remove protection from the photograph so that it can be deleted press the but ton when the photograph is displayed in full frame or zoom playback or highlighted in the thumbnail list To remove protection from all images in the folder or folders currently se lected for Playback Folder press the and buttons together for about two seconds Deleting Indivi...

Page 78: ...amera off Always turn the camera off before con necting or disconnecting the A V cable 3 Connect the A V cable as shown Connect to camera Connect to video device Video yellow Audio white 4 Tune the television to the video channel 5 Turn the camera on During playback images will be displayed on the television or recorded to video tape the camera moni tor will remain off Use an AC Adapter Use of an EH ...

Page 79: ...ble separately Before connecting the camera select the USB item in the camera setup menu and choose a USB option as described below Computer operating system USB Windows XP Home Edition Windows XP Professional Choose PTP or Mass Storage Mac OS X Windows 2000 Professional Choose Mass Storage Do NOT select PTP If PTP is selected when the camera is connected the Windows hardware wizard will be displa...

Page 80: ...d from the system as described below Windows XP Home Edition Windows XP Professional Click the Safely Remove Hardware icon in the taskbar and select Safely remove USB Mass Storage Device Windows 2000 Professional Click the Unplug or Eject Hardware icon in the taskbar and select Stop USB Mass Storage Device Mac OS X Drag the camera volume NIKON D80 into the Trash During Transfer Do not turn the cam...

Page 81: ...enter If the center sup ports DPOF photographs can be selected for printing using Print Set Transfer pictures 67 and print them from a computer using PictureProject or Capture NX available separately 123 Note that this is the only method available for printing RAW NEF pictures Printing Via Direct USB Connection JPEG photographs can be printed directly from a camera connected to a PictBridge printe...

Page 82: ...sert the connectors at an angle Connect the camera directly to the printer do not connect the cable via a USB hub or keyboard 5 Turn the camera on A welcome screen will be displayed fol lowed by the PictBridge playback display Proceed to Printing Pictures One at a Time 71 or Printing Multiple Pictures 72 Press the multi selector left or right to view additional photographs or press the but ton to ...

Page 83: ...A3 or A4 then press OK to select and return to print menu No of Copies Menu shown at right will be displayed Press multi selector up or down to choose number of copies maximum 99 then press OK to select and return to print menu Border Menu shown at right will be displayed Press multi selec tor up or down to choose print style from Printer Default default for current printer Print with Border print...

Page 84: ...se page size border and time stamp options as described on preced ing page warning will be displayed if selected page size is too small To start printing highlight Start Printing and press OK PictBridge menu will be displayed when printing is complete Printing Selected Photographs Choosing Print Select displays the menu shown in Step 1 1 Scroll through pictures To display current picture full scre...

Page 85: ... and aperture on all pictures in print order Imprint date Print date of recording on all pic tures in print order To complete print order and exit highlight Done and press OK To print the current print order when the camera is connected to a PictBridge printer se lect Print DPOF in the PictBridge menu and follow the steps in Printing Selected Photo graphs to modify and print the current order 72 D...

Page 86: ...owing options Option Description Selected Delete selected photographs see below All Delete all photographs Selecting Multiple Pictures To select multiple pictures for deletion slide shows or the Hide image option 1 Highlight picture To view highlighted pic ture full frame press button 2 Select highlighted picture Selection shown by icon 3 Repeat steps 1 2 to select additional pic tures To deselect...

Page 87: ...ta tion 108 will be displayed in wide landscape orientation Slide Show Play pictures back one after the other in an automated slide show A Pictmotion option is available with transitions panning and zoom ef fects and background music background music will only be audible if the camera is connected to a television set 66 The recommended steps involved in creating a slide show are shown below 1 Sele...

Page 88: ...se a frame interval or playback pattern Highlight Change settings and press the multi selector right then choose a frame interval or playback pattern as described below Standard selected in Step 2 To change the interval between slides from the default setting of two seconds highlight Frame interval and press the multi selector right Highlight one of the following options and press OK to select the...

Page 89: ...the photo info displayed This option is not available if Pictmotion is selected in Step 2 Pause slide show Pause the slide show Exit to playback menu End the slide show and return to the playback menu Exit to playback mode End the slide show and return to full frame 61 or thumbnail playback 63 Exit to shooting mode Shutter release Press the shutter release button halfway to turn the monitor off and...

Page 90: ... Attributes for Hidden Images Hidden images have hidden and read only status when viewed on a Windows computer In the case of NEF JPEG images this marking applies to both NEF RAW and JPEG images Print Set Choose Select set to select photographs for printing on a PictBridge printer or DPOF compatible device 73 Choose Deselect all to remove all photos from the current print order Protected and Hidde...

Page 91: ...ntrast sharpening and other settings according to how photographs will be used or the type of scene Option Description N Normal default Recommended for most situations SO Softer Softens outlines producing natural results suitable for portraits or retouching on a computer VI Vivid Enhances saturation contrast and sharpness to produce vivid images with vibrant reds greens and blues VI More vivid Max...

Page 92: ...3 the degrees refer to the color wheel often used to express hue Positive values make reds more orange greens more blue and blues more purple Negative values make reds more purple blues more green and greens more yellow Default setting 0 Tone compensation Control contrast Lower settings prevent loss of detail in highlights under harsh lighting or in direct sunlight Higher settings preserve detail ...

Page 93: ... Off No color filter effect Yellow Enhances contrast Can be used to tone down the brightness of the sky in land scape photographs Orange produces more contrast than yellow red more contrast than orange Orange Red Green Softens skin tones Can be used for portraits Black and white indicators appear in the control panel and viewfinder when Black and white is selected for Optimize image 5 7 Image Quality...

Page 94: ...e previous source photo highlight This image and press multi selector right 5 Highlight folder 6 Display images in selected folder 7 Highlight photograph 8 Set preset white balance to value for high lighted photograph and return to shooting menu Images displayed may include those created with other cameras but only photographs created with D80 can be used as source for preset white balance Note th...

Page 95: ...age displayed in the monitor may not show the effects of noise reduction High ISO NR All Modes Photographs taken at high sensitivities can be processed to reduce noise Choose from the following options Option Description Normal default Noise reduction takes effect at sensitivities over ISO 400 Choose Low for less noise reduction High for more noise reduction Low High Off Noise reduction turns off unl...

Page 96: ...ose the number of ex posures that will be combined to form a single photograph Press OK to return to the multiple exposure menu 3 Highlight Auto gain and press the multi selector to the right 4 Highlight one of the following options and press OK Option Description On default Gain adjusted to correct exposure according to the num ber of exposures recorded gain for each exposure is set to for two ex...

Page 97: ...ery is exhausted The multiple exposure is deleted A mode other than P S A or M is selected If shooting ends before the specified number of exposures have been taken a multiple expo sure will be created from the exposures that have been recorded to that point If Auto gain is on gain will be adjusted to reflect the number of exposures actually recorded 7 Take the remaining exposures The icon will disa...

Page 98: ...R Reset 86 1 Beep 86 2 AF area mode 87 3 Center AF area 87 4 AF assist 87 5 No memory card 88 Option 6 Image review 88 7 ISO auto 88 8 Grid display 89 9 Viewfinder warning 89 10 EV step 89 To display the following options select Full for CSM Setup menu Option 11 Exposure comp 89 12 Center weighted 90 13 Auto BKT set 90 91 14 Auto BKT order 91 15 Command dials 91 16 FUNC button 92 93 17 Illuminatio...

Page 99: ...size of the center focus area Option Description Viewfinder display Normal zone default Focus on a specific subject in a small area without other nearby objects interfering with focus Wide zone Focus on moving subjects and other objects that are difficult to track Not available when Auto area AF is selected for Custom Setting 2 AF area mode See Focus for more information on focus settings 28 4 AF Ass...

Page 100: ... not be achieved at the selected value flash level is adjusted appropriately The maximum value for auto ISO sensitivity can be selected using the Max sensitivity option In modes P and A sensitivity will only be adjusted if underexposure would result at the shutter speed selected for Min shutter speed When On is selected the control panel and viewfinder show ISO AUTO When sensitivity is altered from ...

Page 101: ...l If On is selected the 0 at the center of the exposure display will blink even when exposure compensation is set to 0 This option is not available in mode M 8 Grid Display All Modes Select On to display grid lines in the viewfinder to assist in framing pho tographs 6 The default option is Off 9 Viewfinder Warning All Modes Select On the default option to display the following warnings in the viewfind...

Page 102: ... images bracketing the current white balance setting Only one shot is required to complete the bracketing se quence White balance bracketing is recommended when shooting under mixed light ing or experimenting with different white balance settings Not available at a white balance of Choose color temp or at image qualities of NEF RAW NEF JPEG Fine NEF JPEG Normal or NEF JPEG Basic For information on ...

Page 103: ...keting is activated Bracketing can also be cancelled by performing a two button reset 44 although in this case the bracketing program will not be restored the next time bracketing is activated White Balance Bracketing Selecting NEF RAW NEF JPEG Fine NEF JPEG Normal or NEF JPEG Basic for image quality 34 or Choose color temp for white balance 58 cancels white balance bracketing Bracketing Programs ...

Page 104: ...hile the FUNC button is pressed Matrix metering Matrix metering is activated while the FUNC button is pressed P S A and M modes only Center weighted Center weighted metering is activated while the FUNC button is pressed P S A and M modes only Spot metering Spot metering is activated while the FUNC button is pressed P S A and M modes only FV Lock This feature is used to lock flash output preventing ...

Page 105: ...n the power switch is rotated to If On is selected the backlight will remain on while the exposure meters are active note that this will increase the drain on the battery Using FV Lock with Optional Speedlights FV lock is also available with SB 800 SB 600 and SB R200 Speedlights available separately Set the Speedlight to TTL mode the SB 800 can also be used in AA and A modes see the Speedlight man...

Page 106: ...o lock focus and exposure press and rotate the sub com mand dial to select the focus area AE L AF area Press the AE L AF L button to lock exposure press and rotate the sub command dial to select the focus area AF L AF area Press the AE L AF L button to lock focus press and rotate the sub command dial to select the focus area AF ON AF area Press the AE L AF L button to initiate autofocus press and ...

Page 107: ...trast with the background If Off is selected the focus area is not highlighted If On is selected the focus area will always be highlighted although it may be difficult to see against the background 22 Built in Flash P S A and M Modes Only Choose a flash control mode for the built in flash TTL default Flash output is adjusted automatically in response to shooting conditions Times The number of times the...

Page 108: ...ontrol panel flash mode display Note that the built in flash must be raised to emit monitor preflashes Group A Group B Choose a flash control mode for all flash units in Group A or B TTL i TTL mode Choose a Comp value between 3 0 and 3 0EV in steps of EV AA Auto aperture Choose a flash compensation Comp value between 3 0 and 3 0EV in steps of EV SB 600 and SB R200 flash units will not fire when this optio...

Page 109: ... units to pick up the monitor preflashes from the built in flash particular care is required when not using a tripod Be sure that direct light or strong reflec tions from the remote flash units do not enter the camera lens in TTL mode or the photocells on the remote flash units AA mode as this may interfere with exposure To prevent timing flashes emitted by the built in flash from appearing in photograph...

Page 110: ...an s because the actual shutter speed may be slightly slower than displayed in P and A modes Auto FP may not always be activated at a shutter speed of s Choose to enable fill flash when taking portraits under bright light or when taking photographs at Large aper tures Auto FP High Speed Sync is not available when using the built in flash The default setting is Off 26 Modeling Flash P S A and M Modes O...

Page 111: ... of the shutter release delay in self timer mode 37 The default setting is 10 s 30 Remote On Duration All Modes Choose how long the camera will wait for a signal from the remote before cancelling delayed or quick response remote modes 38 Choose shorter times for longer battery life The default setting is one minute 31 Exp Delay Mode All Modes Select On to delay shutter release until about 0 4s aft...

Page 112: ... camera shows the level of AA batteries as follows Control panel Viewfinder Description Batteries fully charged Low battery Ready fresh batteries blinks blinks Shutter release disabled Insert fresh batteries 32 MB D80 Batteries All Modes To ensure that the camera functions as expected when AA batteries are used in the optional MB D80 battery pack match the option selected in this menu to the type ...

Page 113: ... Auto image rotation 108 Not available at battery levels of or below or when camera is powered by optional MB D80 battery pack with AA batteries CSM Setup Menu Choose the options displayed in the menus Option Description Simple default Display only basic options in the Custom Settings 86 and setup menus see above Other menus list all options Full Display all options in all menus My menu Display on...

Page 114: ...dit additional menus 5 Highlight Done in the list of menu names and press OK to return setup menu Format Memory Card Select Yes to format the memory card Note that this permanently de letes all photographs and any other data the card may contain Be sure that any valued files have been copied to a computer before format ting Formatting Memory Cards Do not turn the camera off or remove the memory card...

Page 115: ...est De Deutsch German En English English Es Español Spanish Fi Suomi Finnish Fr Français French It Italiano Italian Nl Nederlands Dutch Pl Polski Polish Pt Português Portuguese Ru Русский Russian Sv Svenska Swedish Traditional Chinese Simplified Chinese Japanese Korean The Clock Battery The camera clock is powered by an independent rechargeable power source which is charged as necessary when the ma...

Page 116: ...etup menu Input comment The following dialog will be displayed Input a com ment as described below Image Comment Keyboard area Use multi selector to highlight letters press to select Namearea Comment appears here To move cursor press but ton and use multi selector Comments can be up to thirty six characters long Any additional characters will be de leted To delete the character at the current curs...

Page 117: ... if the folder NIKON is selected for Select folder photographs in all folders named NIKON 100NIKON 101NIKON 102NIKON etc will be visible when Current is selected for Playback folder 75 Renaming changes all folders with the same name but leaves the folder numbers intact New Create a new folder and name it as described in Naming Folders below Rename Select a folder from a list and rename it as descr...

Page 118: ...the next photograph taken if the current folder already contains photographs a new folder will be created File Numbering If the current folder is numbered 999 and contains 999 photographs or a photograph numbered 9999 the shutter release will be disabled If File no sequence is on turn it off and format the memory card or insert another memory card in the camera Mirror Lock Up Lock the mirror in the...

Page 119: ...ifferent lenses or at different apertures Reference images can not be viewed using computer imaging software A grid pattern is displayed when reference im ages are viewed on the camera Battery Info View information on the EN EL3e rechargeable Li ion battery currently inserted in the camera If the camera is powered by an optional MB D80 battery pack containing EN EL3e batteries information for each b...

Page 120: ...information on camera orientation allowing them to be rotated auto matically during playback 61 or when viewed in Capture NX avail able separately 123 or PictureProject The following orientations are recorded In continuous mode 36 orientation recorded for first shot applies to all images in same burst even if camera orientation is changed during shooting Camera orientation is not recorded when Off i...

Page 121: ...with Black and white selected for Optimize image Except in the case of Image overlay the photographs to be copied can be selected in full frame playback or from the retouch menu To copy photos during full frame playback 1 Display photo in full frame playback 61 2 Display retouch menu 3 Highlight menu item 4 Display retouch options Image overlay is not available during full frame playback If sub me...

Page 122: ... sub command dial moves cursor vertically To view selected picture full frame press and hold button To exit to playback mode without creating modified copy press button D Lighting D lighting brightens shadows making it ideal for dark or back lit photographs After Before Press the multi selector up or down to choose the amount of correction performed The effect can be previewed in the edit display Pr...

Page 123: ...itor is indicated by yellow border Create copy If the camera detects red eye in the selected photograph a copy will be created that has been processed to reduce its effects No copy will be created if the camera is unable to detect red eye Trim Choosing this option displays the selected image full frame as shown below To create a cropped copy of the selected image To Use Description Zoom in and out ...

Page 124: ...amount of green right to increase the amount of red left to increase the amount of blue or down to increase the amount of magenta The effect is displayed in the monitor together with red green and blue histograms giving the distribution of tones in the copy 63 Small Picture Create a small copy of the selected picture The following sizes are available Option Description 640 480 Suited to television ...

Page 125: ...to previous menu 5 Highlight Select picture 6 Display selection screen 7 Select pictures 74 Selected pictures are marked with icon 8 Confirmation dialog displayed 9 Highlight Yes 10 Copy photos and return to retouch menu To return to Step 7 without creating copies highlight No and press OK Press MENU to exit to retouch menu without creating copies Viewing Small Pictures Small pictures are indicated...

Page 126: ...1 highlighted 2 Press OK A picture selection dialog will be displayed 3 Press the multi selector left or right to highlight the first photo graph in the overlay To view the highlighted photograph full frame press and hold the button 4 Press OK to select the highlighted image and return to the preview display The selected image will appear as Image 1 5 Optimize exposure for the overlay by pressing t...

Page 127: ...view After an overlay is created the camera will enter full frame playback 61 with the new picture displayed in the monitor Image Overlay Only RAW photographs created with the D80 can be selected for image overlay Other images are not displayed on the selection screen Hidden images are also not displayed on the selection screen and can not be selected The overlay has the same photo info including ...

Page 128: ...ed and proven to operate within its operational and safety requirements THE USE OF NON NIKON ACCESSORIES COULD DAMAGE YOUR CAMERA AND MAY VOID YOUR NIKON WARRANTY Picture Angle and Focal Length The size of the area exposed by a 35 mm camera is 36 24 mm The size of the area exposed by the D80 in contrast is 23 6 15 8 meaning that the picture angle of a 35 mm camera is approximately 1 5 times that o...

Page 129: ... 8DIF 400mmf 2 8DIF 500mmf 4DIF 600mm f 4D IF Autofocus not available withTC 17E II TC 20E II AF S teleconverter 6 With maximum effective aperture of f 5 6 or faster 7 If AF 80 200mm f 2 8S 35 70mm f 2 8S new model 28 85mm f 3 5 4 5S or 28 85mm f 3 5 4 5S is zoomed while focusing at mini mum range image on matter screen in viewfinder may not be in focus when in focus indicator is displayed Focus m...

Page 130: ... 8G AF S VR DX 18 200mm f 3 5 5 6G AF S IF ED 24 85mm f 3 5 4 5G AF S ED 28 70mm f 2 8D AF S DX ED 12 24mm f 4D AF ED 18 35mm f 3 5 4 5D AF 20 35mm f 2 8D AF S VR ED 24 120mm f 3 5 5 6G AF IF ED 28 200mm f 3 5 5 6G Lenses that block the subject s view of the AF assist illuminator can interfere with red eye reduction The Built in Flash The built in flash can be used with CPU lenses with focal length...

Page 131: ...l 180 left and 90 right for bounce flash or close up pho tography The SB 800 can be rotated 7 below the horizontal Auto power zoom 24 105 mm and 24 85 mm respectively ensures that the illuminating angle is adjusted in accord with lens focal length The built in wide panel can be used for an angle of 14mm the SB 800 also supports 17 mm An illuminator is included to assist in adjusting settings in the...

Page 132: ...peed Sync6 FV Lock AF assist for multi area AF2 Auto zoom Auto ISO 1 Options shown are only available when SU 800 is used to control other flash units 2 CPU lens required 3 Standard i TTL for Digital SLR is used with spot metering or when se lected with Speedlight Otherwise i TTL Balanced Fill Flash for Digital SLR is used 4 Use Speedlight controls to select flash mode Non TTL auto is selected aut...

Page 133: ... at ISO sensitivities between 100 and 1600 Higher values may not produce the desired results at some ranges or apertures If the flash ready indicator blinks for about three seconds after a photograph is taken the flash has fired at full power and the photograph may be underexposed The optional SB 800 and SB 600 Speedlights and SU 800 wireless Speedlight commander provide ac tive AF assist illuminatio...

Page 134: ...er is used when the subject is framed against a bright light or when a bright light source is in the frame Center weighted metering is recommended with filters with exposure factors filter factors over 1 Y44 Y48 Y52 O56 R60 X0 X1 C PL ND2S ND4 ND4S ND8 ND8S ND400 A2 A12 B2 B8 B12 Approved Memory Cards The following SD memory cards have been tested and approved for use in the D80 All cards of the des...

Page 135: ...ove the camera battery cover as shown at right EH 5 AC adapter Use to power the camera for extended periods 35 Remote controls and cords MC DC1 remote cord Prevents blur caused by camera shake and features a shutter release button lock for long time exposures When connecting the MC DC1 open the remote cord connec tor cover and insert the cord as shown To prevent water from entering the camera keep...

Page 136: ...r salt with a cloth lightly damp ened in distilled water and dry thoroughly Important Dust or other foreign matter inside the camera may cause damage not covered under warranty Lens mirror and viewfinder These elements are made of glass and are easily damaged Remove dust and lint with a blower If using an aerosol blower keep the can vertical to prevent the discharge of liquid To remove fingerprints...

Page 137: ...is not available at battery levels of or below while recording a multiple ex posure or when using an optional MB D80 battery pack with AA batteries The menu shown at right will be displayed 3 Highlight On and press OK The message shown at right will be displayed in the monitor and a row of dashes will appear in the control panel and viewfinder To restore normal operation without inspecting the low ...

Page 138: ...side the camera this foreign matter may adhere to the low pass filter where it may appear in photographs taken under certain conditions To protect the camera when no lens is in place be sure to replace the body cap provided with the camera being careful to first remove all dust and other foreign matter that may be adhering to the body cap Should foreign matter find its way onto the low pass filter cle...

Page 139: ...ct memory or internal circuitry To prevent an accidental interruption of power avoid carrying the product from one location to another while the AC adapter is connected Lens contacts Keep the lens contacts clean Cleaning When cleaning the camera body use a blower to gently remove dust and lint then wipe gently with a soft dry cloth After using the camera at the beach or seaside wipe off any sand or...

Page 140: ... the battery from the camera be sure to replace the terminal cover Charge the battery before use When taking photographs on important occasions ready a spare EN EL3e battery and keep it fully charged Depending on your location it may be difficult to purchase replacement batteries on short notice On cold days the capacity of batteries tends to decrease Be sure the battery is fully charged before taki...

Page 141: ...de dial to another setting or insert memory card Note that Battery info option is only available when camera is powered by EN EL3e battery 107 Image size can not be changed Image quality set to NEF RAW 34 Metering can not be changed Digital Vari Program mode selected or autoexposure lock in effect 24 94 Exposure compensation not avail able Choose mode P S or A 45 Can not measure white balance Subje...

Page 142: ...Custom Setting 2 AF area mode set to Auto area AF or Dynamic area select center focus area Choose On for Custom Setting 4 AF assist Illuminator has turned off automatically Illuminator may become hot with continued use wait for lamp to cool down 24 29 87 87 Shutter release is disabled Memory card is full locked or not inserted Flash is charging Camera is not in focus CPU lens with aperture ring att...

Page 143: ... playback RAW image is not played back Photo was taken at image quality of NEF JPEG 34 Some photos are not displayed during playback Message displayed stating that no images are available for playback Select All for Playback folder Note that Current will automatically be selected when next photo is taken 75 Tall portrait orientation photos are displayed in wide landscape orientation Select On for ...

Page 144: ...Delete photographs Insert new memory card 33 65 74 15 blinks Camera unable to focus using autofocus Recompose photo or focus manu ally 22 32 Subject too bright photo will be overexposed Choose lower ISO sensitivity Increase shutter speed Choose smaller aperture larger f number Use optional Neutral Density ND filter 43 48 50 49 50 122 Subject too dark photo will be underexposed Choose higher ISO sen...

Page 145: ...65 74 CARD IS NOT FORMATTED blinks Memory card has not been formatted for use in D80 Highlight Format and press OK to format memory card Format No FOLDER CONTAINS NO IMAGES Memory card is empty Current folder is empty Insert another card Set Playback folder to All 15 75 ALL IMAGES HIDDEN All photos in current folder are hidden Set Playback folder to All or use Hide image to reveal photos 75 77 FIL...

Page 146: ...le Format for Digital Still Cameras version 2 21 a standard in which information stored with photographs is used for optimal color reproduction when the images are output on Exif compliant printers PictBridge A standard developed through cooperation with the digital camera and printer industries allowing photographs to be output directly to a printer without first transferring them to a computer Av...

Page 147: ...lay 9 Viewfinder warning 10 EV step 11 Exposure comp 12 Center weighted 13 Auto BKT set 14 Auto BKT order 15 Command dials 16 FUNC button 17 Illumination 18 AE L AF L 19 AE lock 20 Focus area 21 AF area illumination 22 Built in flash 23 Flash warning 24 Flash shutter speed 25 Auto FP 26 Modeling flash 27 Monitor off 28 Auto meter off 29 Self timer 30 Remote 31 Exposure delay mode 32 MB D80batteries ...

Page 148: ...e Auto Fine tuning 0 Choose color temp 5 000K ISO sensitivity AUTO 100 Multiple exposure Off Other settings Shooting mode Single frame Focus area Center Center Focus lock Off AE lock hold Off Autofocus mode AF A Metering Matrix Flexible program Off Exposure compensation Off 0 0 Bracketing Off 0 frames Flash mode Auto Auto Slow1 Fill flash Flash compensation Off 0 0 FV lock Off 1 Auto slow sync ...

Page 149: ...10 EV step 1 3 step 11 Exposure comp Off 12 Center weighted ø8mm 13 Auto BKT set AE flash 14 Auto BKT order MTR Under over 15 Command dials Off 16 FUNC button ISO display 17 Illumination Off 18 AE L AF L AE AF lock 19 AE lock Off 20 Focus area No wrap 21 AF area illumination Auto 22 Built in flash TTL 23 Flash warning On 24 Flash shutter speed 1 60 25 Auto FP Off 26 Modeling flash Off 27 Monitor off 20s 28 ...

Page 150: ... 13 0 76 6 NEF JPEG Basic3 L 13 6 72 6 M 13 0 76 6 S 12 7 78 6 NEF RAW 12 4 82 6 JPEG Fine L 4 8 133 23 M 2 7 233 100 S 1 2 503 100 JPEG Normal L 2 4 260 100 M 1 3 446 100 S 0 6 918 100 JPEG Basic L 1 2 503 100 M 0 7 876 100 S 0 3 1500 100 1 All figures are approximate File size varies with scene recorded and make of memory card 2 Maximum number of frames that can be taken before shooting stops at ...

Page 151: ...wn in the following graph F lens focal length 55mm 135mm F 55mm F 135mm The maximum and minimum values for EV vary with ISO sensitivity the above graph as sumes an ISO sensitivity of ISO 200 equivalent When matrix metering is used values over 16 EV are reduced to 16 EV Shutter speed Aperture ...

Page 152: ...V White Balance and Color Temperature Approximate color temperatures for each white balance setting are given below values may differ from color temperatures given by photo color meters White balance Fine tuning None 3 2 1 1 2 3 Auto 3 500K 8 000K Fine tuning added to value selected by camera Incandescent 3 000K 3 300K 3 200K 3 100K 2 900K 2 800K 2 700K Fluorescent 4 200K 7 200K 6 500K 5 000K 3 700...

Page 153: ...hutter speeds as slow as 30s when set to slow sync Aperture Sensitivity and Flash Range Flash range varies with sensitivity ISO equivalency and aperture Aperture at ISO equivalent of Range 100 125 160 200 250 320 400 500 640 800 1000 1200 1600 m ft 1 4 1 6 1 8 2 2 2 2 5 2 8 3 2 3 5 4 4 5 5 5 6 1 0 9 2 3 ft 3 in 30 ft 2in 2 2 2 2 5 2 8 3 2 3 5 4 4 5 5 5 6 6 3 7 1 8 0 7 6 5 2 ft 4 in 21 ft 4in 2 8 3...

Page 154: ... focus brackets and On Demand grid lines Optical fixed eye level pentaprism Reflex mirror Quick return Lens aperture Instant return with depth of field preview Depth of field preview When CPU lens is attached depth of field preview button stops aperture down to value selected by user A and M modes or by camera other modes Self timer Electronically controlled timer with 2 5 10 or 20 s duration Focus a...

Page 155: ...F Sync contact Flash X contact only flash synchronization at shutter speeds of up to s Flash control Auto aperture Available with SB 800 and CPU lens Non TTL auto Available with such Speedlights as SB 800 80DX 28DX 28 27 and 22s TTL TTL flash control by 420 segment RGB sensor i TTL balanced fill flash for digital SLR and standard i TTL fill flash for digital SLR available with built in flash SB 800 and S...

Page 156: ... Less than 85 no condensation Rated input AC 100 to 240 V 50 60 Hz Rated output DC 8 4 V 900 mA Supported batteries EN EL3e rechargeable Li ion batteries Charging time Approx 135 minutes Operating temperature 0 to 40 C 32 to 104 F Dimensions W D H Approx 90 35 58mm 3 5 1 4 2 3in Length of cord Approx 1 800mm 5ft 11in Weight Approx 80g 2 8oz excluding power cable Type Rechargeable lithium ion batte...

Page 157: ... servo autofocus Do not use focusing ring while camera is focusing Closest focus distance 0 45m 1 5ft at all zoom positions Aperture Seven blade diaphragm with auto aperture Aperture range f 3 5 22 at 18mm f 5 6 38 at 135mm Metering Maximum aperture Filter diameter 67mm P 0 75mm Dimensions W D H Approx 73 5mm diameter 86 5mm 2 9 3 4in Weight Approx 385g 13 6oz Lens hood HB 32 available separately ...

Page 158: ... single frame shooting mode continuous servo autofocus image quality set to JPEG Normal image size set to L shutter speed 1 250 s shutter release button pressed halfway for five seconds and focus cycled from infinity to minimum range once monitor turned on for four seconds after each shot built in Speedlight fired at full power with every other shot next shot taken after exposure meters have turned o...

Page 159: ...o sures Burst See Shooting mode continuous B W See Black and white C Camera Control Pro 68 123 Capture NX 106 123 Center AF area Custom Settings menu 87 Center weighted See Cen ter weighted Metering Center weighted Custom Settings menu 90 Clock 103 132 battery 103 clock not set indica tor 103 132 Close up 24 25 CLS See Creative Lighting System Color See Color mode Filter effects Hue Saturation Whit...

Page 160: ...ngs menu 100 Mass storage See USB Mass storage Matrix See Metering Memory buffer 36 83 138 Memory card 15 16 122 138 approved 122 capacity 138 formatting 16 102 lock 15 Menus 74 114 See also CSM Setup menu using 9 10 Metering 52 Mirror 16 106 124 125 126 Mirror lock up setup menu 106 Mode 45 51 See also Aperture priority auto Auto mode Digital Vari Program Programmed auto Manual mode Shutter priori...

Page 161: ... Image size Slide show See Slide show Slide show playback menu 75 77 Slow sync 41 Small picture retouch menu 112 113 Speedlight See Flash Spot See Metering sRGB See Color mode T Television 66 Time 14 103 See also Clock World time Time exposure See Long time exposures Thumbnail See Playback thumbnail TTL See Built in flash Tone compensation 80 Trim retouch menu 111 Two button reset 44 U USB 67 68 70...

Page 162: ...0RINTED IN 4HAILAND O REPRODUCTION IN ANY FORM OF THIS MANUAL IN WHOLE OR IN PART EXCEPT FOR BRIEF QUOTATION IN CRITICAL ARTICLES OR REVIEWS MAY BE MADE WITHOUT WRITTEN AUTHORIZATION FROM 20 2 4 ...

Reviews: