168
y
A
HDMI
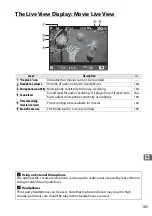
If the camera is connected to an HDMI device (
215), the view through the lens will appear
both in the camera monitor and on the HDMI device. Indicators in the monitor and on the
HDMI device can be hidden or displayed using the
R
button. To use live view when the
camera is connected to an HDMI-CEC device, select
Off
for
HDMI
>
Device control
in the
setup menu (
216). If
1920×1080; 60i
,
1920×1080; 50i
,
1280× 720; 60p
, or
1280×720;
50p
is selected for
Frame size/frame rate
, the monitor will turn off when the camera is
connected to an HDMI video device.
A
Remote Movie Recording
If
Record movies
is selected for Custom Setting g4 (
Assign shutter button
,
shutter-release buttons on optional remote cords or optional wireless remote controllers
(
309, 310) can be used to start movie live view and to start and end movie recording.
D
Recording Movies
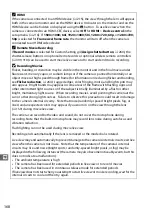
Flicker, banding, or distortion may be visible in the monitor and in the final movie under
fluorescent, mercury vapor, or sodium lamps or if the camera is panned horizontally or an
object moves at high speed through frame (for information on reducing flicker and banding,
see
Flicker reduction
264). Jagged edges, color fringing, moiré, and bright spots may
also appear. Bright bands may appear in some areas of the frame with flashing signs and
other intermittent light sources or if the subject is briefly illuminated by a flash or other
bright, momentary light source. When recording movies, avoid pointing the camera at the
sun or other strong light sources. Failure to observe this precaution could result in damage
to the camera’s internal circuitry. Note that noise (randomly-spaced bright pixels, fog, or
lines) and unexpected colors may appear if you zoom in on the view through the lens
(
159) during movie live view.
The camera can record both video and sound; do not cover the microphone during
recording. Note that the built-in microphone may record lens noise during autofocus and
vibration reduction.
Flash lighting can not be used during movie live view.
Recording ends automatically if the lens is removed or the mode dial is rotated.
Live view may end automatically to prevent damage to the camera’s internal circuits; exit live
view when the camera is not in use. Note that the temperature of the camera’s internal
circuits may rise and noise (bright spots, randomly-spaced bright pixels, or fog) may be
displayed in the following instances (the camera may also become noticeably warm, but this
does not indicate a malfunction):
•
The ambient temperature is high
•
The camera has been used for extended periods in live view or to record movies
•
The camera has been used in continuous release mode for extended periods
If live view does not start when you attempt to start live view or movie recording, wait for the
internal circuits to cool and then try again.
Summary of Contents for D7100
Page 62: ...34 X ...
Page 74: ...46 s ...
Page 82: ...54 ...
Page 90: ...62 k ...
Page 98: ...70 d ...
Page 116: ...88 V ...
Page 132: ...104 r ...
Page 146: ...118 J ...
Page 212: ...184 ...
Page 228: ...200 I ...


