Nice Apollo CBOX1K Manual Download Page 32

32

12.3 - Communication buses 

On the Slave operator, select Function -> Adv. Settings -> Remote Mst. Slv. 

Then select On -> Slave. The red LED associated with the Master/Slave 

connector will illuminate. 
The Master/Slave pair is now configured. The Slave gate operator will perform 

identical open/close/stop functions in tandem with the Master gate operator. 

12.4 - Programming the plug-in receiver and remote controls 

Nice Plug in Receiver: 

The Nice 433Plug-In Receiver provides up to 15 

channels for specific control of individual gate functions. The receiver includes 
built-in programming functions for adding or removing Nice wireless remote 
controls to/from a gate installation. The following procedures detail the steps 
to assign a remote control, add a new remote control, delete a single remote 
control, or remove all remote controls from the receiver memory. 

Programming the Nice 2-Button or 4-Button Remote Control with the 

Nice Plug-In Receiver. 

These procedures apply to the Nice wireless remote control. These procedures 

assign factory default controls automatically to the remote control. 

1.

 Have a functioning Nice 2-button or 4-button remote control with a battery 

installed prior to programming the remote control. 

2.

 Press and hold the button on the side of the Nice receiver until the led 

illuminates green on the Nice receiver, then release the button. 

3.

 Within 10 seconds, press and hold any key on the Nice remote control until 

the led in the Nice receiver blinks green 3 times, indicating that the Nice is 

programmed to control the receiver. 

4.

 After the led on the Nice receiver blinks green 3 times, another 10 second 

interval is started to program another Nice remote control if desired. Repeat 

step 3 to program the additional Nice remote control. Step 3 may be repeated 

as many times as necessary to program all available Nice remote controls. 

5.

 Verify that the Nice remote control(s) can control the gate by pressing one or 

more buttons individually on the remote control(s). 

Add new remote control to the Nice Plug-In Receiver 

A Nice remote control that has been programmed to control a Nice receiver 

may be used to create other Nice remote controls for the same receiver. This 

procedure needs to be performed within 10 to 20m (30 to 60 feet) of the Nice 

receiver, but the Nice receiver does not need to be physically accessed. 

1.

 Press and hold any button on the non programmed Nice remote control for 

at least 5 seconds, then release the button, taking note of the button that was 

pressed. 

2.

 Press the same button on the programmed Nice remote control three times. 

3.

 Press the same button in step 1 on the non programmed Nice remote control 

and release. 

4.

 It is recommended to test the new copy of the Nice remote control with the 

assigned gate controller. 

NOTE: This procedure will affect all Nice receivers within radio range. 

Deleting a Single Nice Remote Control from the Nice Plug-In Receiver 

Memory 

A Nice remote control that has been programmed to control a Nice receiver may 

be removed from the Nice receiver memory without affecting other assigned 

remote controls. This procedure needs to be performed at the Nice Plug-In 

Receiver with the affected Nice remote control.

1. 

Press and hold the button on the side of the Nice receiver until the led on 

the Nice receiver illuminates green and keep the button pressed. The led will 

illuminate after approximately 4 seconds. 

2. 

Press and hold any button on the Nice remote control until the led on the Nice 

receiver blinks 5 green flashes 

3. 

Release the button on the side of the Nice receiver. 

4.

 It is recommended to verify that the non programmed Nice remote control no 

longer controls the gate.

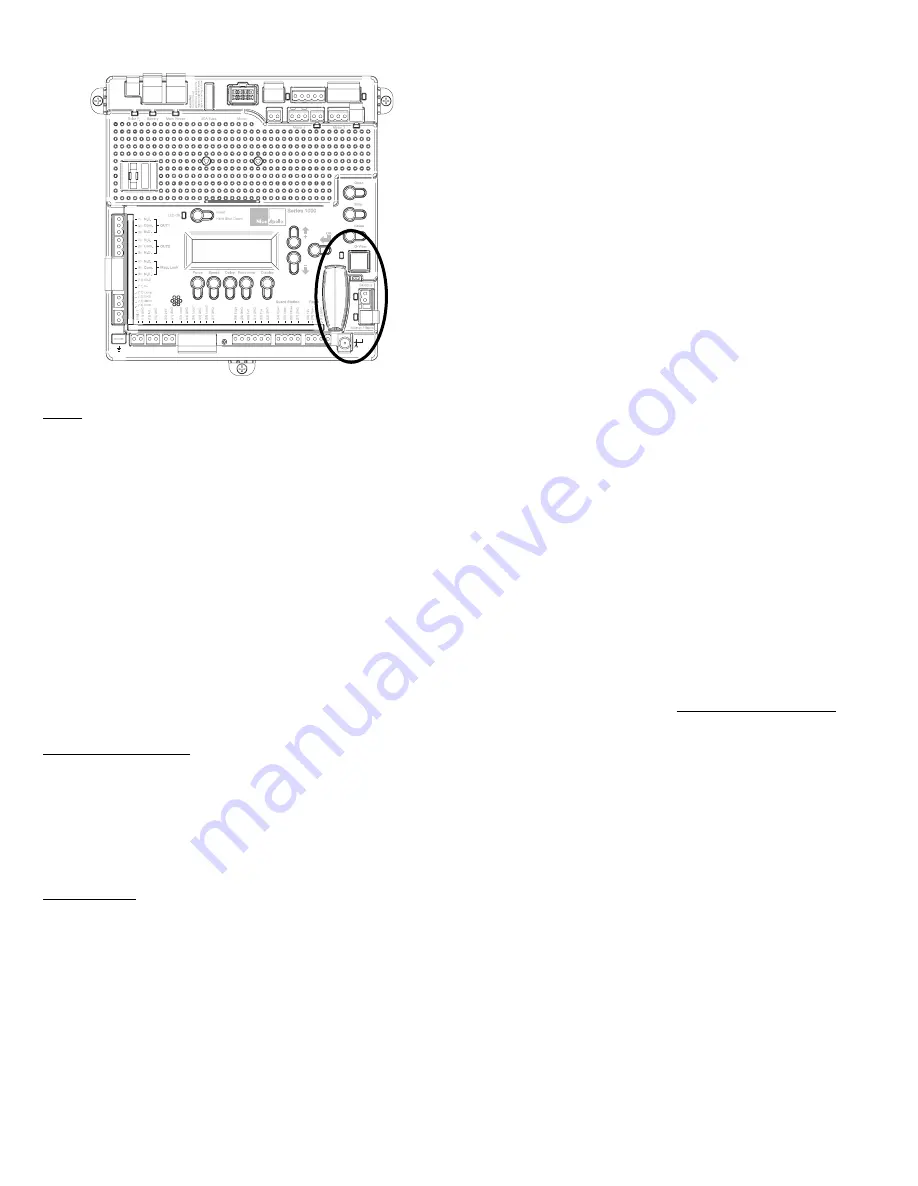
Figure - COMMUNICATION BUSES 

OVIEW

Programming and diagnostic unit which connects directly to the gate 

controller and is part of the Nice “Opera” control system. The unit can be 

used in “stand-alone” mode via its front-panel keypad, or it may be accessed 

via a Bluetooth or cellular-enabled PDA, PC, or Smartphone when used with 

the 

O-View Software Suite. This unit, when matched with the OVIEW Bluetooth 

or 

GSM modules, enables remote control and management of the gate 

controller. Remote control functions include most of the programming 

functions that are available at the front panel LCD on the control board as 

well as software updates. 

OVBT:

 Bluetooth module for OVIEW and the “O-View Software Suite” 

application for PC, PDA, or Smartphone for localized wireless control of the 

gate controller. 

OVBTGSM:

 Combination GSM and Bluetooth module that plugs into the 

OVIEW and provides cellular phone access through the “O-View Software 

Suite” application for PC, PDA, or Smartphone, for wireless local, national, 

and international controller of the gate controller. 

O-VIEW Software Suite:

 Provides desktop or Smartphone level control of 

the gate controller. Other benefits include software updates that can be made 

as new versions of software are made available. 

BLUEBUS ACCESSORIES
MOTB:

 Moon Touch programmable keypad with secure codes (up to 9 digits 

per code if required) to control gate opening and closing. Connects to the 

2-wire BlueBUS connector with inexpensive unshielded twisted-pair wire. 

MOFB:

 Photocell transmitter and receiver pair that connects to the 2-wire 

BlueBUS connector with inexpensive unshielded twisted-pair wire and is a 

non-contact sensor for entrapment protection as specified in UL325, Section 

31.1 “General Entrapment Protection Provisions”. 

MASTER/SLAVE - ONLY USED IN 24V COMMERCIAL OPERATORS

The gate operator includes a two-pin connector designed to link two 

separate gate operators together as a Master/Slave pair. The Master/Slave 

configuration is enabled by connecting two gate operators with simple, 

unshielded twisted-pair wire (Max.100 ft.). All entrapment sensors, switch 

inputs, receiver controls, and outputs must be wired to the gate operator 

designated as the “Master”. The following procedure outlines the process for 

configuring the Master/Slave pair. 
Perform the “Learn” process to configure open and close limits with the gate 

for each operator. See the “Programming Quick Start” procedures in this 

manual for a description of the gate learning process. 
On the Master operator, select Function -> Adv. Settings -> Remote Mst. Slv. 

Then select On -> Master. The red LED associated with the Master/Slave 

connector will illuminate.

Summary of Contents for CBOX1K

Page 1: ...Nice Apollo Control Box Vehicular Gate Operator Control Revision 1 0 0 0_6 2014 CBOX1K...

Page 2: ......

Page 3: ...ion 18 9 3 Push to open installation 19 9 4 Actuator mounting 19 9 5 Actuator wiring 20 9 6 Gate bracket mounting 20 9 7 Limit motor connection to the board 21 9 8 Limit switch adjustment 21 9 9 Setti...

Page 4: ...ction Dry contact inputs are provided for loop probe and photoelectric detectors as well as edge sensors guard station and fire department control of gate opening and closing Voltage outputs 12VDC and...

Page 5: ...he moving gate system No entry into the gate is ever authorized and should be prevented by whatever measures are required for that specific installation Care should always be used during installation...

Page 6: ...nal gate types 4 3 15 Any existing manual gate latches shall be removed or disabled when an automatic gate system is installed Use only mag locks controlled by the system 3 3 Gate system safety device...

Page 7: ...nt any device that operates the gate opener where the user can reach around over or through the gate to operate the controls Controls should be mounted at minimum 8 feet away from any moving part of t...

Page 8: ...ontrol board for STANDBY operation See section 16 for information on STANDBY mode Battery Connect wires to the battery terminal block The positive wire of the battery connects to the left terminal mar...

Page 9: ...included The CBOX1K control box is used for many different model operators The following pages show installation guides for these models Refer to the correct model operator section for instructions on...

Page 10: ...IDENTIFICATION Control Box 11111B T5 Actuator NT TO5012 T7 Actuator NT TO7012 Operator QTY QTY QTY QTY QTY QTY T5ETL 1K 1 1 1 1 0 1 T7ETL 1K 1 0 1 1 1 1 8 NT T51K NT T71K INSTALLATION NT T51K NT T71K...

Page 11: ...the rear pivot bracket using the T5 or T7 graph provided on the next pages The graphs serve to establish the dimensions A and B and the value of the maximum opening degree of the gate Important The va...

Page 12: ...5 16 6 11 16 7 1 16 7 1 2 7 7 8 8 1 4 8 11 16 9 1 16 9 7 16 9 13 16 10 1 4 10 5 8 11 7 16 11 3 15 16 4 5 16 4 3 4 5 1 8 5 1 2 11 13 16 12 3 16 12 5 8 13 13 3 8 Recommended installation line NOT RECOM...

Page 13: ...1 7 16 11 13 16 5 5 16 6 5 16 6 11 16 7 1 16 7 1 2 7 7 8 8 1 4 8 11 16 9 1 16 9 7 16 9 13 16 10 1 4 10 5 8 11 7 16 11 NOT RECOMMENDED VALUES AREA Recommended installation line C 4 1 2 3 1 2 5 1 8 6 6...

Page 14: ...of the T5 T7 to the attachment bracket using the supplied bolt and washer with a 13mm metric socket as shown Be careful not to over tighten the bolt 2 3 1 Unlock the strain relief bushing located on t...

Page 15: ...2 into the connection labeled Motor 2 Note Motor 1 Make sure motor lead connector is plugged in below the limit 5 pin terminal connector T5 and T7 Limit and Encoder wiring T5 and T7 Motor wiring green...

Page 16: ...e RED and BLACK motor leads Using the OPEN button on the front of the Control board hold the button down until the gate reaches the fully intended open position Adjust the Open Limit Switch until the...

Page 17: ...x 11111B 816 Actuator with 8 harness 816X Actuator with 38 harness Supplied with 16501K Pivot Arm 1116 2 with 16501K Gate attach bracket 10025215 2 with 16501K Bolt kit 2 with 16501K 9 15501K 16501K I...

Page 18: ...rate of speed of the gate it is critical that the measurements below are followed The pivot arm may need to be cut to achieve the correct placement of the actuator mounting hole Measurements are take...

Page 19: ...g hole Measurements are taken from the center of pivot of the gate hinge Vertical position of pivot arm DIRECTION OF OPENING GATES CLOSED HINGE POST HINGE POST LEFT HAND SWING RIGHT HAND SWING TOP VIE...

Page 20: ...n below These connections enable the Apollo 816 limit switch and smart sensor inputs into the gate controller 816 limit switch and smart sensor wiring Connect the Apollo 816 actuator cable to the 5 pi...

Page 21: ...pin connector for motor 1 into the connection labeled Motor 1 on the controller as shown For a dual gate installation install the 5 and 3 pin and connector for motor 2 into the connection labeled Mot...

Page 22: ...te limit wires CLOSE LIMIT Red CLOSE LED 3 Using the CLOSE button on the front of the Control Board hold the button down until the gate reaches the fully intended closed position 4 Adjust the Closed L...

Page 23: ...23 10 1 PARTS IDENTIFICATION Control Box CBOX1K Chassis CHBOX350 Arm Assembly ABOX350 10 35001K 36001K INSTALLATION 35001K 36001K INSTALLATION...

Page 24: ...istances are from the hinges square to the center of the mounting post Longer gates should operate at slower speeds E C B D A OPTIMUM SETTING SHOWN IN GREEN A Open Degrees B Inches C Inches D Inches E...

Page 25: ...the gate in the closed position and level for proper operation 3 Conduit should be considered at this time for cable routing from the control box to the chassis assembly Welding mounting bracket Weld...

Page 26: ...to the primary arm using a 1 2 x 2 1 4 hex bolt brass washers and lock nut The stop tab should be positioned away from the gate Install the aluminum adjustable arm to the secondary arm using the 1 2...

Page 27: ...te attach bracket to the gate Note Permanent welds or bolt attachment should be completed once limits are set Make sure that the primary arm is locked into the stop tab on the secondary arm Located in...

Page 28: ...wiring White Close limit Orange Open Limit Green Limit Common Green Orange White 1 2 3 4 5 3500 3600 Limit Wiring White Close limit Orange Open Limit Green Limit Common Green Orange White 1 2 3 3500...

Page 29: ...N limit switch is now set Note if red LED illuminates reverse orange and white limit wires CLOSE LIMIT Red CLOSE LED 3 Using the CLOSE button on the front of the Control Board hold the button down unt...

Page 30: ...irection MUST be set prior to learning the board 2 Press and hold the Open or Close button on the gate controller until the gate is 50 open 3 Press ENTER to allow the control board to scan for attache...

Page 31: ...ars hard shutdown GUARD STATION Guard Station Open 34 Dry contact input for a guard station open switch Momentarily shorting the digital input to GND opens the gate to the full open position with the...

Page 32: ...cting other assigned remote controls This procedure needs to be performed at the Nice Plug In Receiver with the affected Nice remote control 1 Press and hold the button on the side of the Nice receive...

Page 33: ...for the operator connection The wire table is based on stranded copper wire Wire run calculations are based on a 110 VAC power source with a 3 voltage drop on the power line plus an additional 10 red...

Page 34: ...g edge of the closing gate The EXIT sensor input is provided to activate to open the gate or re open a closing gate upon sensing an exiting vehicle Figure FIRE DEPT INPUT 15 2 Magnetic lock connection...

Page 35: ...ty equipment and connections Clean equipment and connections 16 6 Improper broken inadequately supported equipment wiring and conduit loose connections of terminals and loose ferrules 16 7 Poor mechan...

Page 36: ...lls Figure LAYOUT FOR IN GROUND LOOPS Entrapment Protection Inputs Typical Installation Diagram Utilizing Photocells Figure LAYOUT FOR PHOTOCELLS Loop Safety Loop Safety Loop Shadow Loop Exit 4 Min fr...

Page 37: ...at the control panel before making any electric service power connection Be aware of all moving parts and avoid close proximity to any pinch points Know how to operate the manual release Adjust the un...

Page 38: ...Stop gate movement Close the gate Figure GENERAL BOARD OVERVIEW THE PROGRAMMING BUTTONS INDICATED IN THE ABOVE REFERENCE SHOULD BE USED ONLY AFTER UNDERSTANDING THE MANUAL AND ITS RELATION TO THE PROG...

Page 39: ...itivity of sudden impact force to the moving gate on a scale of 1 to 10 1 being most sensitive ESC Exit the FORCE menu 20 2 Speed Max Sets the limit of maximum allowed gate speed on a scale of 20 to 1...

Page 40: ...dvance Settings The following settings are available for customizing the gate operator as required by the customer s installation requirements Set Language English Spanish French Set clock 12H 24H Set...

Page 41: ...perator or system intended for use in a commercial location or building such as a multi family housing unit five or more single family units hotels garages retail store or other building servicing the...

Page 42: ...Table 3 SYMPTOM S POSSIBLE SOLUTION Check that power to the circuit board is turned ON Check terminal block wiring for loose or broken wires If voltage measures OK check the terminal block Check the...

Page 43: ...43 1 1 2 2 A A B B COMPANY NICE APOLLO NAME CONTROL BOX GENERAL OVERVIEW 18 22 18 18 8 32...

Page 44: ...LE POLE 1115 1 4 SWITCH PUSH BUTTON CNTRL BOX 1119 1 5 1050 CIRCUIT BOARD 1050 1 6 1050 BOARD MOUNT KIT 10055090 1 7 NICE RECEIVER 318NPI 1 8 1 1 2 2 A A B B TITLE Company 2 6 8 3 7 4 5 1 Note Control...

Page 45: ...the information from the dated proof of purchase receipt to confirm the warranty period or the technician will confirm your extended warranty period through your registration information on file The t...

Page 46: ...e and has tested the gate to make sure that the gate stops and reverses a short distance with minimal resistance applied Approximately 40 lbs on a swing gate at the end of the gate 8 The installer has...

Page 47: ...47...

Page 48: ...Contact us Nice Group USA Inc 12625 Wetmore Road Suite 218 San Antonio TX 78247 Ph 1 210 545 2900 Fax 1 210 545 2915 www niceapollo com www facebook com NiceApollo...

Reviews: