6
Personal Video Recorder
PVR3690 80GB / 120GB
Quick Start Guide
Copyright 2005 nationwide Antenna Systems.
Please read this quick start guide before using your NextWave PVR3690.
VCR/DVD-R (SCART)
TV (SCART)
ON / OFF
AC / DC Power
Component Video (YPbPr)
RGB
S-Video
Composite (CVBS)
C
onnects to:
TV, Plasma/LCD Panel,
Monitor.
Mains power supply
USB (USB 2.0)
VID File data transfer
C
onnects to:
Media Center or Home PC
for archiving of recorded
programs
Power Switch
AUDIO L/R (RCA)
Stereo Audio
Connect To:
Audio input V Input on
VCR, DVD-R and TV
TV OUT (RF)
RF Signal
Connect To:
Old TV with RF inputs.
Composite (CVBS) Input*
and output
Connect To:
VCR or DVD-R
*Not for recording on HDD. Signal
can be looped through to RCA or TV
SCART Output.
S/PDIF (TOSLINK)
TOSLINK Optical Digital
Audio Interface.
Connect to:
AV Processor
RS232 (15-pin)
Software Upgrade Port
VIDEO (RCA)
Composite (CVBS)
Connect to:
TV, VCR, DVD-R
Please Note
Connect supplied loop
cable from RF LOOP OUT
1 to ANT 2
�����������
���������
Connect to VCR with SCART to RCA
composite video & audio L/R cable.
(not supplied)
Connect to standard TV with supplied
RCA composite video & audio L/R cable.
This setup allows you to record a second channel onto the
VCR/DVD-R, so that you can record one channel to the HDD,
watch another channel and record it as well to the VCR.
�����������
�������
���������
Connect to VCR or DVD-R
with supplied composite video
& audio L/R cable.
������������
Connect to AV Processor with
TOSLINK optical digital audio
interface cable.
(not supplied)
Connect to Plasma/LCD Display with
SCART to Component cable.
(not supplied)
BASIC SETUP
ADVANCED SETUP
Quick Start Guide
Personal Video Recorder
PVR3690 80GB / 120GB
Quick Start Guide
Microsoft and Windows are trademarks of Microsoft Corporation in Australia and other countries.
NextWave Digital and Catch the Next wave are registered trademarks of Nationwide Antenna Systems.
Copyright 2005 Nationwide Antenna Systems.
Introduction
The twin tuners and advanced chipset within the PVR-3690, provide it with the
ability to process several MPEG streams simultaneously.
This ability allows a user to:
- Watch one channel while recording another channel,
- Play back a previously recorded program while recording another program,
- Timeshift or pause live TV while recording another channel.
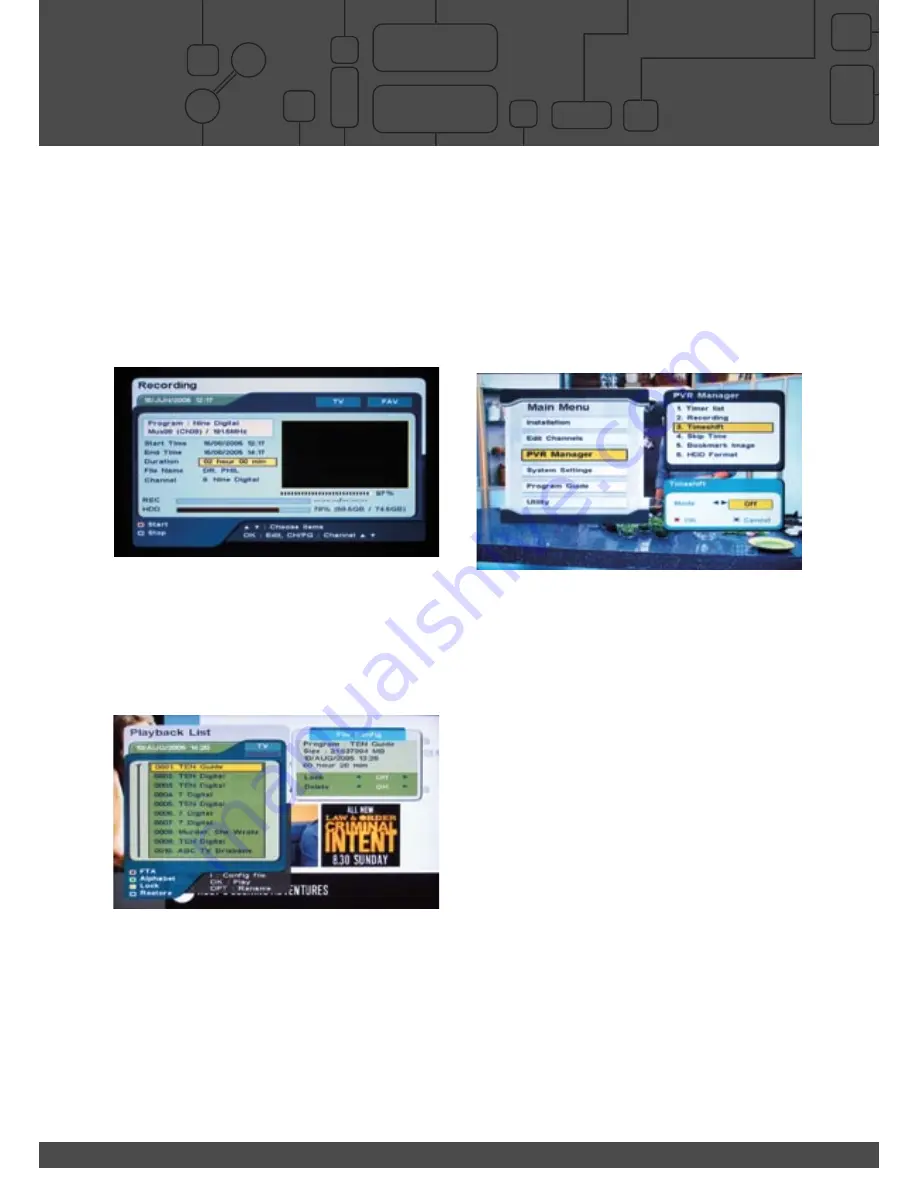
1. Record one channel, watch another.
a.
Press the record button to begin recording current channel.
b.
To view the status of recording, press record button again.
c.
The screen above provides recording status, HDD space and duration of
recording.
d.
Press exit to remove this screen.
e.
Change channels to view another channel.
Your recording does not get interrupted
2. Record a channel, and play back a recorded program
a.
Press the record button to begin recording current channel.
b.
Press ‘F.LIST’ (Playback list) button to list recorded programs.
c.
Select desired program from playback list.
d.
Press ‘OK’ to play
Your recording does not get interrupted
3. Pause live TV (Timeshifting).
While watching live TV pressing pause will temporarily store up to 60min of live TV.
a.
Press ‘PAUSE’ button to pause (timeshift)* live TV.
b.
Pressing ‘PAUSE’ button again restarts the program.
c.
Top right hand corner of TV screen will show duration of timeshift.
d.
Pressing ‘F.FWD’ enables you to catch up to live TV.
*Timeshifting will stop if the channel is changed.
4. Record a channel, time shift another.
a.
Press the record button to begin recording current channel.
b.
Change channels.
c.
Press ‘PAUSE’ button to pause (timeshift)* live TV.
d.
Pressing ‘PAUSE’ button again restarts the program.
e.
Top right hand corner of TV screen will show duration of timeshift.
f.
Pressing ‘F.FWD’ enables you to catch up to live TV.
*Timeshifting will stop if the channel is changed.
5. Continuous Timeshift function (menu activated).
This function needs to be activated via the main menu (see below).
If continuous timeshift is in the ‘ON’ mode, the unit will continuously cache 30min
of whatever is being watched. The unit automatically starts storing programs
temporarily as soon as you change channel.
You will be able to rewind the program and fast forward to catch up to the live
broadcast, without having to manually use the pause button timeshift method
described in point number
3
.
6. Delete Files.
a.
Press ‘F.LIST’ (Playback list) button to list recorded programs.
b.
Select desired program from playback list.
C.
Press ‘i’ (info button)
d.
Highlight ‘delete’ in ‘File Config’ sub menu.
e.
Press ‘OK’ to delete.
7. Skip Function.
The skip function settings are available in the ‘PVR Manager’ sub menu. Skip time
is available in 10/20/30 sec increments and 1/2/3/5/10/15 min increments.
a.
Play a recorded program.
b.
Press ‘F.SKIP’ button to skip forward at configured increment.
C.
Press & Hold the ‘F.SKIP’ button to skip forward at 10min increment.
8. USB 2.0 Connection to PC.
The included PVR manager software allows recorded programs to be transferred
from the PVR to a Microsoft
™
Windows
™
PC for archiving. Additionally, the
PVR manager software can play back recorded programs stored on a PC.
Install the software on the CD to your Windows
™
PC to begin using this
functionality. Please refer to the www.nextwave-digital.com for a more detailed
tutorial about the included software.
Timeshifting
Summary of Contents for PVR-3690
Page 48: ...NOTES ...
Page 49: ...NOTES ...


