


24
The
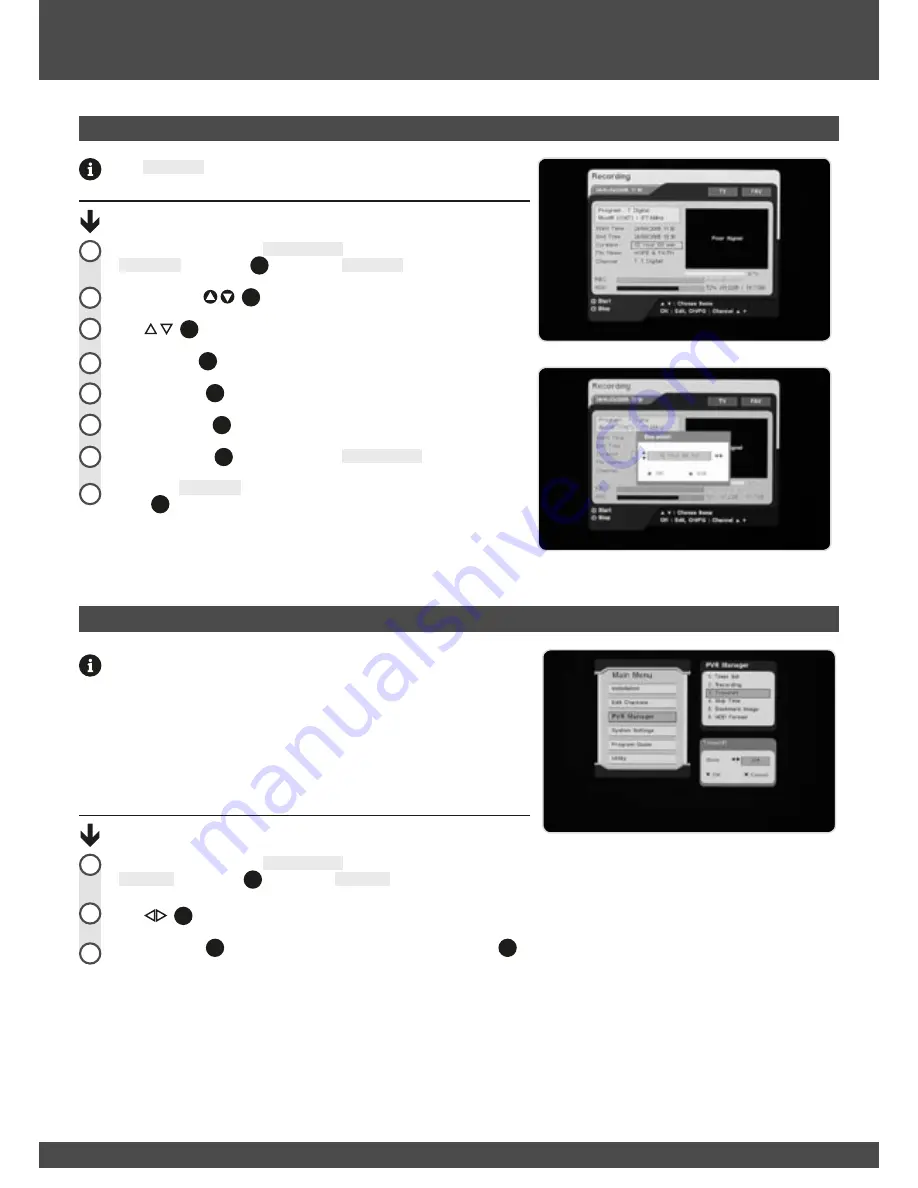
Recording
menu allows you to begin recording from your current time.
Recording a program via the Recording menu:
Navigate (page 16) to the
PVR Manager
sub-menu and highlight
Recording
. Press
OK
(
1
36
) to open the
Recording
menu.
Use the
CH/PG
(
1
31
) buttons to change channels.
Use
(
1
37
) buttons to highlight a particular setting.
Press the
OK
(
1
36
) buttons to change the highlighted setting.
Press the
RED
(
1
40
) button to begin recording.
Press the
BLUE
(
1
43
) button to stop recording.
Press the
BACK
(
1
38
) button to return to
PVR Manager
menu.
To exit the
Recording
menu, and return to viewing press the
EXIT
(
1
39
) button.
Recording
2
1
Timeshift
This sub-menu enables or disables continuous timeshift mode.
If continuous timeshift is in the ‘ON’ mode, the unit will continuously cache
30min of whatever is being watched. The unit automatically starts storing
programs temporarily as soon as you change channel.
You will be able to rewind the program and fast forward to catch up to the
live broadcast, without having to manually use the pause button timeshift
method described on page 34.
Enabling continuous timeshift:
Navigate (page 16) to the
PVR Manager
sub-menu and highlight
Timeshift
. Press
OK
(
1
36
) to open the
Timeshift
sub-menu.
Use
(
1
37
) buttons to select off or on.
Press the
RED
(
1
40
) button to accept the change, or press the
BLUE
(
1
43
)
button to cancel.
2
1
Main Menu
3
3
4
5
6
7
8
Summary of Contents for PVR-3690
Page 48: ...NOTES ...
Page 49: ...NOTES ...


