DioView 100
– User’s Guide
DioView 100
- User’s Guide
Page 7 of 22
Nexdio Co., Ltd.
4 SOFTWARE
INSTALLATION
4.1 Installing the
DioView 100
Software and USB Driver
1) Verify that your desktop or laptop computer meets the system requirements described in Chapter 1.
2) Insert the supplied “
DioView 100
Software Installation CD” into the CD-ROM drive of you PC.
3) By following the Install Wizard instructions on your PC, the installation program should automatically
run and copy all necessary programs into your hard drive. If the installation program does not run
automatically, then explore your CD-ROM dive and run the “setup.exe” in the CD.
4) Do not remove the “DioView 100 Software Installation CD” in the CD-ROM drive.
5) Connect
the
DioView 100
to your PC using the supplied Mini-USB Cable.
6) Turn
on
the
DioView 100
by pressing the Power On/Off button on the
DioView 100
for approximately
one second.
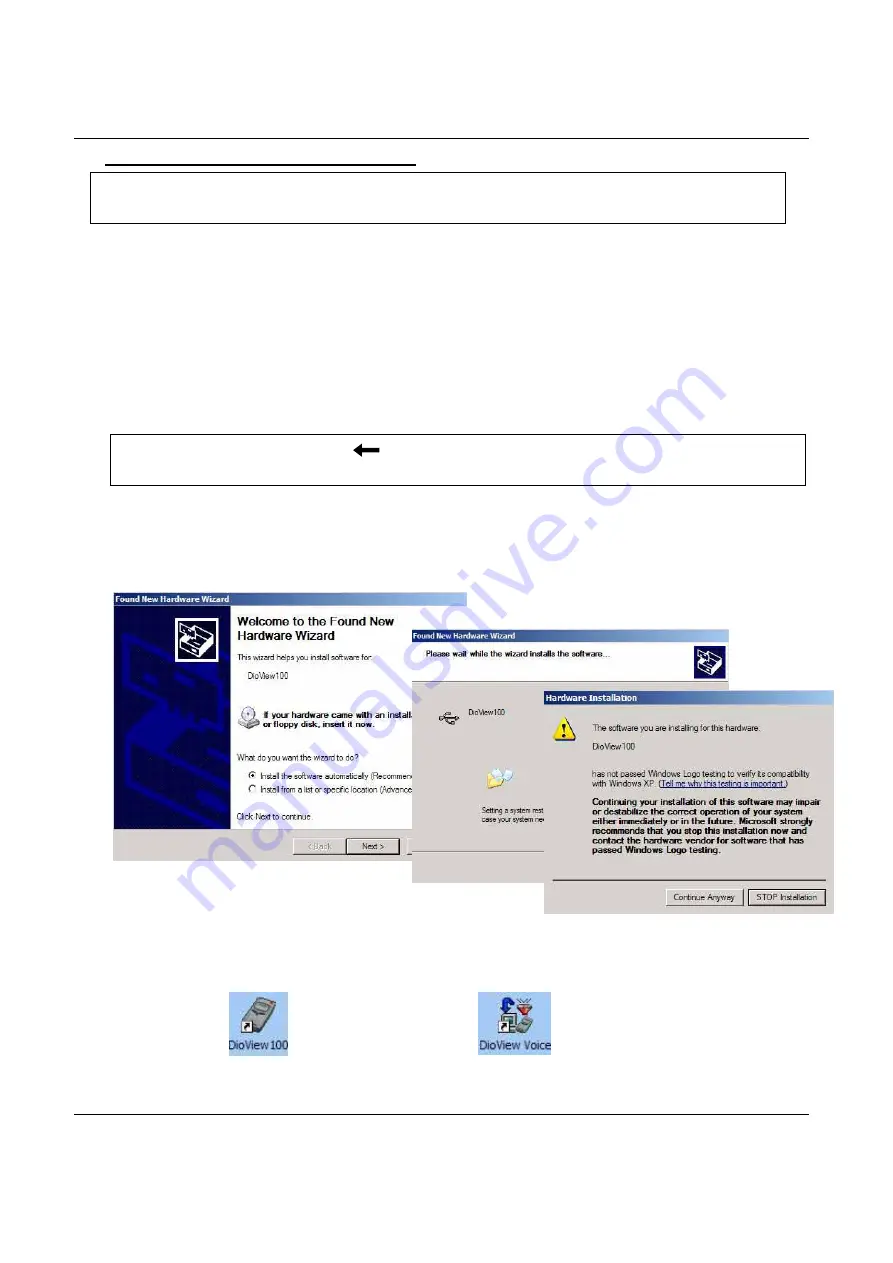
7) The “Found New Hardware Wizard” dialog box will appear automatically as below.
8) Select
“
Install the software automatically (Recommended)
”
and click “
Next
”.
9) If the message about “not passed Windows Logo testing…..” appears, click the “
Continue
Anyway
”.
10) Click the “
Finish
” to compete the USB Driver for the DioView 100.
11) You will see two new shortcut icons on the desktop of you PC when the installation has been
completed.
: DioView 100 Desktop : DioView 100 Voice Memo Manager
<Note>
Do not connect the DioView 100 to your PC until the DioView 100 Software has
been completely installed into your PC.
Enjoy the potable presentations with your DioView 100!
<Note>
Please make sure the (
Black arrow
) on the mini-USB plug of the USB cable
is facing up when you plug it into the DioView 100.


