DioView 100
– User’s Guide
DioView 100
- User’s Guide
Page 12 of 22
Nexdio Co., Ltd.
5.3 Setting the
DioView 100
Printer
1) “Landscape” is set as the default orientation on the DioView 100 Printer, providing the best image
results in most presentations.
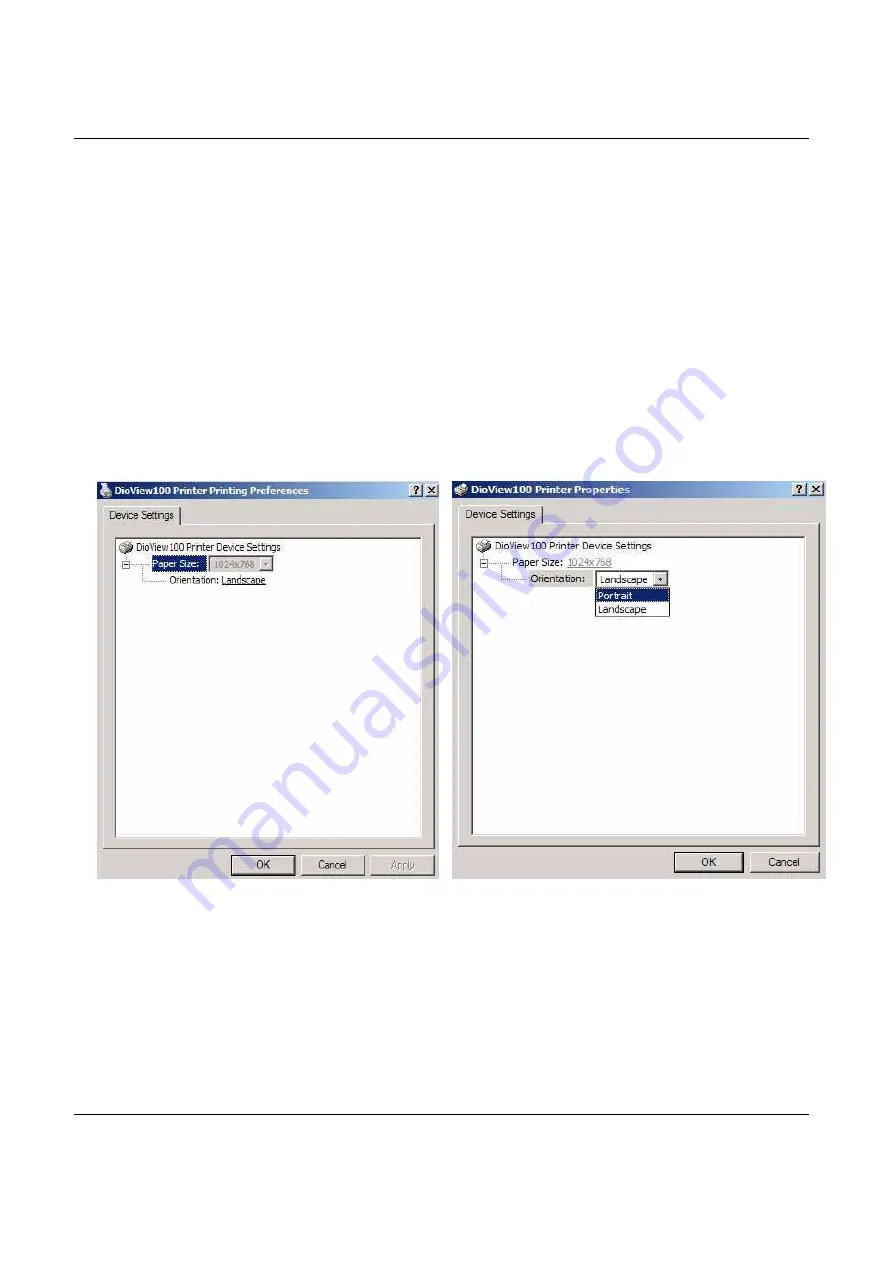
2) Set the orientation to “Portrait” on the “DioView 100 Printer Properties” for better image results for
Portrait-type documents. For example, when the original document is in “Portrait” orientation, then
for best results convert the presentation data file in ”Portrait” orientation for the DioView 100.
3) You can set the “Orientation” either in “Landscape” or “Portrait” on the “DioView 100 Printer
Properties” by following the instructions below.
4) First, select the “DioView 100 Printer” on the “Print” dialog box” as described at section “5.2” when
you are in a Windows® application. Or, by clicking “
Start
”
→
“
Setting
”
→
“
Printers and Faxes
”, and
open the “
DioView 100 Printer
” and click “
Printer
” and “
Printing
Preferences
”.
5) The “DioView 100 Printer Properties” dialog box will appear as below. Then, click “Orientation” and
select “Landscape” or “Portrait” according to the orientation of the original document, and click “
OK
”.
6) You will need to reset the proper printing orientation again on the DioView 100 Printer, when a
document that has a different orientation then the “Orientation” that has already been set on the
DioView 100 Printer.


