background image

4

Hard Drive Installation

Please observe all static 
safety precautions 
before proceeding. 

Before removing any electronic 
component from its protective 
anti-static bag, you should safely 
discharge any excess static elec-
tricity. A simple way to do this is 
by touching a grounded piece of 
metal, such as the metal cover of  
your computer’s power supply 
or a water pipe.

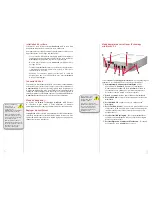
Begin by removing the four Phillips screws from the bottom 

1. 

of the 

Newer Technology miniStack v2.5

 enclosure. Remove 

the drive carrier from inside of the enclosure.

Place your 3.5” SATA hard drive onto the mounting bracket as 

2. 

shown. The connecting cables need to be positioned to the 
left, with the opening in the drive bracket to the top. Once 
inserted properly into the bracket, insert the four included 
screws to fasten it securely.

Make sure your hard 
drive is attached to the 
heat sink in the same 
manner as illustrated.

Attaching it incorrectly will 
result in your hard drive being 
unable to fi t properly into the 
enclosure.

5

電源ケーブルおよびデータ ケーブルが挟まることのない

1. 

ように避けて通しながら、ドライブとブラケットをエンク
ロージャの中に置きます。 

この図のエンクロージャの右上にある白と黒のワイヤを取

2. 

り、添付されている黄色いカプトン テープを使って、図
にあるように熱プローブ (ワイヤの青い部分) をハードド
ライブ中央に貼り付けます。 

ハードドライブが挿入されたら、エンクロージャの底部に 

3. 

4 つのプラスのネジを戻すことによりドライブキャリヤを
完全に固定します。すべてのワイヤができるだけ平らにな
っていることを確認し、プラスチックのフタを 

miniStack


エンクロージャの上に置きます。続行する前に、上面カバ
ーに出っ張っている部分がないことを確認してください。

電源ケ ブ およびデ タ ケ ブ が挟ま

と な

ハードドライブとヒ
ート シンクが完全に
エンクロージャに挿
入されていることを
確認してください。

そうしないと、正常に上面パ
ネルがはまらなくなり、ステ
ップ 1 で外したプラスのネジ
でヒートシンクを固定できな
くなります。 

熱プローブはファン
速度を調整する役割
を果たします。

熱プローブを貼り付けなかっ
た場合、ドライブがオーバー
ヒートし、データの破壊およ
び損失の原因となる可能性が
あります!

Summary of Contents for miniStack V2.5

Page 1: ...ewer Technology Inc no asume ninguna responsabilidad por cualquier diferencia entre el producto descrito en este manual y el producto que usted pueda recibir Les informations contenues dans la présente sont au mieux de nos connaissances exactes et fiables Newer Technology Inc n assume aucune responsabilité à l égard d erreurs contenues dans la présente Newer Technology Inc réserve le droit d apport...

Page 2: ...00 1394a hubs allowing you to expand your peripherals without adding external hubs which clutter up your desk Internal Storage The Newer Technology miniStack v2 5 has a built in SATA connector which supports large drive technology for massive storage capacity Simply place your own 3 5 SATA hard drive inside the miniStack enclosure and connect using either FireWire 400 or USB 2 0 it s that easy Pac...

Page 3: ...のデータ転送速度が USB 2 0 より高いことが確認さ れています FireWire と USB の両方を接続 することにより FireWire の データ転送速度と USB ハブの 多用途性が可能になります 3 Using your Newer Technology miniStack v 2 5 RemovetheNewerTechnologyminiStackv2 5fromitspackaging and examine the back of the enclosure You will see the following ports Smart Power Switch 1 Used to turn the miniStack on As long as the power switch is in the ON position the mini Stack will po...

Page 4: ... drive bracket to the top Once inserted properly into the bracket insert the four included screws to fasten it securely Make sure your hard drive is attached to the heat sink in the same manner as illustrated Attaching it incorrectly will result in your hard drive being unable to fit properly into the enclosure 5 電源ケーブルおよびデータ ケーブルが挟まることのない 1 ように避けて通しながら ドライブとブラケットをエンク ロージャの中に置きます この図のエンクロージャの右上にある...

Page 5: ...he enclosure 4 in this picture and tape the thermal probe the blue portion of the wire onto the center of the hard drive using the enclosed piece of yellow Kapton tape as shown Once the hard drive is inserted replace the four Phillips 5 screws on the bottom of the enclosure to fully secure the drive carrier Make sure that all wires are as flat as possible and place the plastic top back onto the mi...

Page 6: ...has to your computer and will automatically mount via that connection Fan Settings The miniStack v2 5 has a cooling fan that will monitor thermal temperatures inside the drive enclosure and only turns on when needed There are no adjustments needed to change the speed of the fan For optimal performance it is recommended that you connect your miniStack to your computer with both FireWire and USB Tho...

Page 7: ...ずれかを使用して接続するだけで 簡単に内部ストレー ジとして使用できます パッケージの内容 Newer Technology miniStack v2 5 エンクロージャ 外部電源アダプタ 入力 100 240V 出力 12V 2A 5V 2A ハードドライブ取り付け用ネジ 電源ケーブル USB 2 0 A B インターコネクト ケーブル FireWire 1394a 6 ピン 6 ピン イ ンターコネクト ケーブル 7 Formatting for use with Mac OS X If the drive has never been formatted upon initial boot of your new NewerTechnology miniStack v2 5 drive you will be greeted with the following dialog box...

Page 8: ...c reserves the right to make changes in the specifications and or design of this product without prior notice The photographs contained within may differ from the product that you receive and are used for illustration purposes only Newer Technology Inc assumes no responsibility for any differences between the product described in this manual and the product you may receive 組立 取扱説明書 3 5 インチ SATA ハードドラ...

Page 9: ...men Die Fotos hierin können von dem Produkt das Sie erhalten abweichen und dienen lediglich zur Anschauung Newer Technology Inc übernimmt keine Verantwortung für Unterschiede die zwischen dem in diesem Handbuch beschriebenen Produkt und dem von Ihnen erhaltenen Produkt bestehen können 2008 Newer Technology Inc Alle Rechte vorbehalten Version 1 5 08 MCS Almacenaje externo en disco duro SATA de 3 5 ...

Page 10: ... unidad grande para ofrecer capacidad de almacenaje masivo Simplemente coloque su propio disco duro SATA de 3 5 dentro de la carcasa del miniStack y conéctelo por medio de FireWire 400 o de USB 2 0 Así de sencillo Contenido del paquete Carcasa del miniStack v2 5 de Newer Technology Adaptador externo de corriente entrada V salida V A V A Tornillos para disco duro Cable de corriente Cable de interco...

Page 11: ...acht und sich nur bei Bedarf einschaltet Es sind keine Einstellungen erforderlich um die Drehzahl des Laufwerks zu ändern Für optimale Leistung wird empfohlen den miniStack gleichzeitig über FireWire und USB an Ihren Computer anzuschlie ßen Obwohl USB 2 0 theoretisch einen höheren Durchsatz bietet zeigen Tests aus der Praxis dass FireWire eine schnellere Datenübertragung liefert Durch gleichzeitig...

Page 12: ...epa correctamente en la carcasa 5 Setzen Sie Laufwerk und Halterung in das Gehäuse ein 1 Achten Sie dabei darauf dass die Stromversorgungs und Datenkabel nicht eingeklemmt werden Nehmen Sie das schwarz weiße Kabel oben rechts am Gehäuse 2 in dieser Abbildung auf und kleben Sie denTemperaturfühler den blauen Abschnitt des Kabels mit dem beigefügten gelben Kapton Klebestreifen wie abgebildet auf die...

Page 13: ...rnfalls passt die Festplatte nicht einwandfrei in das Gehäuse 5 Coloque la unidad y el soporte dentro de la carcasa enrutando 1 los cables de corriente y de datos para evitar pellizcarlos Tome el cable negro y blanco de la esquina superior derecha de 2 la carcasa que se muestra en esta imagen y coloque cinta para pegar la sonda térmica porción azul del cable al centro del disco duro usando el peda...

Page 14: ...ndo se necesita No es necesario hacer ajustes para cambiar la velocidad del abanico Para desempeño óptimo se recomienda conectar el miniStack a la computadora con FireWire y USB Aunque USB 2 0 en teoría ofrece mayor velocidad las pruebas en el mundo real demuestran que FireWire ofrece una transferencia de datos más veloz Conectarse tanto por FireWire como por USB permitirá la velocidad de transfer...

Page 15: ...terne Speicherung DerNewerTechnologyminiStackv2 5hateineneingebautenSATA Anschluss welcher Laufwerke für höchste Speicherkapazitäten unterstützt Schieben Sie einfach Ihre eigene 3 5 SATA Festplatte in das miniStack Gehäuse und schließen Sie sie entweder über FireWire 400 oder USB 2 0 an so einfach ist das Lieferumfang Newer Technology miniStack v2 5 Gehäuse Externer Netzadapter Eingang V Ausgang V...

Page 16: ...es a las especificaciones y o al diseño de este producto sin previo aviso Las fotografías aquí contenidas pueden diferir del producto que usted recibe y sólo se usan con fines ilustrativos Newer Technology Inc no asume ninguna responsabilidad por cualquier diferencia entre el producto descrito en este manual y el producto que usted pueda recibir Betriebsanleitung und Montageleitfaden 3 5 SATA Festpl...

Page 17: ...es modifications dans les caractéristiques et ou la conception de ce produit sans préavis Les photographies contenues dans la présente peuvent différer du produit que vous avez reçu et ne sont utilisées qu à titre d illustration Newer Technology Inc n assume aucune responsabilité en cas de différences entre le produit décrit dans ce manuel et le produit que vous recevrez Disque dur SATA 3 5 po Stocka...

Page 18: ...cteur SATA intégré qui prend en charge la technologie des gros lecteurs pour une capacité de stockage massive Placez simplement votre propre disque dur SATA de 3 5 po à l intérieur du boîtier du miniStack et connectez le au moyen du FireWire 400 ou de l USB 2 0 il n y a rien de plus facile Contenu de l emballage Boîtier du Newer Technology miniStack v2 5 Adaptateur d alimentation externe entrée V ...

Page 19: ... du boîtier du lecteur et se met en marche seulement si nécessaire Aucun réglage n est requis pour changer la vitesse du ventilateur Pour une performance optimale nous recommandons de connecter votre miniStack à votre ordinateur à la fois par FireWire et USB Bien qu USB 2 0 ait un débit théorique supérieur les tests réels ont montré que FireWire a un débit plus rapide Brancher à la fois FireWire e...

Page 20: ...dur ne pourra pas s insérer correctement dans le boîtier 5 Placer le lecteur et le support à l intérieur du boîtier 1 en acheminant les câbles d alimentation et de données de façon à éviter de les pincer Prendre le fil noir et blanc à la partie supérieure droite du boîtier 2 dans cette image et attacher le capteur thermique la partie bleue du fil sur le centre du disque dur à l aide du morceau de ...

Reviews: