5
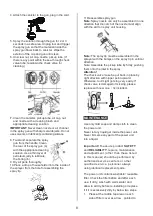
should be pointing toward the front of gun
If you are going to be spraying in an upward
direction. The angled end of the pickup tube
should be pointing toward the rear of the gun.
MATERIAL PREPARATION
Liquid material preparation Tip:
Make sure the type of material you use can be
cleaned with either mineral spirits or paint thinner
(for oil-based paints) or a warm water and soap
solution (for water soluble paints like latex). Use
drop cloths during pouring, mixing, and viscosity
testing of materials to be sprayed to protect your
floors and anything else in the spraying area that
you wish to remain untouched.
The liquid being sprayed may need to be thinned
(diluted) before starting. When thinning, use the
proper liquid thinner recommended on the container
by the material Manufacturer.
Warning!
Do not use materials with a
flashpoint below than 21°C (70°F).
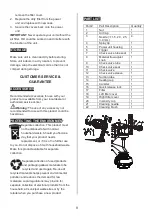
A viscosity test cup is provided to determine the
“runout time” of the material being used.
1. Before measuring for the proper viscosity,
stir the material thoroughly.
2. Dip the viscosity cup into the material
being sprayed and fill the cup completely.
3. With the cup held over the material container,
measure the amount of time it takes for the
stream of material flowing out to “break” or
stop being a constant stream out of the
bottom of the cup (100 seconds or less).
This is the “runout time”. Refer to the thinning
table below for information on the thinning
required for different materials. If material needs
thinning, add the appropriate liquid thinning
material recommended by the manufacturer.
Thinning table
Note:
It is possible to spray latex paint with this
unit, however, the required thinning may exceed
material manufacturer’s recommendation.
Thin latex paint so that it runs through viscosity
cup within100 seconds. The operator should
consider the type of application and final location
of the project when spraying a material that
requires more than 100 seconds to run through
the viscosity cup.
OPERATION INSTRUCTION
Preparation tips
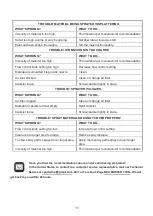
Always stir and strain the material thoroughly
before use. If need, please use the included
paper filter to filter out the impurities.
With any spraying job you should always ensure
that you have properly prepared the surface to
get the best finish. That is, all surface are free
from dust, dirt, rust and grease. Lightly pressure
wash decks or exterior surfaces and ensure that
they are dry before spraying.
Even though HVLP sprayers have very little
overspray, it is recommended that you mask all
edges and other areas and use drop cloths to
protect your floors and anything else in the
spraying area that you wish to remain
Material
Runout Time
1
Oil Enamel
25-40
2
Oil based primer
30-45
3
Oil stain
No thinning required
4
Clear sealer
No thinning required
5
Polyurethane
No thinning required
6
Varnish
20-50
7
Lacquer sanding
sealer
25-35
8
Lacquer
25-35
9
Automotive finishes
20-40
10
Latex paint
Follow manufacture’s
recommendations


