


NTI RACKMUX Console Drawer with UNIMUX Switch
10
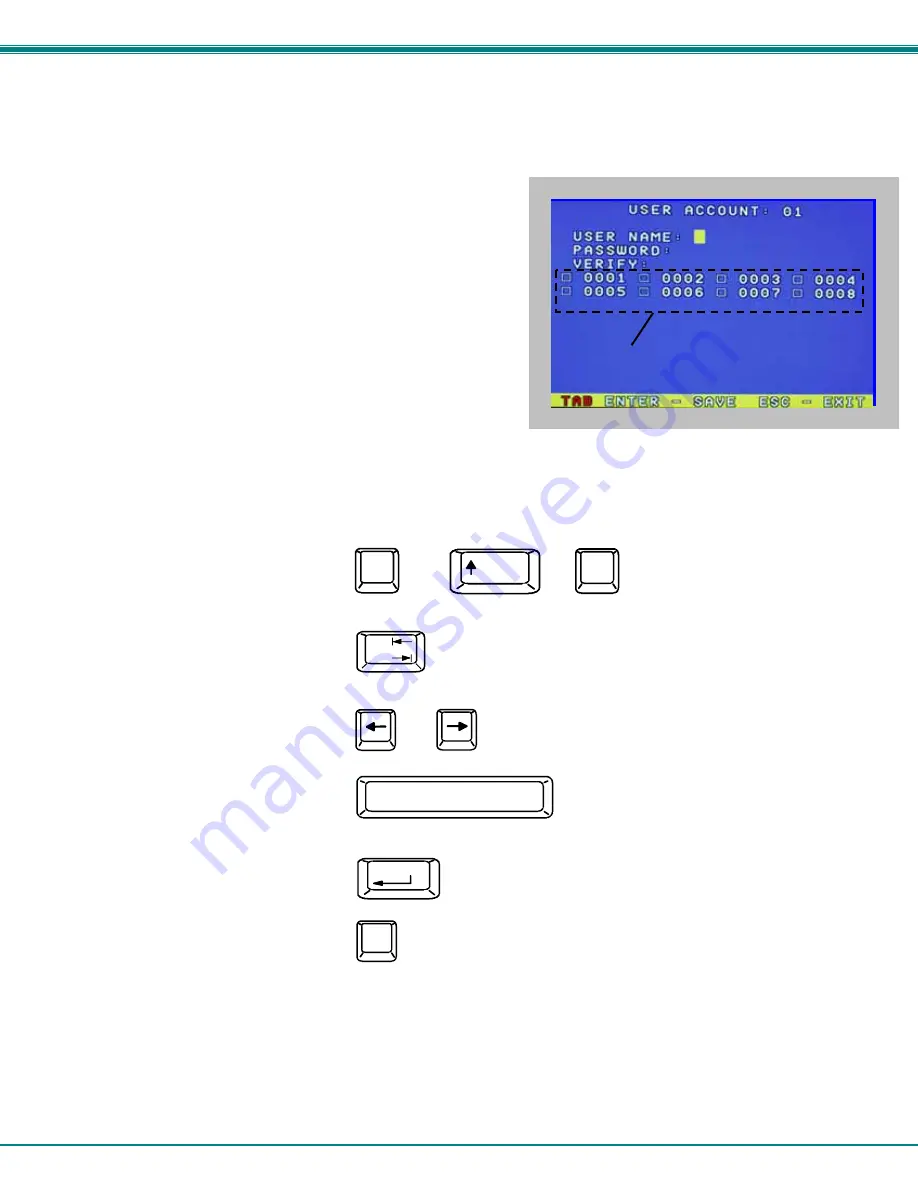
Edit user
To enter the Edit User mode press <E> from the User Name List after selecting a user or an empty record.
The Edit User mode (see Fig. 9) enables the administrator to:
-
add a new user
-
remove an existing user
-
edit the settings for an existing user
The Edit User mode contains three edit boxes and a check box list of
up to 32 check boxes representing the User Access List (list of the CPU
port(s) the user has access rights to).
The first edit box is used to edit the user name. The next two edit boxes
are used to input the password twice (in order to verify it was typed
correctly). The password can be up to 13 characters in length.
The check boxes are used to control the user access to the CPU ports.
The user will only have access to check boxes with checks in them.
Figure 9- Edit the user access list
The list below describes the functions available in the Edit User mode:
Function:
Keystroke:
Add a character to user name string,
password string, or verify password
string, whichever is selected
Switch sequentially between the
User Name edit box, Password
edit box, Verify Password edit
box, and User Access List
Navigate through User Access
List when it is active
Toggle access rights (check/
uncheck) of the highlighted
port in the User Access List
Save the edited configuration.
Administrator will be prompted for
a Yes or No confirmation
Go back to User Name List menu
NOTE: To delete a user from the User Name List, use either the <Delete> key or the <Backspace> key to remove
characters, not the <Spacebar>. Using the <Spacebar> will overwrite the characters with spaces and retain the
user configuration in the User Name List.
.
Tab
(Spacebar)
Enter
(If Password string and Verify Password string
are different, this command will have no effect,
enabling the administrator to correct the password)
Esc
Shift
or
A-Z
(Type any upper or lower case
alphabetical or numeric character)
+
A-Z
0-9
User Access List
or


