28
NetComm Wireless NTC-40WV Industrial Indoor 3G Router with Voice
www.netcommwireless.com
Ver 1.4
OPTION
DESCRIPTION
DHCP start range
Sets the first IP address of the DHCP range
DHCP end range
Sets the last IP address of the DHCP range
DHCP lease time (seconds)
The length of time in seconds that DHCP allocated IP addresses are valid
Default domain name suffix
Specifies the default domain name suffix for the DHCP clients. A domain name suffix enables users
to access a local server, for example, server1, without typing the full domain name
server1.domain.com
DNS server 1 IP address
Specifies the primary DNS (Domain Name System) server’s IP address.
DNS server 2 IP address
Specifies the secondary DNS (Domain Name System) server’s IP address.
WINS server 1 IP address
Specifies the primary WINS (Windows Internet Name Service) server IP address
WINS server 2 IP address
Specifies the secondary WINS (Windows Internet Name Service) server IP address
NTP server (Option 42)
Specifies the IP address of the NTP (Network Time Protocol) server
TFTP Server (Option 66)
Specifies the TFTP (Trivial File Transfer Protocol) server
DHCP option 150
This is used to configure Cisco IP phones. When a Cisco IP phone starts, if it is not pre-configured
with the IP address and TFTP address, it sends a request to the DHCP server to obtain this
information. Specify the string which will be sent as a reply to the option 150 request.
DHCP option 160
This is used to configure Polycom IP phones. When a Polycom IP phone starts, if it is not pre-
configured with the IP address and TFTP address, it sends a request to the DHCP server to obtain
this information. Specify the string which will be sent as a reply to the option 160 request.
Enter the desired DHCP options and click the Save button.
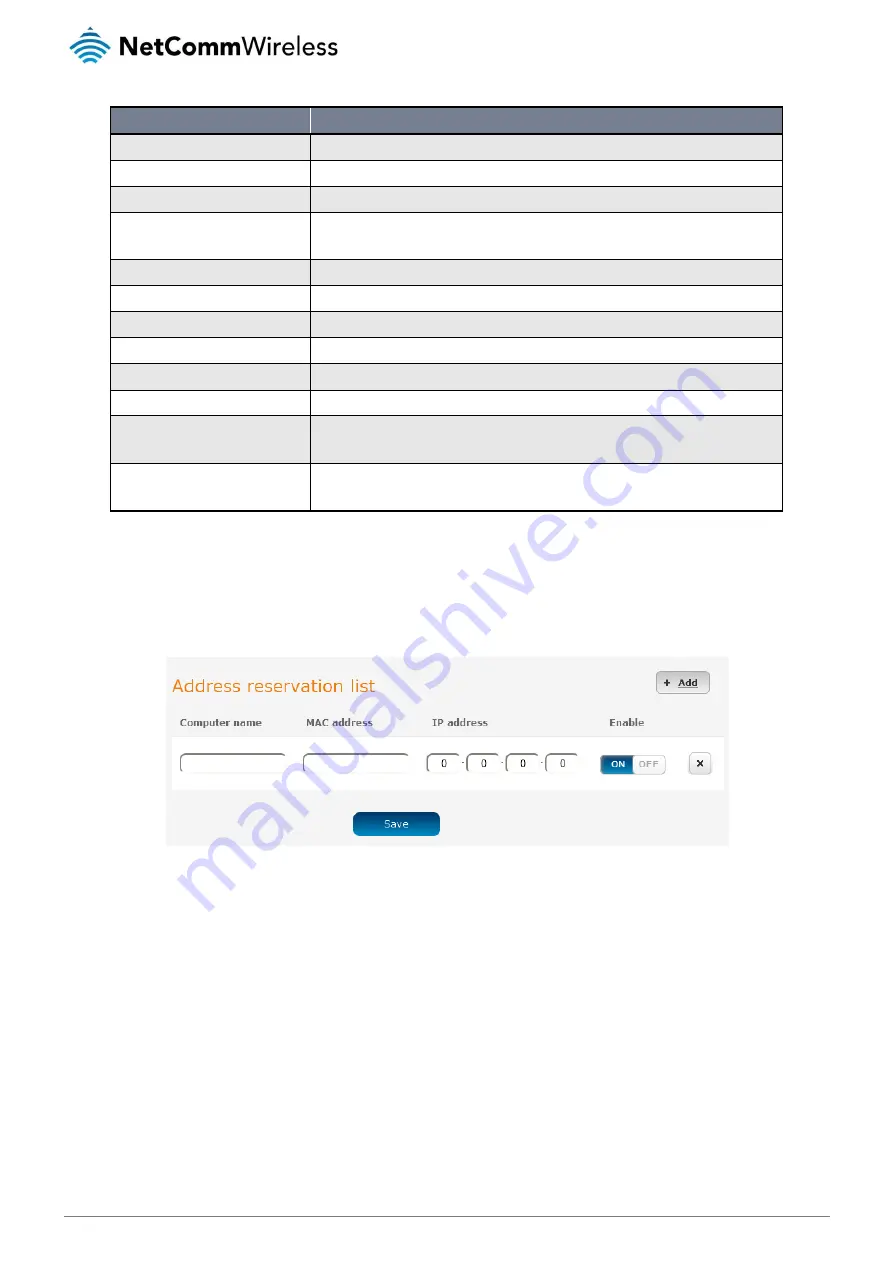
Address reservation list
DHCP clients are dynamically assigned an IP address as they connect, but you can reserve an address for a particular device using
the address reservation list.
Figure 26 – DHCP – Address reservation list
To add a device to the address reservation list:
1.
Click the +Add button.
2.
In the Computer Name field enter a name for the device.
3.
In the MAC Address field, enter the device’s MAC address.
4.
In the IP Address fields, enter the IP address that you wish to reserve for the device.
5.
If the Enable toggle key is not set to ON, click it to switch it to the ON position.
6.
Click the Save button to save the settings.


