


NV-HMI-7XX User Manual
87
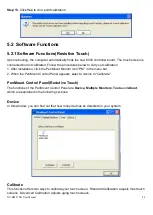
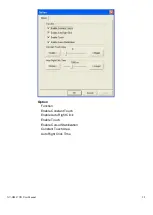
Standard Calibration
Click this button and arrows appear pointing to
red squares. Use your finger or stylus to touch
the red squares in sequence. After the fifth red
point calibration is complete. To skip, press
‘ESC’.
Advanced Calibration
Advanced Calibration uses 4, 9, 16 or 25 points
to effectively calibrate touch panel linearity of
aged touch screens. Click this button and
touch the red squares in sequence with a
stylus. To skip, press ESC’.
Command Calibration
Command call calibration function. Use
command mode call calibration function, this
can uses Standard, 4, 9, 16 or 25 points to
calibrate
E.g. Please run ms-dos prompt or
command prompt c:\Program Files\PenMount
Universa Driver\Dmcctrl.exe -calibration 0
( Standard Calibration) Dmcctrl.exe - calibration
($) 0= Standard Calibration 4=Advanced
Calibration 4 9=Advanced Calibration 9
16=Advanced Calibration 16 25=Advanced
Calibration 25
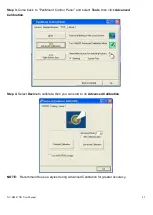
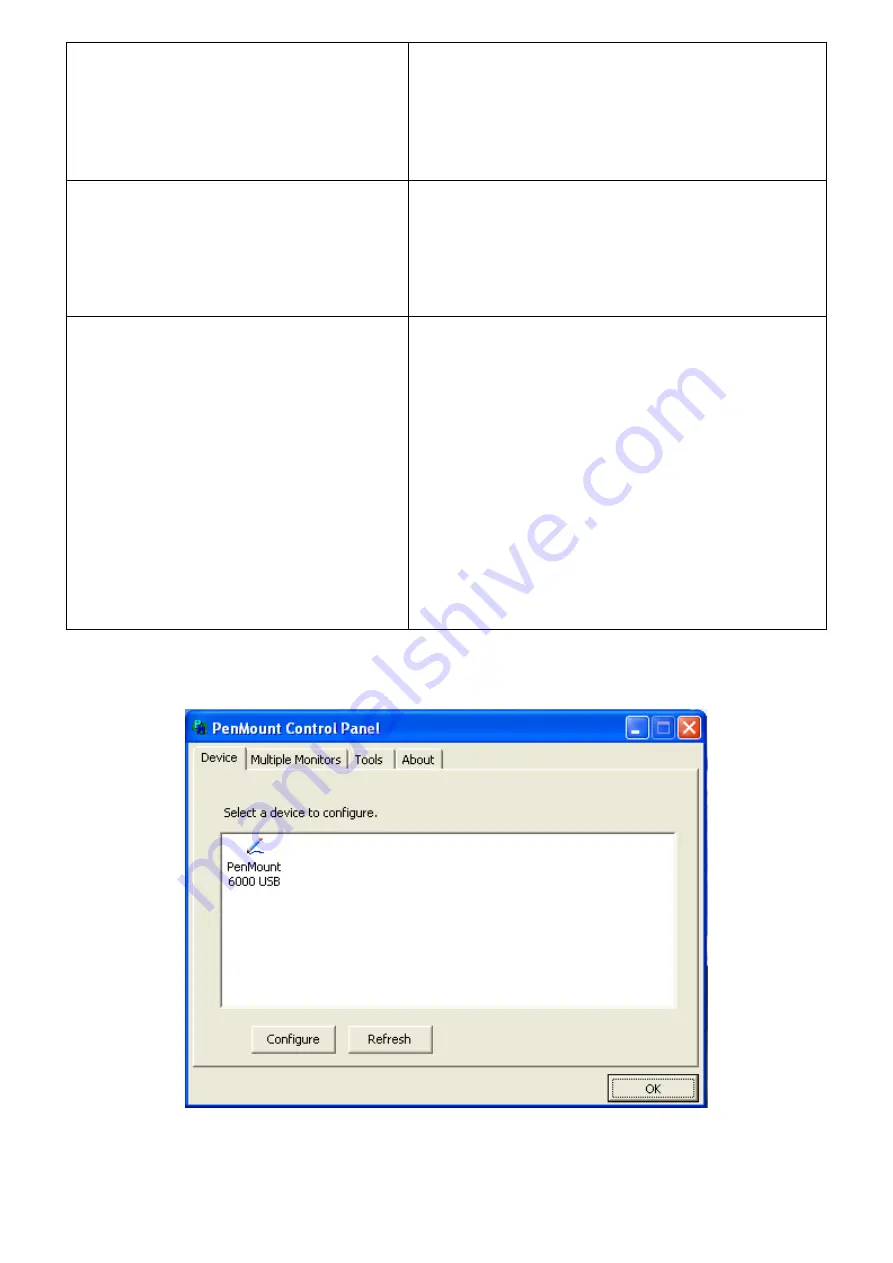
Step 1.
Please select a device then click “Configure”. You can also double click the device too.
Summary of Contents for NV-HMI-717P
Page 9: ...NV HMI 7XX User Manual 9 1 2 Dimensions Figure 1 1 Dimensions of NV HMI 717...
Page 10: ...NV HMI 7XX User Manual 10 Figure 1 2 Dimensions of NV HMI 721...
Page 49: ...NV HMI 7XX User Manual 49 3 3 Main Settings...
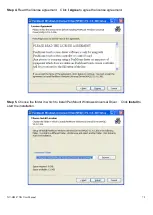
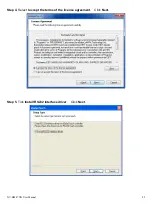
Page 69: ...NV HMI 7XX User Manual 69 Step 3 Read license agreement Click Yes Step 4 Click Next...
Page 77: ...NV HMI 7XX User Manual 77 Step 2 Select Resistive Touch Step 3 Click Next to continue...
Page 81: ...NV HMI 7XX User Manual 81 Step 2 Select Projected Capacitive Step 3 Click Next to continue...
Page 102: ...NV HMI 7XX User Manual 102 Hardware Saturn Hardware Configuration...
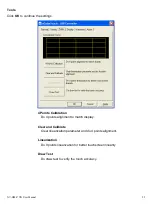
Page 103: ...NV HMI 7XX User Manual 103 About To display information about eGalaxTouch and its version...


