background image


C-6  Frequently Asked Questions 


When the system goes into Hibernation mode, it saves 
data and system status and then shuts off power to all 
components.  

Hibernation mode lets you save power without first 
saving your work. Resuming from Hibernation mode 
requires less time than performing a cold boot. 

Your system must be configured for Hibernation. In 
Windows Power Management Properties, check the 
box labeled “enable hibernate support,” under the 
Hibernate tab.  

To go into Hibernation mode, go to Start, select Turn 
Off Computer. Press the Shift key (Stand By changes to 
Hibernate.) Select Hibernate. 


How do I bring my system out of Standby mode? 


Sliding the Power switch brings the system out of 
Standby mode. 


What can I do to conserve battery power? 


There are several ways to conserve battery power, and 
this is an important activity, particularly if you 
frequently use your system in situations when you can’t 
operate your system on AC power. 

Try using your system with a lower screen illumination 
to conserve battery. 


There are also activities that draw larger amounts of 
battery power. If possible, operate your system on AC 
power in these circumstances to conserve your battery. 
For example, NEC Solution Americas recommends 
running the system on AC power while using external 
devices such as a printer or a USB drive or when 
connected to a network. 

Summary of Contents for Versa LitePad

Page 1: ......

Page 2: ...owever actual performance of each such product is dependent upon factors such as system configuration customer data and operator control Since implementation by customers of each product may vary the suitability of specific product configurations and applications must be determined by the customer and is not warranted by NECSAM To allow for design and specification improvements the information in ...

Page 3: ...es 1 16 AC Adapter and Power Cable 1 17 Tablet Stand 1 17 Tablet Pens 1 18 Keyboard 1 19 Mouse 1 20 2 Getting Started Stand Setup 2 2 Setting Up the Stand for Landscape Display 2 4 Setting Up the Stand for Portrait Display 2 8 Folding Up the Stand from Landscape Display 2 11 Folding Up the Stand from Portrait Display 2 13 Cable Connections 2 16 Connecting the AC Adapter 2 16 Connecting the USB Key...

Page 4: ...Entering BIOS Setup 3 2 Standard CMOS Setup Menu 3 3 Looking at Screens 3 3 Using Keys and Buttons 3 4 Checking Setting System Parameters 3 5 Resetting System Parameters 3 5 Standard Menu 3 5 Advanced Menu 3 7 Security Menu 3 8 Password Protection 3 9 Hard Disk Drive Passwords 3 10 Establishing Hard Disk Drive Passwords 3 10 Changing Hard Disk Drive Passwords 3 11 Using Hard Disk Drive Password Pr...

Page 5: ...ling the A D CD Software 4 9 NEC Online Documentation 4 10 Product Recovery CD 4 10 Guidelines for Using the Product Recovery CD 4 11 Product Recovery CD Options 4 11 Full Disk Drive Restore 4 12 Partition Only Restore 4 14 NEC CD RW CD 4 16 5 Adding Expansion Devices USB Devices 5 2 USB Diskette Drive 5 3 USB CD ROM and CD R RW Drives 5 4 Using the USB CD ROM or CD R RW Drive 5 7 Handling CDs 5 8...

Page 6: ...mation 9 2 Web Site 9 3 Support Services 9 4 E mail to Support Services 9 4 A Setting Up a Healthy Work Environment Making Your Computer Work for You A 2 Arrange Your Equipment A 3 Adjust Your Chair A 3 Adjust Your Input Devices A 4 Adjust Your Screen or Monitor A 5 Vary Your Workday A 6 Pre existing Conditions and Psychosocial Factors A 6 B Specifications Base System B 2 Expansion B 5 Power B 6 S...

Page 7: ...Contents vii Booting C 4 Power Management C 5 Battery Charging C 7 Miscellaneous C 8 Index Regulatory Statements ...

Page 8: ......

Page 9: ...r includes information about a Battery Refresh option in the BIOS Setup utility Standard menu Chapter 4 Using the Operating System and Utilities for an understanding of your Microsoft Windows XP Tablet PC Edition operating system and its power management features You can also find information about system utilities and applications available for your tablet PC Chapter 5 Adding Expansion Devices to...

Page 10: ...FAQs for a look at questions that users commonly ask and the answers to those questions Text Conventions To make this guide as easy as possible to use text is set up as follows Warnings cautions and notes have the following meanings Warnings alert you to situations that could result in serious personal injury or loss of life Cautions indicate situations that can damage the hardware or software Not...

Page 11: ...elease Notes provide additional information about your tablet PC that was not available at the time the user s guide was printed Information in the Release Notes is the result of extensive product testing NEC Versa LitePad Tablet PC User s Guide An online version of your printed NEC Versa LitePad Tablet PC User s Guide is available on the NEC Solutions America Web site www necsolutions am com mobi...

Page 12: ......

Page 13: ... Versa LitePad Tablet PC Before You Begin About Your Tablet PC On the Front of the Tablet PC On the Left Side of the Tablet PC On the Right Side of the Tablet PC On the Back of the Tablet PC About Your Tablet PC Accessories ...

Page 14: ...r completing the steps in the quick setup card that comes with your tablet PC your NEC Versa LitePad tablet PC is ready to go To get started do the following Read Appendix A Setting Up a Healthy Work Environment for guidelines that help you use your computer productively and safely Information includes how to set up and use your computer to reduce your risk of developing nerve muscle or tendon dis...

Page 15: ... a powerful ultra low voltage ULV Mobile Intel Pentium III Processor M running at 933 MHz or higher Your tablet PC provides a wide choice of ports and connectivity such as a CompactFlash Card slot three USB ports CRT port LAN port and wireless LAN Your tablet PC comes with 256 MB of system memory and is easily upgradeable to 512 MB of memory You have virtually unlimited storage capacity with the 2...

Page 16: ...on the front back and sides See the following figures and information to get familiar with the features on the front of the tablet PC NEC Versa LitePad tablet PC front features A Wireless LAN Switch E Key Buttons B System Control Buttons F LCD Panel with Protective Cover C Status LEDs G Built in Microphone D Power Switch H Battery Pack ...

Page 17: ...Introducing the NEC Versa LitePad Tablet PC 1 5 System control buttons A Rotate Screen Button C Fn Button B Escape Button D Security Button Key buttons A UP Button C DOWN Button B Enter Button ...

Page 18: ...utton Key Buttons Use these buttons like keyboard keys for navigation and for application shortcuts Button combinations provide multiple functions You can change and select button functions through the operating system Key buttons include UP Enter and DOWN buttons See Tablet Controls in this chapter for information about each button Status LEDs Keep informed about the current operating status of y...

Page 19: ...ore use see Chapter 2 Then keep the battery charged and ready for use Battery removal and replacement is easy see Chapter 2 Tablet Controls The tablet switches and buttons let you select specific tablet PC operations See the following information for a description of these tablet controls Tablet PC Switches and Buttons Switch Button Function Additional Functions with Fn Button Wireless LAN switch ...

Page 20: ...g Activated Tablet button message on task tray Fn Fn Displays a tablet menu of options in the task tray Fn Rotate Change between LCD only and simultaneous LCD and CRT display modes Fn Esc Alt Esc change current window Fn Security Ctrl Alt Del Fn Up Page Up Fn Enter Tab Fn Down Page down Security button Activates the Windows Ctl Alt Del security command When Windows is running the tablet PC enters ...

Page 21: ... Rotate Screen button as a single button You can customize button combinations using the Fn button and the Up Enter Down or Esc button To customize a button or button combination use Tablet and Pen Settings in Windows double tap or double click the Tablet and Pen Settings icon in the system tray or from the Start button go to Control Panel Printers and Other Hardware Tablet and Pen Settings and se...

Page 22: ...1 10 Introducing the NEC Versa LitePad Tablet PC Status LEDs A Power LED C Hard Drive LED B Battery LED D Wireless LAN LED ...

Page 23: ...ttery power is at 3 or less Battery Amber blinking Battery low battery power is at 3 or less and tablet PC is in suspend mode Off Tablet PC power is turned off Battery LED AC adapter Amber Battery is charging with power on tablet PC is in suspend mode or power is off AC adapter Amber blinking Battery error with power on tablet PC is in suspend mode or power is off Hard Drive LED AC adapter or batt...

Page 24: ...he tablet PC from theft VGA Port Use this 15 pin port to attach an external monitor to your PC tablet With an external monitor attached use the Fn and Rotate Screen buttons to toggle between LCD and Simultaneous LCD CRT video modes see the table Tablet PC Switches and Buttons in this chapter LAN Port Use this port to connect the system to a local area network LAN Power Port Attach the AC power ada...

Page 25: ...s you to connect an external microphone for monophonic recording or amplification through the unit USB Ports Allows you to easily and conveniently connect a USB equipped peripheral device to each of these ports You can connect the USB keyboard USB mouse and USB CD ROM drive that ship with the NEC Versa LitePad tablet PC You can also connect an optional USB CD R RW drive and other USB devices such ...

Page 26: ...F Card Slim Pen Use this slim 5 mm electronic pen as you would a pen on paper You can use the pen as your input device to write sketch enter data and execute programs This electromagnetic pen requires no battery Store the slim pen in its tablet pen holder so you always have it when you need it Note Two pens come with your tablet PC a slim pen and a clip pen Store the slim pen in the tablet PC pen ...

Page 27: ... PC The back of the NEC Versa LitePad tablet PC features memory and hard drive bays a battery release button speaker and vents see the following figure Descriptions follow the figure Back features A Speaker D Hard Drive Bay B Battery Release Button E Vents C Memory Module Bay ...

Page 28: ...ns the hard drive Memory Module Bay Contains the SDRAM memory module See Chapter 5 for memory upgrade information Vents Allow your tablet PC to cool properly and maintain a safe operating environment Do not block the vents while the tablet PC is in use About Your Tablet PC Accessories Your NEC Versa LitePad tablet PC comes with the following accessories AC adapter and power cable Tablet stand Tabl...

Page 29: ...o you can use your tablet PC just about anywhere See Connecting the AC Adapter and Battery Operation in Chapter 2 for AC adapter and battery information AC adapter and power cable A AC Adapter Cable C Power Cable B AC Adapter Tablet Stand The tablet stand provides a place to put your tablet PC for working viewing presentations and for easy cable connections The tablet stand folds up and is easily ...

Page 30: ... entering data and executing programs directly from the tablet screen This slim pen comes in the tablet PC pen holder see On the Right Side of the Tablet PC in this chapter Clip pen a 9 mm digital pen with a pressure sensitive tip a side button and a pen clip This pen features a replaceable tip Five replaceable tips and a tip grip ring come with the pen These pens feature battery free cordless ope...

Page 31: ...varies according to the application in use See the specific application s user guide for information about how each function key works within the application you use Windows Keys Use the following two keys to facilitate your work Shortcut Application key provides quick access to shortcut menus This key acts like a right mouse button Floating Window key displays the Start menu Typewriter Keys Typew...

Page 32: ...calculator key pad within the alphanumeric keys These keys operate with the numeric lock NumLk and Fn keys With Fn on and NumLk off the pad acts like cursor control keys With Fn and NumLk on the pad acts like a numeric keypad With both Fn and NumLk off these keys act as normal typewriter keys Mouse A mini USB three button optical wheel mouse comes with the NEC Versa LitePad tablet PC Connect the m...

Page 33: ...2 Getting Started Stand Setup Cable Connections Startup Tips for Working Pen Operation Battery Operation System Care ...

Page 34: ...ng the battery pack and for using the tablet PC with AC power connect standard accessories keyboard mouse and CD ROM drive start up the tablet PC find tips for working with your tablet PC use the tablet PC pens remove replace and use the battery pack care for your tablet PC Stand Setup Set up the tablet stand to use your NEC Versa LitePad tablet PC at your desk or for presentations away from your ...

Page 35: ...rocedures for folding up the stand for storage or for working somewhere else Note Press the Rotate Screen button on the NEC Versa LitePad tablet PC to change the screen display orientation see On the Front of the Tablet PC in Chapter 1 You need to calibrate the pen for each screen orientation landscape and portrait see Pen Operation in this chapter Stand setups with the tablet PC A Portrait Setup ...

Page 36: ...wer stable height for the tablet PC in this wider orientation Use the following procedure to set up the stand for landscape display 1 Release the rails from the locked position by pulling the tabbed bar towards the front of the stand Releasing the rails A Tabbed Bar B Rails C Rails secured in locking tabs at the back of stand 2 Lift the top end of the stand off of the desk or table ...

Page 37: ... 3 Slide the rails back until the tabbed bar is secured in the bar with the slot Adjusting the rails for landscape display A Bar with Slot 4 Check that the tabbed bar is secured in the slotted bar see the following figure ...

Page 38: ...2 6 Getting Started 5 Pivot the support posts outward Positioning the support posts for a landscape setup A Secured Bars ...

Page 39: ...lity and to prevent damage to the tablet PC always use the landscape stand setup for the landscape orientation of the tablet PC Positioning the tablet PC for landscape display Note To fold up the stand for storage or for working somewhere else see Folding Up the Stand from Landscape Display in this chapter ...

Page 40: ... earlier procedure Setting Up the Stand for Landscape Display 2 Pivot the support posts inward and down Starting from landscape setup support posts down 3 Keeping the locking bars secured lift the top panel up until the rails are in a straight line with the top panel see the following figures Then press down on the top panel to lock the rails into the tabs at the back of the top panel ...

Page 41: ...Getting Started 2 9 Lifting the top panel A Top Panel B Secured Bars Locking the top panel in place A Rails in line with top panel C Press top panel downward B Locking Tabs ...

Page 42: ...2 10 Getting Started Looking at the portrait display position 4 Place the bottom of the tablet PC on the support posts Positioning the tablet PC for portrait display ...

Page 43: ...e To fold up the stand for storage or for working somewhere else see Folding Up the Stand from Portrait Display in this chapter Folding Up the Stand from Landscape Display To fold up the stand for portability or storage follow these steps 1 Pivot the support posts inward and down 2 Slide the tabbed bar towards the front of the base Note Be sure to slide the tabbed bar on top of the base Don t let ...

Page 44: ...ed 3 Push the tabbed bar towards the top panel to lock the rails and secure the stand in the flat position Locking the rails A Rails secured in locking tabs at the back of the stand Looking at the folded and locked stand ...

Page 45: ...nd for portability or storage follow these steps 1 Holding the base and keeping the locking bars secured lift the top panel up to release it from the locking tabs on the back Pivot the top panel towards the rear Folding up the stand from portrait setup A Lift top panel and pivot down ...

Page 46: ... Getting Started 2 Slide the tabbed bar towards the front of the base Note Be sure to slide the tabbed bar on top of the base Don t let the bar slide under the base Folding up the stand from landscape setup ...

Page 47: ...15 3 Push the tabbed bar towards the top panel to lock the rails and secure the stand in the flat position Locking the rails A Rails secured in locking tabs at the back of the stand Looking at the folded and locked stand ...

Page 48: ...that come with the system See the following sections for connection information Connecting the AC Adapter Connect the AC adapter and power cable that come with your tablet PC to run your system when an AC outlet is available Note Keep the AC adapter connected whenever possible When connected the AC adapter charges the battery pack whether the tablet PC is powered on or off Connect the AC adapter a...

Page 49: ...dapter is intended for use with a computer and must meet EN609050 standards Do not cover or place objects on the AC adapter Keeping the adapter clear of objects lets the adapter cool properly during use Only use the AC adapter that comes with your NEC Versa LitePad tablet PC Although other adapters look similar using them can damage your system Note For information about charging and using the bat...

Page 50: ...cable that comes with the drive into the back of your CD ROM drive and into a USB port and power port on your tablet PC See USB Devices in Chapter 5 for drive features and installation information NEC Solutions America recommends that you always operate your system on AC power when using an external device such as a CD ROM drive Startup See the Quick Setup card that comes with your NEC Versa LiteP...

Page 51: ...itten notes in Journal You can also learn about using the tablet PC and pen by tapping the Windows Start button and selecting the Get Going with Tablet PC option Calibrate your pen and set other tablet options Double tap the Tablet and Pen Settings icon in the Windows system tray to display the Tablet and Pen Settings screen You can set options in the Settings Display Tablet Buttons and Pen Option...

Page 52: ...should be relaxed and straight While using the keyboard mouse and pen keep your shoulders and arms as relaxed as possible Take regular breaks from the tablet PC to rest your eyes Perform stretching exercises to relax your fingers hands wrists forearms and shoulders See Appendix A Setting Up a Healthy Work Environment for more information Pen Operation Two pens ship with the NEC Versa LitePad table...

Page 53: ... input data Your tablet PC supports handwriting recognition When you use a tablet pen to write directly on the screen and create digital ink your tablet PC can translate your handwriting into keyboard style text Pressure from your hand transmits information from the pressure sensitive pen tip to the tablet screen The button on the side of the pen lets you operate the pen as a mouse with a right cl...

Page 54: ...ablet pen like a mouse Equivalent pen mouse actions are as follows Single tap the tablet screen equivalent to a single click of the primary mouse button Double tap the tablet screen equivalent to a double click of the primary mouse button Press and hold the pen on the tablet screen equivalent to a click of the right mouse button right click Point hover equivalent to pointing with the mouse Hold pe...

Page 55: ...en Settings icon in the Windows system tray Select the Settings menu to calibrate pen accuracy Note You need to calibrate the pen for each screen orientation landscape or portrait Select the Pen Options menu to set pen actions to work as a mouse and to set the pen button to right click Replacing Clip Pen Tips Five tips and a tip grip ring come with the clip pen 9 mm When you notice pen performance...

Page 56: ...EC Versa LitePad tablet PC Using the Battery Pack See the table Tablet PC Status LEDs in Chapter 1 for a description of the Power and Battery LED status Also see Determining Battery Status and Identifying Low Battery Status in this chapter for battery power information To prevent data loss fully charge the battery pack before running the tablet PC on battery power see Connecting the AC Adapter ear...

Page 57: ...ear An electrical plug appears when the system is connected to an AC power source A battery icon always appears when the system is not connected to an AC power source To show the Power icon on the taskbar when connected to AC power tap the Windows Start button select Control Panel select Performance and Maintenance and select Power Options From the Power Options Properties window select the Advanc...

Page 58: ... procedures to improve battery performance Remove and reinstall the battery in your NEC Versa LitePad tablet PC and fully recharge the battery to 100 Refresh the battery using the Battery Refresh function in the BIOS Setup utility see Standard Menu in Chapter 3 Extending Battery Life While on the road it is important to be aware of the simple things you can do to extend the life of the system s ba...

Page 59: ...hese symptoms Shorter work times Discoloration warping Hot to the touch Strange odor Replace the battery installed in your NEC Versa LitePad tablet PC as follows Only use batteries that are designed for your NEC Versa LitePad tablet PC Installing another manufacturer s battery or using a combination of very old and new batteries can deteriorate battery and equipment performance 1 Save your files e...

Page 60: ...pack as follows Slide the battery release button to the right and hold firmly While holding the release button slide the battery out of the battery bay Releasing the battery pack A Battery Release Button B Battery Pack Removing the battery pack ...

Page 61: ...Getting Started 2 29 4 Insert the new battery pack as follows Align the battery connector and slots with the battery bay connector and tabs Battery connector and tabs A Battery Slots B Battery Connector ...

Page 62: ...he tablet PC over Charging the Battery Charge the battery pack by simply connecting your NEC Versa LitePad tablet PC to an AC power source Note During charging keep the environmental temperature between 32 F and 104 F 0 C to 40 C To monitor the charging activity observe the battery LED on the front of the tablet PC The battery LED lights as follows Lights amber when the battery is charging Blinks ...

Page 63: ... the battery away from heat sources including direct sunlight open fires microwave ovens and high voltage containers Temperatures over 140º F 60ºC may cause damage Do not drop or bump the battery Do not disassemble the battery Do not solder the battery Do not puncture the battery Do not use a battery that appears damaged or deformed has any rust on its casing is discolored overheats or emits a fou...

Page 64: ...ablet PC the AC adapter or the battery Avoid moving the NEC Versa LitePad tablet PC during system operation especially while the hard disk diskette drive or other drive is being accessed When using the AC adapter make sure the power source falls within the system s compatible range of 100 240 volts and 50 or 60 Hz AC Never use the AC adapter if the voltage falls outside of this range Watch for thi...

Page 65: ...nts Store the tablet PC and AC adapter in an environment that meets the following conditions If the temperature of the NEC Versa LitePad tablet PC suddenly rises or falls for example when you move the system from a cold place to a warm place vapor condenses inside the system Turning on the system under this condition can damage the internal system components Before turning on the system wait until...

Page 66: ...ese cleaners are usually high in alkalinity which is measured in pH Using these cleaners can harm the magnesium surface LCD screen Carefully wipe the LCD screen with a soft cloth or a screen wipe designed for that purpose Special screen wipes are available through your local computer dealer System case NEC Solutions America recommends that you carefully wipe the case with a slightly damp almost dr...

Page 67: ...3 Using the BIOS Setup Utility Introducing BIOS Setup Entering BIOS Setup Checking Setting System Parameters Updating the BIOS Checking Changing Switch Settings ...

Page 68: ...ed in the system s complementary metal oxide semiconductor CMOS memory Entering BIOS Setup Connect your keyboard or use your tablet pen to run the BIOS Setup utility You can use some of the tablet PC buttons to access the BIOS Setup utility and to select menu options Access the BIOS utility at power on Just press the DOWN button when the following prompt appears Press DOWN to Enter BIOS Setup When...

Page 69: ...sh Enter Use the up and down arrow keys on your keyboard to move through the BIOS Setup menu items or use the UP and DOWN tablet PC buttons See Using Keys and Buttons in this chapter for a list of keys and buttons you can use to run the BIOS Setup utility Looking at Screens BIOS setup screens have two main areas Parameters The left side of the screen This area lists parameters and their current se...

Page 70: ...and exit setup UP DOWN Moves the cursor between the displayed parameters Selects the Setup menu screen Changes the value for the selected item field Tab Enter Moves the cursor between subfields For example for System Time Tab moves the cursor from hour to minute to second Home Goes to the top of the screen End Goes to the bottom of the screen Enter ENT Enter Brings up a parameter sub menu FnA Open...

Page 71: ...ced CMOS Setup System Security Setup Boot Device Setup Exit Options Resetting System Parameters To reset all parameters to the optimal default settings press or tap F9 use the arrow keys to select OK to load the defaluts or Cancel and press Enter Standard Menu Use the Standard menu to view the system memory and language to modify the system date system time drive parameters set boot sector virus p...

Page 72: ...year These settings remain in memory even after you turn off system power To set the date use the Tab Shift Tab or Enter keys to move from field to field You can also use the Enter button to move from field to field System Time Sets the time enter the current hour minute and second in hr min sec 24 hour format To set the time use the Tab Shift Tab or Enter keys to move from field to field You can ...

Page 73: ...e Setting s USB Legacy Support Enabled Disabled Remote Power on Enabled Disabled Intel SpeedStep Technology Enabled Disabled CPU Power Management Enabled Disabled USB Legacy Support When set to Enabled enables support for a legacy USB device Remote Power On When set to Enabled allows the LAN board to wake the system Intel SpeedStep Technology When enabled Intel SpeedStep technology is controlled b...

Page 74: ... Set User HDDs Security Password Press Enter Display of Set Master HDDs Security parameter requires Supervisor Password enabled Supervisor Password Is Display only Automatically displays password status User Password Is Display only Automatically displays password status Change Supervisor Password Allows you to set or change the Supervisor password The Supervisor password allows access to all Setu...

Page 75: ...ssword Once you set a supervisor password you must enter it before you can enter BIOS Setup To establish password protection for entering the BIOS Setup utility you must set the supervisor password before setting a user password To enter a password select Set Supervisor Password press Enter enter the password re enter the password to confirm it and press any key to continue Repeat the procedure to...

Page 76: ...ssword and enable the established passwords for the internal HDD Follow these steps to establish HDD passwords and to enable HDD password protection If you set the master and user password on a hard drive password security can never be disabled Passwords can be changed If the master password is forgotten and the drive is installed in another system you cannot access the data on the hard drive If t...

Page 77: ...ess Enter at the prompt to enter a password Using Hard Disk Drive Password Protection To facilitate the transfer of one or more HDDs between systems establish a single master password and store the password in a secure place Forgetting your master password results in the inability to access the data on your hard drive Establish different user passwords to limit access to specific systems If you se...

Page 78: ...mpted To take advantage of HDD password protection in another system the system must be equipped with the same HDD password protection feature To determine if that system has HDD password check the Security Setup in the BIOS Setup to see if there are provisions for establishing HDD passwords Boot Menu The Boot Device Setup menu allows you to define the boot devices and boot order of system devices...

Page 79: ... use F9 for this operation Updating the BIOS The BIOS is code transmitted onto your system s microprocessor or central processing unit CPU As indicated in this chapter you use the BIOS Setup utility to configure your system s software and hardware features Only use the BIOS Update Diskette for your specific model to update your NEC Versa LitePad tablet PC BIOS Note You only need to update the BIOS...

Page 80: ...tte Note Preparing the BIOS Update Diskette makes the diskette bootable This procedure requires a system that has the MS DOS operating system available Microsoft Windows XP does not have an MS DOS operation If a bootable disk is required contact Support Services at NEC Solutions America see Chapter 9 1 Scan your hard drive for any computer viruses 2 Unlock the write protect notch on the diskette i...

Page 81: ...prepared the system for a BIOS update perform the following steps 1 Insert the BIOS Update diskette into the diskette drive 2 Power on the tablet PC with the diskette in the diskette drive The system boots and automatically loads the utility Read the message that displays and follow the instructions 3 Press Enter to continue The utility checks the currently installed BIOS version and the diskette ...

Page 82: ...10 to save changes and exit Setup Checking Changing Switch Settings The NEC Versa LitePad tablet PC has a four position dip switch on the bottom of the tablet PC Switches are identified as follows Switch 1 Password Override switch The default setting is OFF If you forget the password you set in the BIOS Setup utility and you cannot access BIOS Setup or Windows change the setting to ON and your cur...

Page 83: ...e handling any internal components discharge static electricity from yourself by touching a nearby unpainted metal surface 1 Power off the system disconnect AC power and disconnect any peripheral devices 2 Turn over the tablet PC 3 Locate the screw securing the memory bay cover to the bottom of the tablet PC Remove the screw and lift off the memory bay cover Memory bay cover A Memory Bay Cover B S...

Page 84: ...IOS Setup Utility 4 Locate the plastic cover next to the memory module as shown in the following figure Locating switches A Password Override Switch C Crisis Recovery Boot Switch B Logo Select Switch D Reserved Switch ...

Page 85: ...dule cover and screw plug in the AC adapter and power on the system 7 At the startup screen press the DOWN button to enter the BIOS Setup utility Select the Security menu and check that switch setting procedure has cleared the password 8 Power off the system and disconnect AC power Turn over the tablet PC 9 Turn over the tablet PC and remove the memory bay cover 10 Set switch 1 back to OFF see the...

Page 86: ......

Page 87: ...4 Using the Operating System and Utilities Windows Introduction Windows Power Management NEC Customize Utility Application and Driver CD NEC Online Documentation Product Recovery CD NEC CD RW CD ...

Page 88: ...blet PC for additional tutorials about using the tablet PC and pen Windows Power Management Your NEC Versa LitePad tablet PC manages its power resources using the Advanced Configuration and Power Interface ACPI while the system is powered on using AC or battery DC power ACPI enables the operating system to manage the power given to each attached device and to turn off a device when not in use Take...

Page 89: ...on batteries power Power Schemes Parameter Default Setting Alternate Setting s Power Schemes Portable Laptop Home Office Desk Presentation Always On Minimal Power Management Max Battery Turn off monitor Plugged in After 15 Minutes 1 2 3 5 10 15 20 25 30 45 minutes 1 2 3 4 5 hours Never Turn off monitor Running on batteries After 2 Minutes 1 2 3 5 10 15 20 25 30 45 minutes 1 2 3 4 5 hours Never Tur...

Page 90: ...nutes 1 2 3 4 5 6 hours Never Power Schemes Defines the most appropriate power scheme for your computer Turn off monitor Selects the time delay before your LCD panel turns off Turn off hard disks Selects the time delay before your hard disk s power down System standby Selects the system standby timeout period for your system when running under AC or DC power System hibernates Selects the system hi...

Page 91: ... Action Hibernate Power Off Standby Hibernate Run a program None When the alarm occurs run this program Enabling an Alarm action enables Force stand by or shutdown even if program stops responding setting Low battery alarm Allows you to define a low battery alarm percentage notification and system action Critical battery alarm Allows you to define a critical battery alarm percentage notification a...

Page 92: ... the Sleep button on my computer Standby Do nothing Ask me what to do Standby Hibernate Shut down If USB keyboard has the Sleep button feature Always show icon on the taskbar Determines whether or not the Power Meter icon displays on the taskbar Prompt for password when computer goes off standby Determines whether or not the system prompts for your Windows password when resuming from Standby When ...

Page 93: ...ement states The following table describes the system behavior for each power management state Windows Power Management Behavior Feature LCD Timeout Standby STR Hibernate STF Default Setting 5 Minutes DC power 15 minutes AC power 5 minutes DC power 20 minutes AC power 2 hours DC power 3 hours AC power Manually Invoke Go to Start Shutdown Standby Press Power button Press Power button System Behavio...

Page 94: ...s the NEC wallpaper Help button provides an overview of the NEC Customize utility Exit button closes the NEC Customize utility Using the NEC Customize Utility Follow these steps to use the NEC Customize utility 1 Double click the NEC Customize icon 2 From the display window select the desired option 3 Follow the on screen instructions to process the selected option 4 If necessary click Exit to clo...

Page 95: ...ect Application and Driver CD The Application and Driver CD dialog box appears Note If the NEC Customize icon is not available double click My Computer on the desktop or in the Start menu and then click the CD icon The Application and Driver CD dialog box appears The Application and Driver CD dialog box provides selection tabs Each tab represents a software category The selection tabs include appl...

Page 96: ...solutions Product Recovery CD The Product Recovery CD contains the NEC Product Recovery utility that allows you to restore your system to its initial installation state If you determine that you need to restore your system to its initial installation state use the instructions that follow Note Only use the Product Recovery utility to restore your system to its initial installation state as a last ...

Page 97: ...e option in the window at the right side of the screen Full Disk Drive Completely rebuilds your hard disk drive destroying all existing data in the process Select this option if you wish to restore your hard disk drive to its initial installation state Note Use the Full Disk Drive restore option if your hard disk consists of one partition drive Partition Only Lets you preserve your existing hard d...

Page 98: ...ore option if the preinstalled software is unusable Use the Product Recovery utility to perform a Full Disk Drive restore as follows 1 Check the Product Recovery CD title and make sure that it is the correct CD for your NEC Versa LitePad tablet PC and operating system 2 Put CD1 into the CD ROM drive tray close the drive door and reboot your system 3 Read the License Agreement screen that appears U...

Page 99: ...ith progress bars is displayed and indicates the progress of the recovery Do not turn off or disturb the system during the recovery process At the prompt for the next CD remove CD1 insert CD2 into the CD ROM drive Select OK to start loading CD2 When the recovery process is complete you are prompted to remove the CD from the CD ROM drive and reboot your system 8 At the prompt remove the CD from the...

Page 100: ... restore option if the preinstalled software on drive C is unusable Use the Product Recovery utility to perform a Partition Only restore as follows 1 Check the Product Recovery CD title and make sure that it is the correct CD for your NEC Versa LitePad tablet PC and operating system 2 Put CD1 into the CD ROM drive tray close the drive door and reboot your computer 3 Read the License Agreement scre...

Page 101: ...an NEC screen loads 7 At the NEC screen click Continue to start the recovery process A screen with progress bars is displayed and indicates the progress of the recovery Do not turn off or disturb the system during the recovery process Remove CD1 at the prompt for the next CD and insert CD2 into the CD ROM drive Select OK to start loading CD2 When the recovery process is complete you are prompted t...

Page 102: ...rograms from a CD and write information to a CD The NEC CD RW CD provides a driver CDINIT and an application Easy CD Creator The materials that come with the CD describe how to install and use your software On screen prompts provide guidelines during the installation Once the software is installed access the on screen help for more information about using and configuring your CD R RW drive ...

Page 103: ...5 Adding Expansion Devices USB Devices Memory Module CF Cards Monitor Audio Options ...

Page 104: ... R RW drive digital camera scanner printer modem mouse keyboard telephone or game device You can add multiple USB devices to the tablet PC in several ways add three devices one to each USB port add multiple devices to each USB port by daisy chaining each device to the next device each device must have a USB port add multiple devices to each port through an optional multiple USB port hub To connect...

Page 105: ...features see the following figure Status LED Lights during data read write operations When the indicator is lit do not eject the diskette unplug the USB cable or turn off the NEC Versa LitePad tablet PC Doing so can cause loss of data from your diskette Eject button Ejects the diskette USB cable Connects to a USB port on your NEC Versa LitePad tablet PC Ease of use Allows connection or removal fro...

Page 106: ...se the Safely Remove Hardware function on the Windows XP taskbar USB CD ROM and CD R RW Drives A USB CD ROM drive comes with your NEC Versa LitePad tablet PC The USB CD R RW drive is an optional device Use the USB CD ROM and CD R RW drives to load and start programs from a compact disc CD or to play your audio CDs These drives are fully compatible with Kodak multisession Photo CD discs and standar...

Page 107: ...Adding Expansion Devices 5 5 USB CD ROM drive front features A Eject Button C Emergency Eject Hole B Status LED USB CD R RW drive front features A Status LED C Eject Button B Emergency Eject Hole ...

Page 108: ...5 6 Adding Expansion Devices USB CD ROM CD R RW drive rear features A USB IF Power Cable B USB Drive Connectors USB CD ROM CD R RW drive bottom feature A Emergency Eject Tool ...

Page 109: ... power failure To open the tray and remove a disc in an emergency use the emergency eject tool at the rear of the drive Press the tool into the hole to release the tray Ease of use The USB CD ROM and CD R RW drives can be disconnected or connected to your tablet PC at any time with tablet PC power on or off see the next section Using the USB CD ROM or CD R RW Drive To use the USB CD ROM or CD R RW...

Page 110: ...hing or soiling either side of the disc Do not write on or apply labels to the data side of the disc Keep the disc away from direct sunlight or high temperatures Clean fingerprints or dust from the disc by wiping it with a soft cloth Gently brush the cloth from the center of the disc toward the edge Avoid using benzene paint thinner record cleaner static repellent or any other chemical on the disc...

Page 111: ... the system disconnect AC power remove the battery pack see Chapter 2 and disconnect any peripheral devices 2 Locate the screw securing the memory bay cover to the bottom of the tablet PC Remove the screw and lift off the memory bay cover Note Removing the memory bay cover screw requires a very small tip Phillips screwdriver Memory bay cover A Memory Bay Cover B Screw ...

Page 112: ...harge static electricity from yourself by touching a nearby unpainted metal surface Press the locking tabs away from the sides of the module until the module pops up at an angle Pull the memory module out of the slot along the angle and store it in a static free bag Removing the memory module A Locking Tabs B Memory Module ...

Page 113: ...et insert the module connector into the socket Firmly push the module into the socket Press down on the edge of the memory module until the locking tabs on the sides of the socket snap into place securing the module Installing the memory module A Module Alignment Notch 5 Replace the memory bay cover and its screw 6 Turn the system over Reinstall the battery pack and reconnect the peripherals and t...

Page 114: ... side of the tablet PC Use the slot to insert one Type I or one Type II CF Card Inserting a CF Card To insert a CF Card follow these steps 1 Remove the CF Card slot cover by pressing twice on the eject button next to the slot Pull the cover out of the slot and save it CF card slot cover A CF Card Eject Button B CF Card Slot Cover 2 Align the CF Card so that the connector end points toward the CF C...

Page 115: ...ps to connect an external monitor to your tablet PC 1 Check that the tablet PC is powered off and the monitor power switch is turned off Note The NEC Versa LitePad tablet PC must be powered off or suspended while the monitor is being connected 2 Pull open the monitor port cover and attach the 15 pin cable connector to the VGA monitor port on the system see On the Back of the Tablet PC in Chapter 1...

Page 116: ...s You can connect the following audio options an external microphone to the microphone in jack stereo headphones to the headphone jack Note If you are using an external microphone and experience sound distortion or feedback lower the speaker volume For additional speaker setup and operation information see the documentation that comes with the speaker set Adjust the volume through the Windows volu...

Page 117: ...6 Communicating with Your NEC Versa Wireless LAN LAN Connection Internet Connections ...

Page 118: ...logy and guaranteed to work with all other Wi Fi certified products To comply with FCC and Industry Canada RF Exposure requirements NEC Solutions America recommends when using the NEC Versa LitePad tablet PC with a built in wireless LAN module you maintain a distance of at least 1 inch 2 5 centimeters between the antenna of this device and all persons To use wireless LAN see the online documentati...

Page 119: ... the 10 100Base TX LAN standard and both Wake on LAN and Network Boot functions To take advantage of the interface connect an RJ 45 cable to the LAN port on the left side of the system see On the Left Side of the Tablet PC in Chapter 1 Internet Connections Your NEC Versa LitePad tablet PC is equipped with the Windows operating system to provide a fully integrated Internet experience Use the Intern...

Page 120: ...ngs port settings a user name logon and password your e mail address the name of a POP3 IMAP or HTTP server for incoming mail the name of an SMTP server for outgoing mail To access the Internet Connection Wizard in Windows click or tap the Windows Start button select Control Panel Network and Internet Connections and then select a task or the Internet Option Launch the connection wizard and follow...

Page 121: ...7 Traveling Tips Preparing for Travel Packing for Travel Using Power Connections Getting Through Customs Connecting to the Internet ...

Page 122: ... fully charged the inspection only takes a minute or so Otherwise be prepared to attach the AC adapter and power cable And if you don t have these the inspection might include a disassembly of the system Back up your tablet PC hard disk Insert a fully charged battery to make sure your system is ready to quickly boot up at the airport security check Fully charge all your batteries Tape your busines...

Page 123: ...onal AC extension cord Using Power Connections With the right accessories you can run your NEC Versa LitePad tablet PC almost anywhere Your system self adjusts to various power sources The United States Canada and most of Central and South America use 120 volt alternating current AC Most other countries of the world use 240 volt AC The NEC Versa LitePad tablet PC adapts to voltages ranging from 10...

Page 124: ... a Certificate of Registration a document that is issued when you register your NEC Versa LitePad tablet PC with the Customs Service prior to departure The certificate of registration contains a brief description of your tablet PC and lists appropriate serial numbers for identification The document is available from the customs web site at http www customs ustreas gov To avoid hassle when moving y...

Page 125: ...are provided to you completely so your settings work effectively with the provider s system If you have problems the hotel or convention center may be able to direct you to a support technician Connecting Using Wireless LAN There are now many public wireless LAN services available for the traveler Many hotels some airports and some cafes now offer wireless LAN access to the Internet for a nominal ...

Page 126: ......

Page 127: ...8 Solving System Problems Problem Checklist Startup Problems If You Need Assistance ...

Page 128: ...PC The electrical outlet to which your AC adapter is connected is working Test the outlet by plugging in a lamp or other electrical device All cables are tightly connected The display setting is configured correctly The display s brightness is adjusted properly If using battery power check that the battery pack is properly inserted and fully charged Troubleshooting Problem What to Do The system do...

Page 129: ...ttery power Plug in the AC adapter before resuming operation Battery power does not last long If you are using wireless LAN run it on AC power If you are using an optical drive such as the CD ROM drive use it on AC power Fully charge and fully discharge the battery several times to recondition it Use the Battery Refresh function in the Standard Menu of the BIOS Setup utility see Standard Menu in C...

Page 130: ...d reinstalling the battery System shuts off instead of going into sleep mode You held the power sleep switch for more than four seconds For sleep mode slide the switch and immediately release System does not shut off after pressing the power sleep button You might not have held the power sleep switch long enough Slide the switch and hold for four seconds or more before releasing System password se...

Page 131: ...curely installed or connected Verify that the system parameter for the I O port configuration is set correctly in Setup If You Need Assistance If you have a problem with your computer first review the checklist and troubleshooting table in the previous section If you still have a problem see Chapter 9 Getting Service and Support for details about contacting NEC Solutions America Note If you are us...

Page 132: ......

Page 133: ...9 Getting Service and Support Contact Information Web Site Support Services E mail to Support Services ...

Page 134: ...rvices U S and Canada customers only 1 800 632 4525 E mail to Support Services through a commercial online service or the Internet op system support necsam com If you have access to a telephone a modem an access point and or a LAN Internet connection you can use these services to obtain information about your system at any time day or night seven days a week Not only do these services provide info...

Page 135: ...luding Frequently Asked Questions reference manuals and warranty information BIOS updates drivers and Setup Disk files to download contact information including telephone numbers for Technical Support and links to vendor Web sites an automated e mail form for your technical support questions a password accessible area for resellers To access the Mobile Solutions Division of NEC Solutions America H...

Page 136: ... support to ensure that NEC Solutions America support personnel can successfully troubleshoot your system For outside the U S or Canada please contact your local NEC office or dealer for the support and service available in your country E mail to Support Services NEC Solutions America Support Services offers technical support by e mail if you have Internet access The e mail address is op system su...

Page 137: ...lthy Work Environment Making Your Computer Work for You Arrange Your Equipment Adjust Your Chair Adjust Your Input Devices Adjust Your Screen or Monitor Vary Your Workday Pre existing Conditions and Psychosocial Factors ...

Page 138: ...nerve tendon and muscle disorders Note Prolonged or improper use of a computer workstation may pose a risk of serious injury To reduce your risk of injury set up and use your computer in the manner described in this appendix Although some studies have shown an association between increasing hours of keyboard use and the development of some musculoskeletal disorders it is still unclear whether work...

Page 139: ...nge your equipment so that you can work in a natural and relaxed position Place items that you use frequently within easy reach Adjust your workstation setup to the proper height as described in this appendix by lowering the table or stand that holds your computer equipment or raising the seat height of your chair Position your tablet PC directly in front of you for increased safety and comfort Ad...

Page 140: ...vices Position your keyboard directly in front of you Avoid reaching when using your keyboard or mouse If you use a mouse position it at the same height as the keyboard and next to the keyboard Keep your wrists straight and use your entire arm when moving a mouse Do not grasp the mouse tightly Grasp the mouse lightly and loosely Adjust the keyboard height so that your elbows are near your body and...

Page 141: ... eyes periodically by focusing on an object at least 20 feet away Blink often Position the screen or external monitor at a 90 angle to windows and other light sources to minimize glare and reflections Adjust the monitor tilt so that ceiling lights do not reflect on your screen or external monitor If reflected light makes it hard for you to see your screen or external monitor use an anti glare filt...

Page 142: ...l Display Terminal Workstations ANSI HFS Standard No 100 1988 The Human Factors Society Inc P O Box 1369 Santa Monica California 90406 Pre existing Conditions and Psychosocial Factors Pre existing conditions that may cause or make some people more susceptible to musculoskeletal disorders include the following hereditary factors vascular disorders obesity nutritional deficiencies e g Vitamin B defi...

Page 143: ...ramping stiffness throbbing weakness soreness tingling and or numbness in the hands wrists arms shoulders neck back and or legs This appendix was prepared in consultation with Dr David Rempel of the University of California San Francisco Ergonomics Program and Mr M F Schneider of HUMANTECH Inc Ann Arbor Michigan ...

Page 144: ......

Page 145: ...B Specifications Base System Expansion Power Security Dimensions and Weight Recommended Environment ...

Page 146: ...dom Access Memory RAM Standard Memory 256 MB of high speed PC133 memory in one SO DIMM slot Memory Expansion 512 MB of PC133 memory upgrade in SO DIMM slot BIOS Read Only Memory ROM 512 KB flash ROM Cache Memory L1 Cache 16 KB code and 16 KB data Calendar Clock Year month day hour minute second maintained by internal back up battery Core Chip Napa2 T North Bridge and Ali 1535 South Bridge Video Co...

Page 147: ...max Colors up to 65 536 Color depth 24 bit Digitizer Tablet Electromagnet give and receive method Wacom Pens Wacom slim pen 5 mm and clip pen 9 mm User Controls Buttons push button Change screen orientation Escape Function Security Down Enter Up Switches slide switch Power Radio wave Audio Controller embedded in core chip South Bridge Sound Codec ADI 1981B Internal monoaurol speaker Internal micro...

Page 148: ...ouse Hard Disk Drive 1 8 inch 5mm IDE UltraDMA 100 20 GB or higher hard disk drive Note When referring to storage capacity GB stands for one billion bytes Some utilities may indicate varying storage capacities Total user accessible capacity may vary depending on operating environments Input Output I O Facilities Integrated industry standard interfaces LAN Port 1 port RJ 45 jack DC In 1 port for AC...

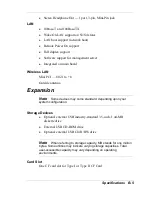
Page 149: ...de antenna Expansion Note Some devices may come standard depending upon your system configuration Storage Devices Optional external USB industry standard 3 5 inch 1 44 MB diskette drive External USB CD ROM drive Optional external USB CD R RW drive Note When referring to storage capacity MB stands for one million bytes Some utilities may indicate varying storage capacities Total user accessible cap...

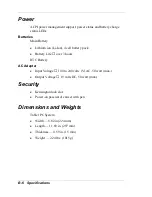
Page 150: ...ll battery pack Battery Life over 3 hours RTC Battery AC Adapter Input Voltage 100 to 240 volts V AC 50 watt max Output Voltage 19 volts DC 50 watt max Security Kensington lock slot Power on password can set with pen Dimensions and Weights Tablet PC System Width 8 82 in 224 mm Length 11 69 in 297 mm Thickness 0 59 in 15 mm Weight 2 24 lbs 1015 g ...

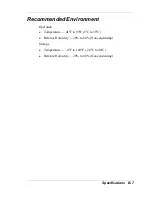
Page 151: ...ations B 7 Recommended Environment Operation Temperature 41ºF to 95ºF 5ºC to 35ºC Relative Humidity 20 to 80 Noncondensing Storage Temperature 4ºF to 104ºF 20ºC to 40ºC Relative Humidity 20 to 80 Noncondensing ...

Page 152: ......

Page 153: ...C Frequently Asked Questions External Mouse Display Diskette Drive Booting Power Management Battery Charging Miscellaneous ...

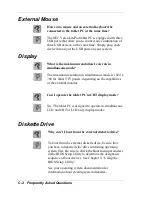
Page 154: ...1024 x 768 for XGA TFT panels depending on the capabilities of the external monitor Can I operate the tablet PC in CRT display mode No The tablet PC is designed to operate in simultaneous LCD and CRT or LCD only display modes Diskette Drive Why can t I boot from the external diskette drive To boot from the external diskette drive be sure that you have a diskette in the drive containing operating s...

Page 155: ...e The Versa LitePad tablet PC supports the 1 44 MB diskette drive option which uses 3 5 inch high density HD diskettes These diskettes are also called double sided high density DSHD diskettes You can store 1 44 MB of information on these diskettes This diskette drive can also use 3 5 inch double sided double density DSDD diskettes These diskettes only hold 720 kilobytes of data about half the amou...

Page 156: ...ch to perform a cold boot or Wait at least five seconds and then turn the power on What is the difference between a warm boot and a cold boot A warm boot restarts the system while system power is on A warm boot is also a software reset A warm boot clears volatile system memory and reloads the operating system A cold boot is a system start with power off A cold boot also resets the hardware It chec...

Page 157: ...ndows documentation for detailed information about managing power What is the purpose of Standby mode You can initiate a Standby mode full Suspend to RAM by accessing Start Turn Off Computer Stand By This places the system in a deeper state of sleep and requires that you press the power button to resume operation Putting your system into Standby initiates the Standby power saving mode and is a con...

Page 158: ...nate Select Hibernate How do I bring my system out of Standby mode Sliding the Power switch brings the system out of Standby mode What can I do to conserve battery power There are several ways to conserve battery power and this is an important activity particularly if you frequently use your system in situations when you can t operate your system on AC power Try using your system with a lower scre...

Page 159: ... can only be charged to its maximum if the battery and its environment is within 59 to 77 degrees Fahrenheit 15 to 25 degrees Centigrade The more the temperature deviates from this range during recharging the less chance the battery can fully charge To recharge the battery to its full capacity it is recommended to cool down the unit by unplugging the AC adapter When the unit has cooled then plug i...

Page 160: ...ate in Windows by double clicking the time in the lower right corner of the screen Change the date and time as needed How do I speed up my application If the application you are using runs really slow close any other applications you are not using this should speed things up If your application still runs slow you might consider upgrading the current memory module installed in the tablet PC see Me...

Page 161: ...ndows application If you need help in a Windows application click on a Help button or Help menu item Most applications provide online help If the application doesn t provide these try pressing F1 How do I save a file You save a file by selecting File then Save As or Save from the drop down menu If the file was not previously named you are prompted for a file name In Windows XP you can use up to 25...

Page 162: ......

Page 163: ...pen over time applications programs Software designed to perform specific functions like solving business or mathematical problems audio The range of acoustic mechanical or electrical frequencies that humans hear B base RAM Area of system memory between 0 and 640 kilobytes available to the user for the operating system and application programs BIOS Basic Input Output System A collection of compute...

Page 164: ...ndard and released by the PCMCIA standards body and trade associations CardBus offers wider and faster 32 bit bus and bus mastering operation for improved adapter performance and can operate at speeds up to 32 MHz CD Compact disc A polished metal platter capable of storing digital information The most prevalent types of compact discs or those used by the music industry to store digital recordings ...

Page 165: ...CMOS is backed up by an internal battery that preserves clock calendar data and system configuration parameters stored in CMOS cold boot Process of starting up the computer by turning on the power If power is already on the process means to turn off the computer and turn it on again A cold boot reinitializes all devices CRT Cathode Ray Tube A type of display screen used in desktop monitors It form...

Page 166: ...agnetic material for storing information diskette drive A magnetic drive that writes on and retrieves data from a diskette E enhanced VGA A video interface that offers more colors or higher resolution than VGA extended RAM The area of RAM above the first megabyte of memory in the system available for enhancing system performance F FIR Fast Infrared an infrared technology that sends data at 4 0 Mbi...

Page 167: ...y equal to one cycle per second hot key Combination of two or three keys that you press simultaneously for a particular function input output I O The process of transferring data between the computer and external devices IDE Intelligent Drive Electronics A hard disk drive type that has controller electronics built into the drive and delivers high throughput interface A connection that enables two ...

Page 168: ...puter s memory from a storage device M megabyte MB 1 048 576 bytes memory Electronic storage area in a computer that retains information and programs A computer has two types of memory read only memory ROM and random access memory RAM menu A video display of programs or options microprocessor A semiconductor central processing unit that is the principal component of a microcomputer Usually contain...

Page 169: ...e line MPEG The MPEG Moving Pictures Experts Group standard is used to encode motion images The MPEG player program in Windows lets you play back MPEG files multimedia Integrated forms of media such as sound text graphics and video N nonvolatile memory Storage media that retains its data when system power is turned off Nonvolatile memory in the Versa LitePad tablet PC is a complementary metal oxid...

Page 170: ...ive into isolated or separate sections Partitioning a hard drive creates additional logical drives e g a 5 1 GB hard drive partitioned into three logical drives creates drives C D and E Partitioning facilitates file management by allowing you to isolate the computer s operating system to drive C while storing applications and data files on separate drives D and E also referred to as partitions pas...

Page 171: ...a functional unit that interprets and executes instructions prompt A special symbol indicating the beginning of an input line Also a message that appears on the screen indicating that the user must take a certain action Q QWERTY The QWERTY keyboard designed in the 1800s for mechanical typewriters refers to the first six keys QWERTY on the top row of letters on the standard keyboard R RAM Random Ac...

Page 172: ...r example 1024x768 See pixels RS 232C Standard interface for serial devices This port is sometimes referred to as the serial port S scanner An optical device that reads printed material and converts it to a computer screen image serial interface An interface that communicates information one bit at a time serial printer A printer with a serial interface SIR Serial Infrared an infrared technology t...

Page 173: ...tal audio output through the use of an optical output cable to an optical disk device Standby mode A state of power management that puts the system to sleep Standby mode shuts down all devices in the system while retaining data and system status SVGA Super Video Graphics Array Graphics technology that supports up to 256 or more colors and a graphics resolution of 800 x 600 pixels SVGA Super Video ...

Page 174: ...ction of up to 127 peripheral devices such as mice modems and keyboards USB supports plug and play installation on some systems V VGA Video Graphics Array Graphics technology that supports up to 256 colors and a graphics resolution of 640x480 pixels volatile memory Storage media that loses its data when system power is turned off Standard memory and memory that you add to the Versa LitePad tablet ...

Page 175: ...ting a device waveform A graphic representation of a sound wave as displayed on an oscilloscope which converts sound waves into electronic signals write To record or store information to a storage device X XGA Extended Graphics Array This high resolution graphics standard supports 1024x768 pixels and 16 million simultaneous colors XGA also supports non interlaced monitors ...

Page 176: ......

Page 177: ...g box 4 9 installing 4 9 launching 4 9 Audio connecting options 5 14 specifications B 3 B Back features 1 15 Battery alarms 4 5 charging 2 30 C 7 CMOS 3 2 conserving power 2 27 4 2 C 6 determining battery status 2 25 error 1 11 extending life 2 26 4 2 features 1 7 2 24 installing 2 29 LED 1 10 1 11 2 30 life 1 3 low battery status 2 26 low power 1 11 main 2 24 maintaining a charge C 7 maximizing p...

Page 178: ...rt 3 7 user HDD password 3 9 using keys and buttons 3 4 BIOS version 3 6 Boot menu 3 12 Boot order 3 12 Boot password 3 8 Bootable diskette 3 14 Brightness settings 2 19 8 3 Buttons descriptions 1 7 1 9 DOWN 1 5 1 9 Enter 1 5 1 9 Escape 1 5 1 8 Fn 1 5 1 8 key 1 6 locating 1 5 Rotate Screen 1 5 1 7 Security 1 5 1 8 system control 1 6 UP 1 5 1 9 C Cable connections 2 16 AC adapter 2 16 keyboard 2 18...

Page 179: ...4 USB diskette drive 5 3 E E mail support services 9 2 9 4 Embedded numeric keypad 1 20 Emergency release latch 5 7 Enter button description 1 9 locating 1 5 Entering BIOS Setup 3 2 Escape button description 1 8 locating 1 5 Establishing passwords 3 9 Exit menu 3 13 Expansion devices CF Cards 5 12 external monitor 5 13 headphone 5 14 memory 5 8 microphone 5 14 powered external speaker 5 14 USB CD ...

Page 180: ...fications B 4 status LEDs 1 19 typewriter keys 1 19 using 2 20 Windows keys 1 19 L LAN connection while traveling 7 4 features 1 3 port 1 12 support 6 3 Landscape display mode 1 7 LCD and CRT display 1 7 1 12 5 13 LCD only display 1 7 1 12 LCD panel colors B 3 features 1 7 resolution B 3 specifications B 3 LCD power management 4 3 4 4 LCD screen cleaning 2 34 LEDs See Status LEDs Left side feature...

Page 181: ...ties See Utilities NEC wallpaper 4 8 Numeric keypad 1 20 O Online documentation 4 10 Operating environment 1 16 2 33 B 7 Operating system setup 2 18 Windows XP Tablet PC Edition 4 2 P Partition Only restore 4 14 Partitioning the hard disk 4 11 4 14 Password boot password 3 8 clearing 3 16 3 17 establishing 3 9 forgetting 3 16 3 17 hard disk drive 3 10 override switch 3 16 3 17 3 18 protection 3 8 ...

Page 182: ...re 4 12 guidelines 4 11 options 4 11 Partition Only restore 4 14 Protecting your system 2 32 R Recharging the battery 2 26 Refreshing the battery 2 26 3 7 8 3 Release button for battery 2 28 Remote Power on 3 7 Replacing the battery 2 27 Resolution C 2 Restoring the system 4 11 Resume 1 6 Right side features 1 13 Rotate Screen button description 1 7 locating 1 5 S Safe work environment 1 2 Scanner...

Page 183: ...3 8 Support services 9 2 9 3 9 4 Suspend mode 1 6 1 7 1 11 Suspend to File C 5 Switch settings changing 3 19 description 3 16 locating 3 18 password override switch 3 16 3 17 3 18 Switches See also Switch settings descriptions 1 7 1 9 power 1 6 1 7 wireless LAN 1 6 1 7 System care 2 32 cleaning 2 34 cooling 1 16 date 3 6 dimensions B 6 features 1 3 front features 1 4 1 11 Hibernate 4 4 memory 5 8 ...

Page 184: ...pgrading memory 5 8 USB CD R RW drive connecting 5 7 emergency release latch 5 7 features 5 4 using 5 7 USB CD ROM drive connecting 2 18 5 7 emergency release latch 5 7 features 5 4 using 5 7 using with AC power 2 18 USB devices connecting 1 13 5 2 support 5 2 USB diskette drive booting C 2 connecting 1 13 5 4 features 5 3 using 5 4 C 2 USB Legacy support 3 7 USB mouse 1 20 USB ports 1 13 5 2 C 2 ...

Page 185: ... 4 7 Wireless LAN antenna 6 2 connection while traveling 7 5 features 1 3 6 2 LED 1 10 1 11 operation 1 11 switch 1 6 1 7 turning on 6 2 using 6 2 Wireless Manager icon 6 2 Work environment setting up A 2 tips 2 20 using your tablet PC 1 2 X XGA LCD panel C 2 ...

Page 186: ......

Page 187: ...rotection against harmful interference in a residential installation This equipment generates uses and can radiate radio frequency energy and if not installed and used in accordance with the instructions may cause harmful interference to radio communications However there is no guarantee that interference will not occur in a particular installation If this equipment does cause harmful interference...

Page 188: ...ium battery maintains system configuration information In the event that the battery fails to maintain system configuration information NEC Solutions America recommends that you have the battery replaced For battery replacement service call your NEC Solutions America dealer or NEC Solutions America Support Services There is a danger of explosion if the battery is incorrectly replaced Replace only ...

Page 189: ...uter s LCD panel contains mercury Do not place a used LCD panel in your regular trash The panel must be collected recycled or disposed of in an environmentally approved manner Contact your local waste management officials for other information regarding the environmentally sound collection recycling and disposal of the LCD panel Wireless Devices To comply with FCC and Industry Canada RF Exposure r...

Page 190: ......

Page 191: ... www necsolutions am com mobilesolutions declare that the product NEC Versa LitePad is in conformity with part 15 of the FCC Rules Operation of this product is subject to the following two conditions 1 this device may not cause harmful interference and 2 this device must accept any interference received including interference that may cause undesired operation ...

Page 192: ......

Reviews: