5-4 Using the System Drives and Bays
4.
Remove the device (see the section, “Removing a Device from the NEC Modular
Bay Slot” or “Removing a Device from the NEC VersaBay IV Slot). Click OK
after the device is removed.
5.
Insert a different device in the NEC VersaBay IV slot or the NEC Modular Bay
slot (see “Installing a Device in the NEC Modular Bay Slot” or “Installing a
Device in the NEC VersaBay IV Slot”).
References to the drive letter listed under My Computer and the Windows Explorer
change automatically when the device is swapped or removed. The balloon message
that appears when you move your cursor over the taskbar icon also changes to reflect
the new VersaBay IV or Modular Bay status.
Removing a Device from the NEC Modular Bay Slot
Use the following steps to remove a device from the NEC Modular Bay slot.
1.
Use the Phoenix BaySwap utility or power off the system.
2.
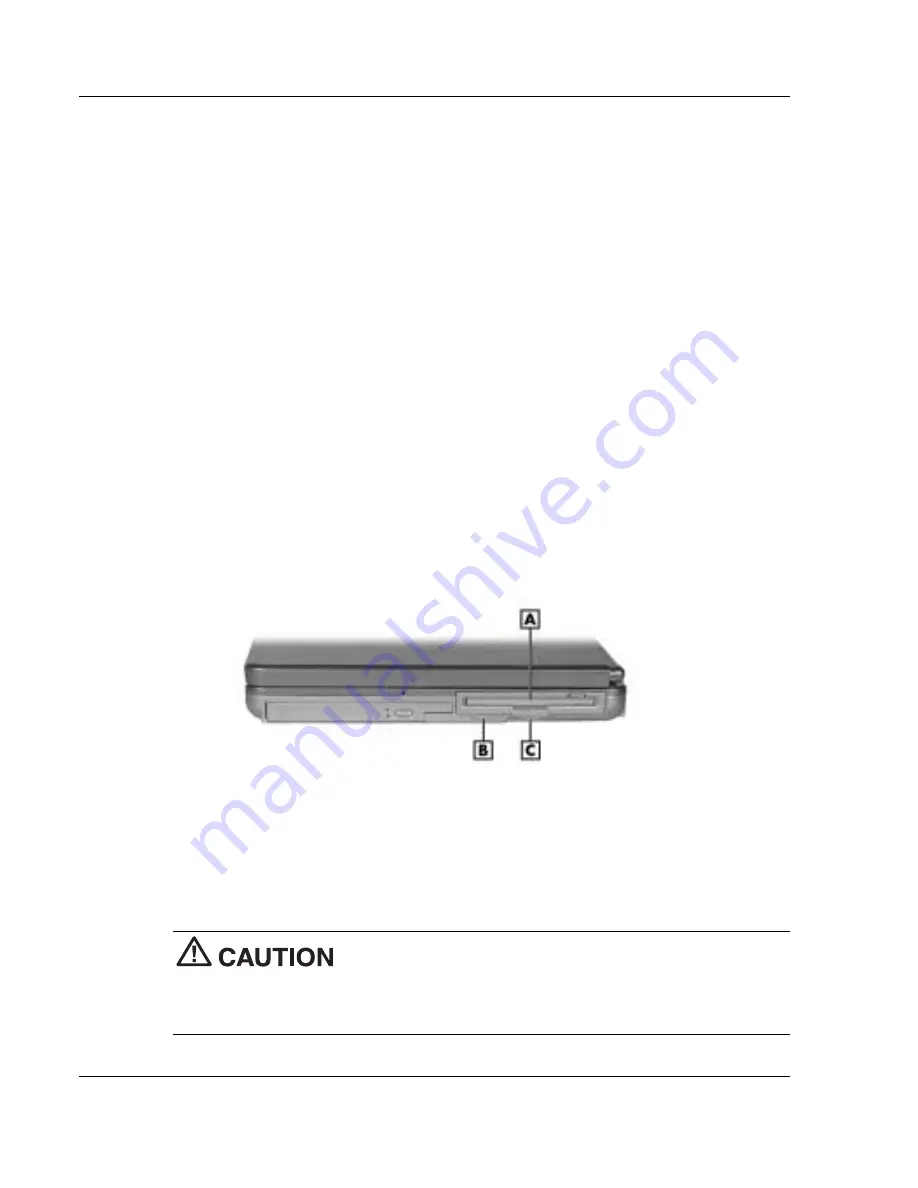
Locate the NEC Modular Bay release latch to the left of the Modular Bay slot.
Locating NEC Modular Bay features
A – NEC Modular Bay Device
C – Pull tab
B – Modular Bay Release Latch
3.
Slide the latch to the left and hold it. Grasp the pull tab on the device and remove
the device from the system.
Always install the weight-saving module that ships with your
system in the Modular Bay slot if no Modular Bay device is installed in the slot. See
“Installing a Device in the NEC Modular Bay Slot” for instructions on installing the
module.
Summary of Contents for Versa L320
Page 1: ...Versa L320 Notebook Computer User s Guide ...
Page 138: ...9 Using Multimedia Audio Video Multimedia Applications ...
Page 143: ...10 Solving System Problems Problem Checklist Startup Problems If You Need Assistance ...
Page 158: ...B Specifications System Components Interrupt Controllers Memory Map ...


