


5-92 Installing Options
4.
Align the screws on the new hard drive with the holes in
the bracket.
5.
Secure the hard drive to the bracket with the four screws
that came with the drive or the screws from the old drive
(see the following figure).
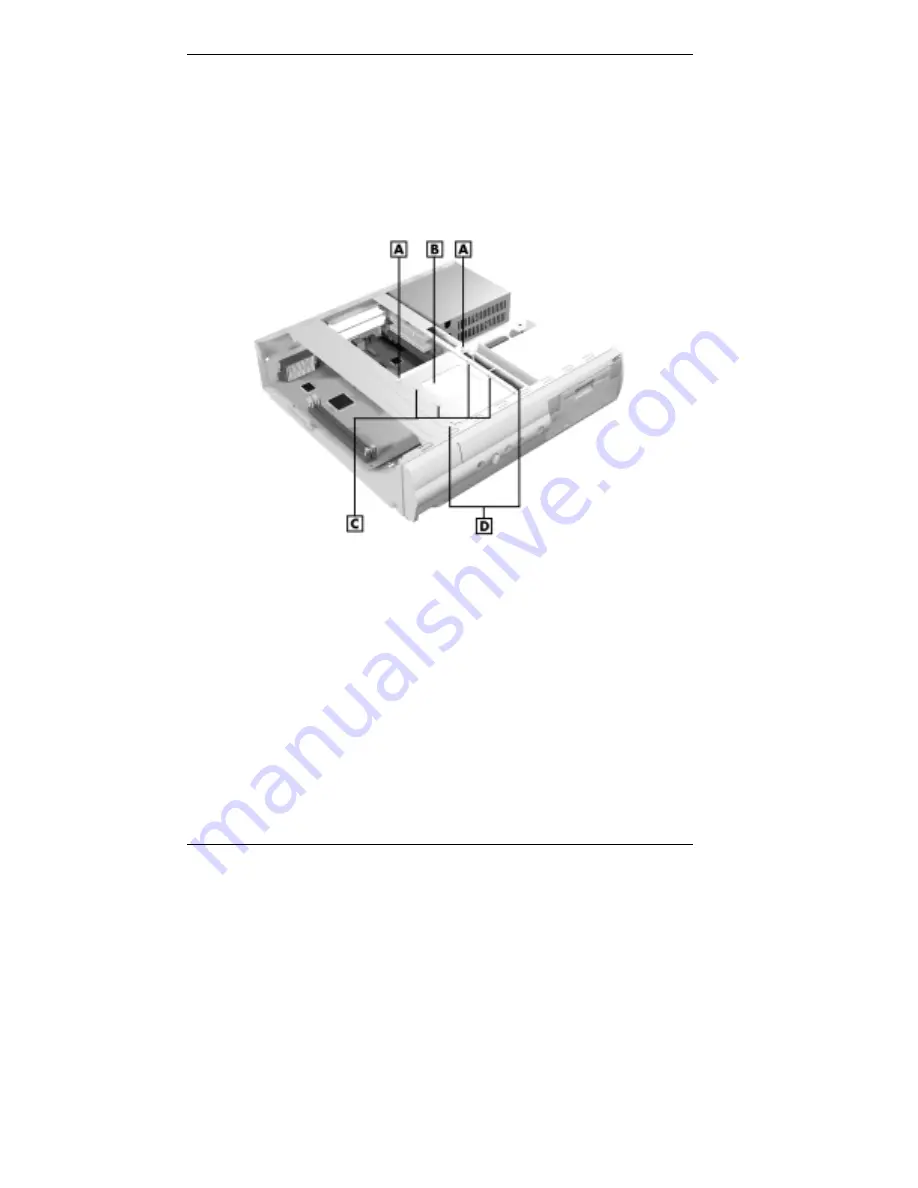
Internal hard drive screws — small desktop
A – Bracket Screw
C – Hard Drive Screws
B – Hard Drive
D – Chassis Braces
6.
With the cable connectors toward the rear of the system,
position the bracket and hard drive on the chassis braces
and align the screw holes.
7.
Insert and tighten the two screws to secure the bracket to
the chassis braces.
8.
Connect the device cables (see “Connecting Device
Cables” and “Cabling Storage Devices”).


