F
D
MULTIMEDIA MONITOR RD-336E
ON
OFF
ON POWER OFF
DEGAUSS
VIDEO1VIDEO2 RGB1
RGB2
WIDTH
HEIGHT
SIDE PIN
SCAN SELECT
POSITION/CONTROL
NORMAL
RASTER CONTROL
RGB/VIDEO
VIDEO
CONTRAST BRIGHT COLOR
TINT SHARPNESS
NORMAL
VISUAL CONTROL
VOLUME
MUTE
EXIT PROCEED
ON SCREEN
9
0
B
A
C
E
G
I
H
8
13
14
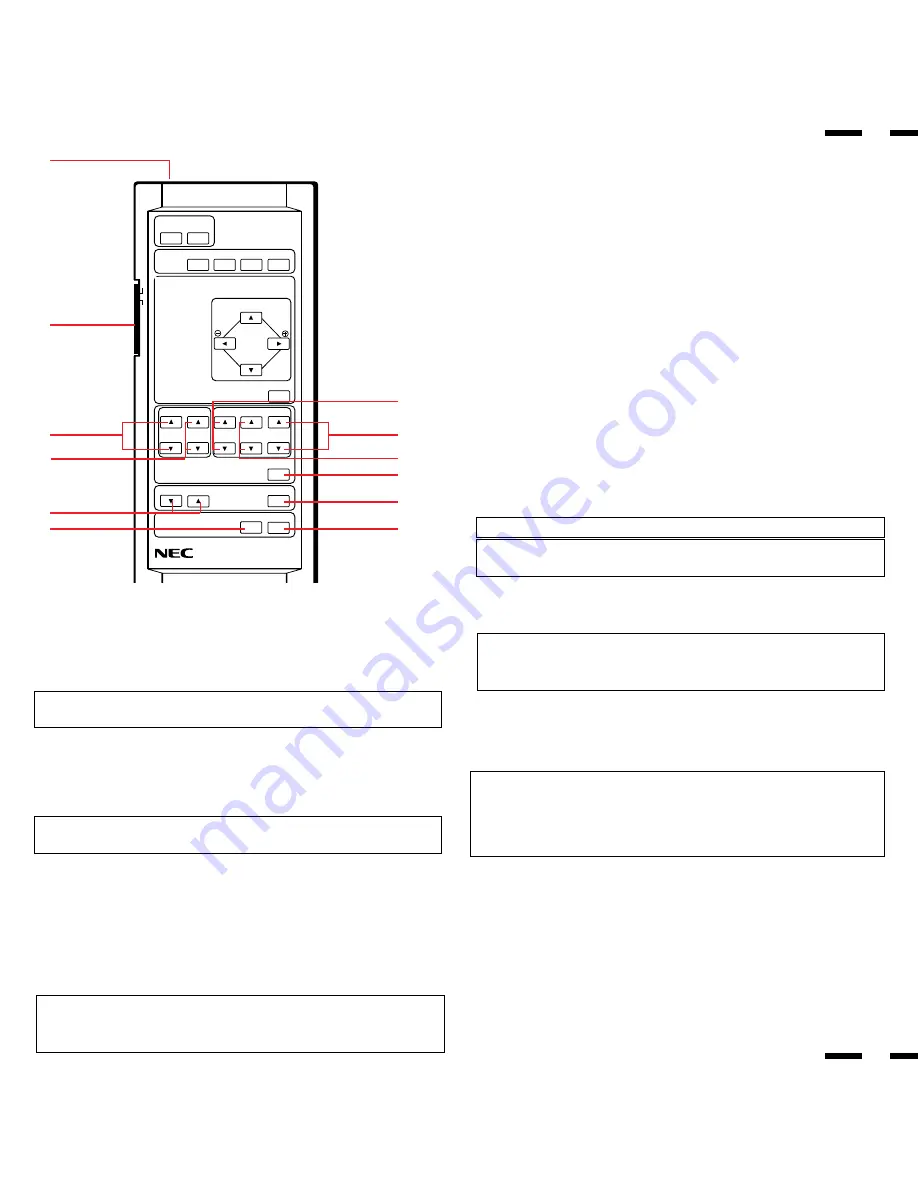
Visual Control
8
RGB/VIDEO
CONTRAST (
/
Ä
) ......... Adjusts the image brightness in relation to the
background.
Press and hold
for higher contrast.
Press and hold
Ä
for lower contrast.
9
RGB/VIDEO
BRIGHT (
/
Ä
) .............. Adjusts the overall image and screen bright-
ness.
Press and hold
for a brighter picture.
Press and hold
Ä
for a darker picture.
0
COLOR (
/
Ä
) ............... Adjusts color intensity of VIDEO display.
Press and hold
for more color saturation.
Press and hold
Ä
for less color saturation.
A
TINT (
/
Ä
) .................... Adjusts red and green values of VIDEO display.
Press and hold
for a greener tint.
Press and hold
Ä
for a redder tint.
This control does not work for the PAL signal.
B
SHARPNESS (
/
Ä
) ...... Adjusts picture detail of VIDEO display.
Press and hold
for a sharper picture.
Press and hold
Ä
for a softer picture.
NOTE:
The COLOR, TINT and SHARPNESS keys work for the VIDEO display only.
NOTE:
The VISUAL CONTROL storing operation is effective only for one input
(VIDEO1, VIDEO2, RGB1 or RGB2).
C
NORMAL ............................ This key resets the picture adjustment set-
tings of user changeable memory and recalls
the factory preset data.
NOTE:
The CONTRAST, BRIGHT, COLOR, TINT and SHARPNESS ad-
justment level are factory preset at the optimum position.
D
VOLUME (
Ä
/
) ............. Adjusts the volume.
Press and hold
Ä
to decrease sound.
Press and hold
to increase sound.
E
MUTE .................................. Press to cancel sound ; press again to restore
sound.
NOTE: The other ways to restore sound are to press POWER ON, then OFF
and to press VOLUME keys on the remote control unit.
F
EXIT .................................... Press to exit the OSM controls in the main
menu. Press to exit to the previous menu in a
submenu.
G
PROCEED .......................... Press to access OSM. Press to proceed to
the selected menu choice (indicated by the
arrow). Press to move the arrow down to se-
lect one of the choices.
NOTE:
• Other control keys than POSITION/C / -,
/
Ä
, and NORMAL are
not available during the OSM screen display.
• Other control keys than POSITION/C / -,
/
Ä
, and NORMAL can
be directly to access to each control. OSM controls are not possible in that
case.
H
Backlight Switch
Set to ON to light up keys from the inside of
the remote control panel.This is useful when
the remote control unit is used in a darkened
room.
NOTE: The backlight key characters may be invisible in a bright-lit room. Make
sure that the backlight switch is OFF when the remote control unit is not used.
If no button operation is made within 30 seconds when the backlight is lit in the
wireless condition, the backlight go off automatically. To turn the backlight on
again, set the switch to the OFF position, then set it to the ON position.
I
Remote Jack ...................... Insert the plug of the supplied remote cable
when using the supplied remote control unit
in the wired condition. Connecting the moni-
tor and the remote control unit with the sup-
plied remote cable turns on the backlight in-
dependent of the backlight switch setting
when the monitor is powered on.
Ä
Ä
Ä
Ä
Ä
Ä
Ä
Ä
Ä
Ä
Ä
Ä
Ä
Ä
VIDEO
VIDEO
VIDEO
Summary of Contents for PlasmaSync 3300
Page 30: ...51 52 Dimensions ...


