14
ENGLISH
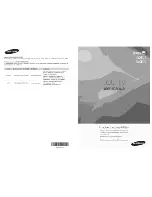
Setting up TV Programme
Programme edit
This function enables you to delete or skip the stored
programmes.
Also you can move some programmes to other programme
numbers or insert a blank programme data into the
selected programme number.
1. Press the
MENU
button.
2. Select the
Setup
menu. Then press the
VOL
Ïq
button.
3. Press the
PR
xy
button select
Programme edit
menu.
Then press the
VOL
Ïq
button.
4. Select the programme name to edit with the
PR
xy
and
VOL
Ïq
button.
Deleting a programme
1. Select a programme to be deleted with the
PR
xy
or
VOL
Ïq
button.
2. Press the
RED
button twice.
The selected programme is deleted, all the following
programmes are shifted up one position.
Copying a programme
1. Select a programme to be copied with the
PR
xy
or
VOL
Ïq
button.
2. Press the
GREEN
button.
All the following programmes are shifted down one
position.
Moving a programme
1. Select a programme to be moved with the
PR
xy
or
VOL
Ïq
button.
2. Press the
YELLOW
button.
3. Move the prgramme to desired programme number
with the
PR
xy
or
VOL
Ïq
button.
4. Press the
YELLOW
button again to release this
function.
Skipping a programme number
1. Select a programme number to be skipped with the
PR
xy
or
VOL
Ïq
button.
2. Press the
CYAN
button. The skipped programme
turns to blue.
3. Press the
CYAN
button again to release the skipped
programme.
Note
: When a programme number is skipped it means
that you will be unable to select it using the
PR
xy
button during normal TV viewing. If you want to select
the skipped programme. directly enter the programme
number with the
NUMBER
buttons or select it in the
programme edit or table menu.
5. Press the
TV/AV
button to return to normal TV viewing.
POWER
MENU
TV/AV
PR
OK
PR
VOL
VOL
TV/PC
SLEEP
TEXT/MIX
UPDATE TIME REVEAL HOLD
Q.VIEW
LIST
PSM
SSM
I/II
1
2
3
4
5
6
7
8
9
*
*
0
NS-201
ƇƉ ȖȘ
5-6=<>)>
Programme edit
0
5
1 0 0 0 0 0
6
2 0 0 0 0 0
7
3
8
4
9
■
Delete
■
Copy
■
Move
■
Skip
15
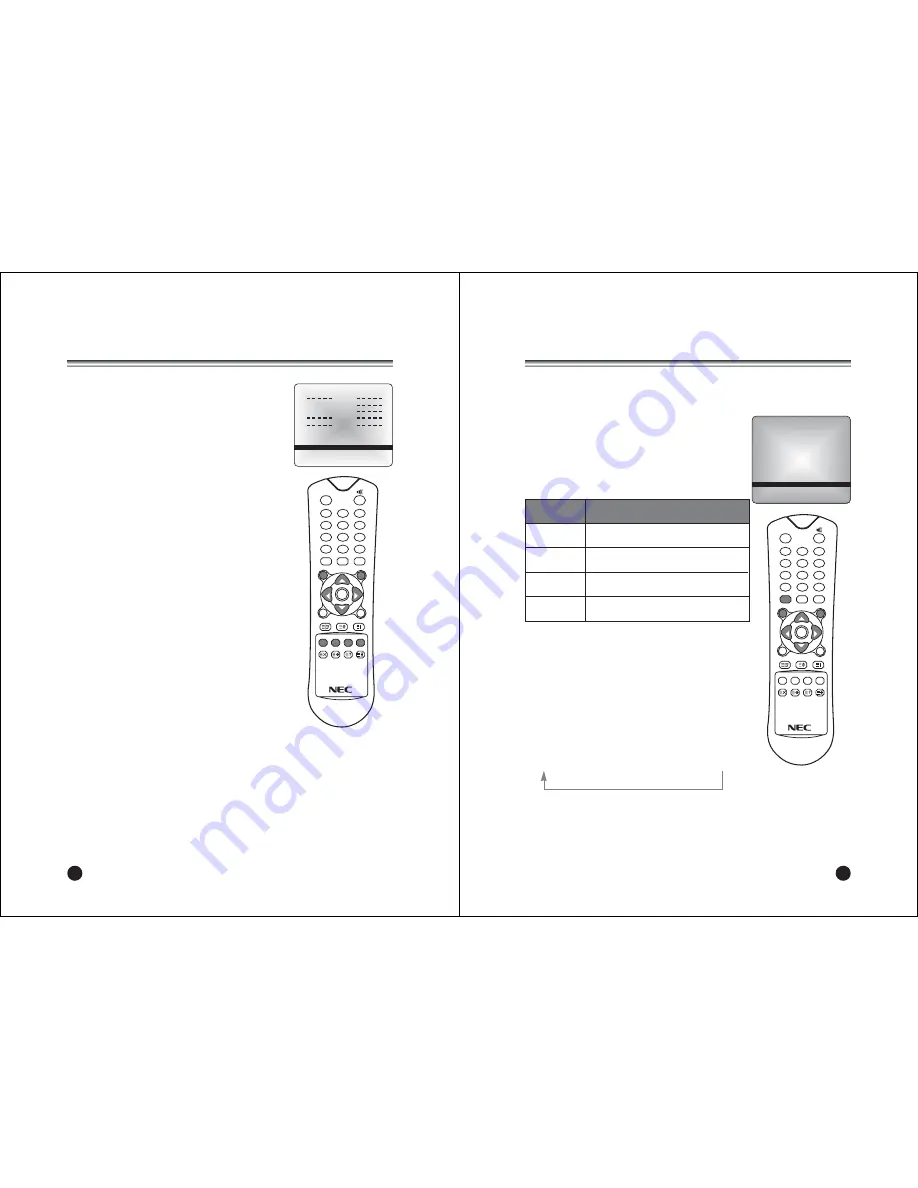
Picture Control
You can adjust picture Contrast, Brightness, Colour and Sharpness to the levels you
prefer.
Manual Picture Control
1. Press the
MENU
button.
2. Select the
Picture
menu.
Then press the
VOL
Ïq
button.
3. Press the
PR
xy
button select a picture item.
4. Press the
VOL
Ïq
button to adjust the picture
condition as you want.
5. Press the
TV/AV
button to store for the picture
User
.
Auto Picture Control
*The Picture options - Dynamic, Standard, Mild, Game,
and User are programmed for optimum reproduction at
the factory and cannot be changed.
PSM (Picture Status Memory)
1. Press the
PSM
button.
2. Press the
PSM
button repeatedly to select [PSM].
Each press of the button changes the screen display as
below.
Dynamic
؋
Standard
؋
Mild
؋
Game
؋
User
• Dynamic
: Vivid Picture Appearance
• Standard
: Standard Picture Appearance
• Mild
: Softer Picture Appearance
• Game
: External Video Game Picture Setup
• User
: Manual Picture Setup
POWER
MENU
TV/AV
PR
OK
PR
VOL
VOL
TV/PC
SLEEP
TEXT/MIX
UPDATE TIME REVEAL HOLD
Q.VIEW
LIST
PSM
SSM
I/II
1
2
3
4
5
6
7
8
9
*
*
0
NS-201
Selected Item
Contrast
Brightness
Colour
Sharpness
Setting Change
More darkness VOL
Ï
0~100
q
VOL More light
Less bright VOL
Ï
0~100
q
VOL More bright
Lower color intensity VOL
Ï
0~100
q
VOL Higher color intensity
Soft picture VOL
Ï
0~100
q
VOL Sharp picture
ƇƉ ȖȘ
5-6=<>)>
Picture
Contrast
90
Brightness
80
Colour
80
Sharpness
90
* Tint menu only appears at NTSC signal.
Summary of Contents for NLT-20
Page 14: ...500 031104 ...